Dynojet 250i: Installation Guide User Manual
Page 171
S T A N D A R D A N D E X T E N D E D T I R E C A R R I A G E I N S T A L L A T I O N — D I S C O N T I N U E D
Standard Tire Carriage—Discontinued
Version 5
Model 200i and 250i Motorcycle Dynamometer Installation Guide
E-3
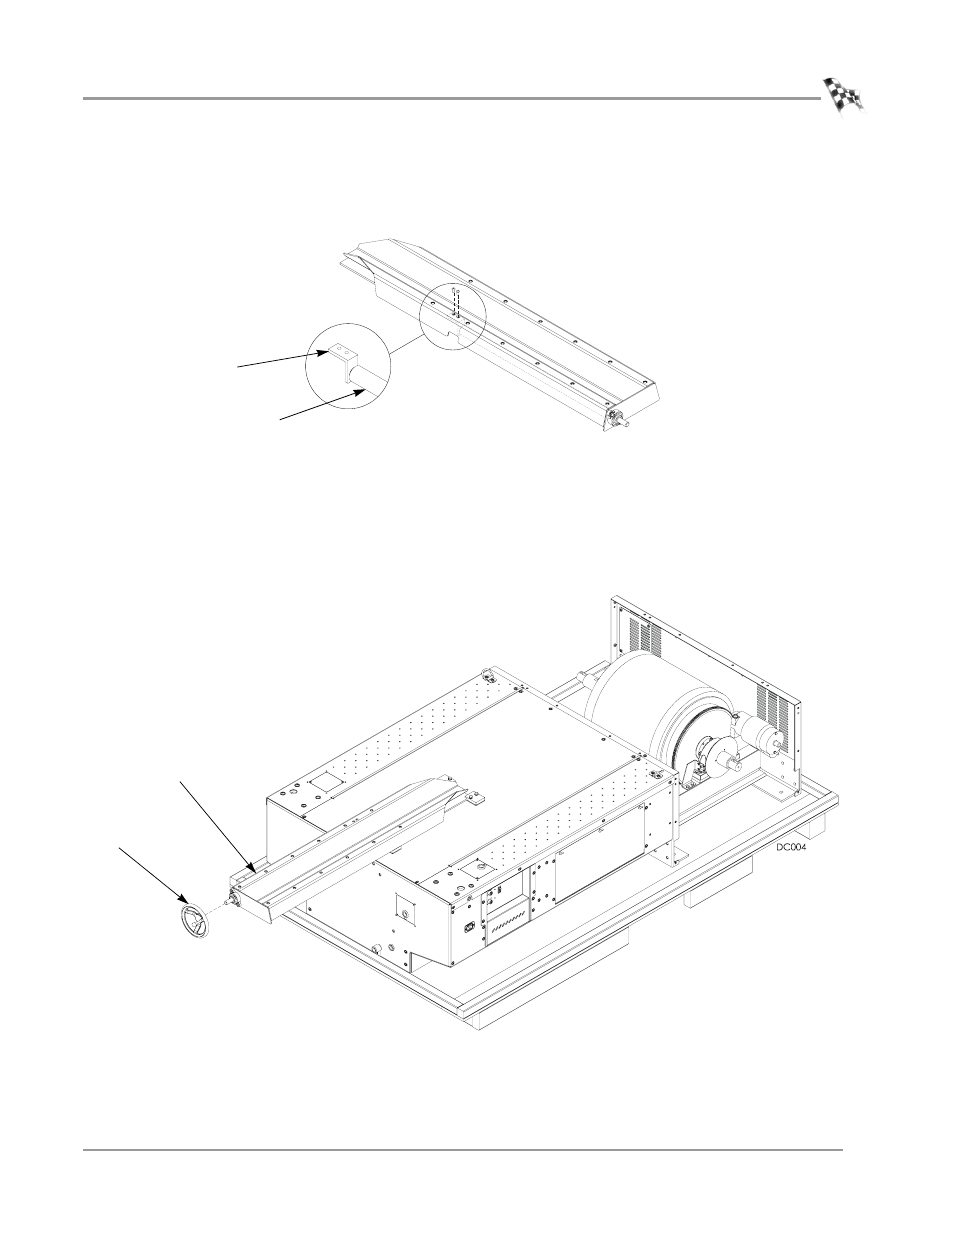
3
Using a 5/32-inch allen wrench, remove the two 1/4 x 1/2-inch button-head screws
securing the screw support bracket. Remove the bracket and set the screws and
bracket aside.
Figure E-2: Remove the Screw Support Bracket
4
Slide the carriage under the carriage clamps and the nut block until the carriage
screw is touching the nut block.
5
Slide the hand crank onto the end of the carriage screw.
6
Secure the hand crank to the screw shaft by tightening the set screw using a
5/32-inch allen wrench.
Figure E-3: Install the Tire Carriage and Secure the Hand Crank
carriage screw
screw support
bracket
hand crank
carriage