Starting editing, To edit more scenes, To stop editing – Sony DCR-PC1 User Manual
Page 68
Attention! The text in this document has been recognized automatically. To view the original document, you can use the "Original mode".
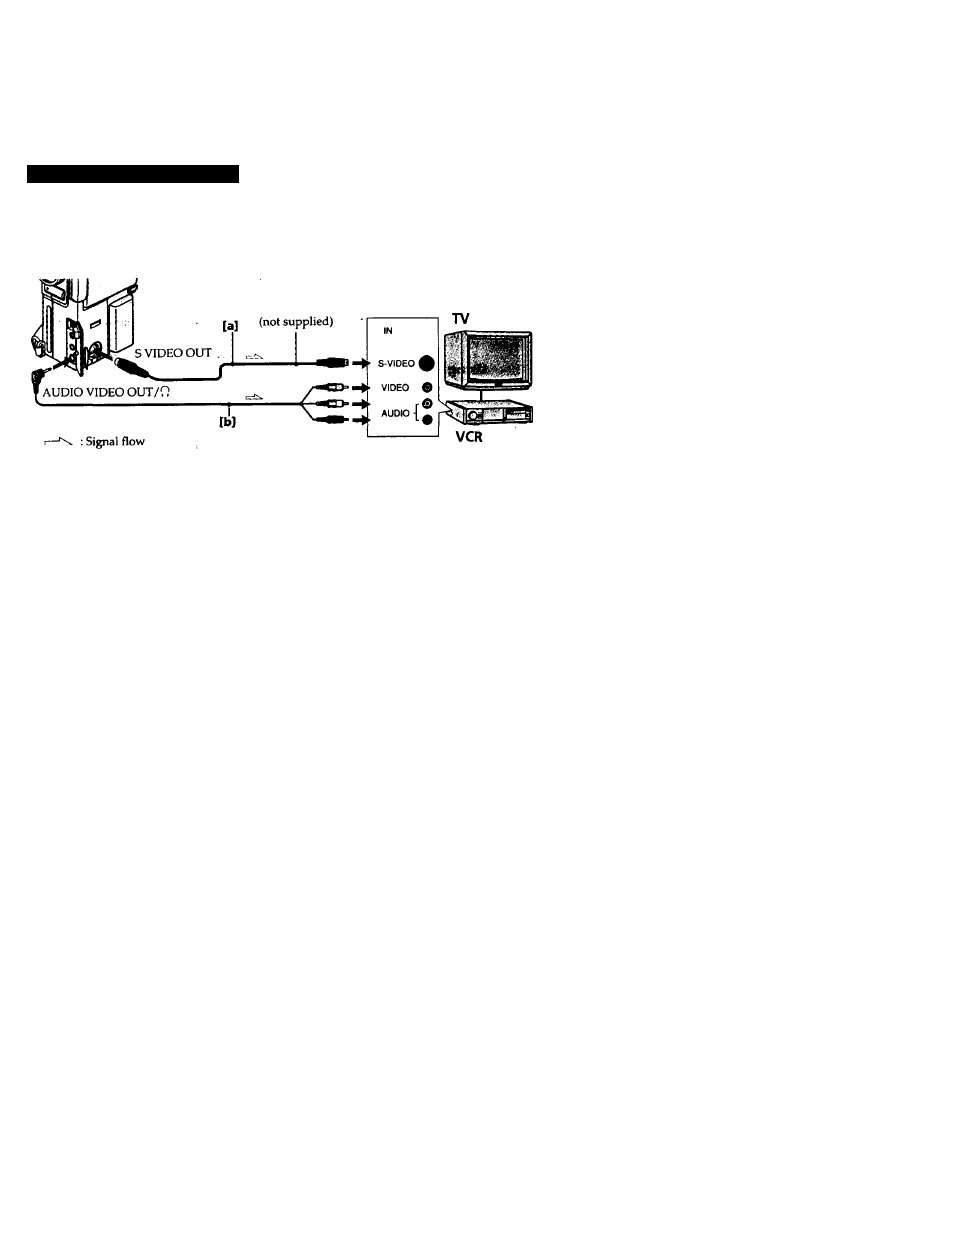
Editing onto another tape
Using the A/V connecting cable [b] or S video connecting cable
(not supplied) [a]
Set the input selector on the VCR to LINE.
Notes on editing when using the A/V connecting cable
• Press DATA CODE, SEARCH MODE, or DISPLAY to turn off the display indicators.
Otherwise, the indicators will be recorded on the tape.
• If your TV or VCR is a monaural type, connect the yellow plug of the A/V connecting
cable for video to the TV or VCR. Coimect only the white or red plug for audio to the
TV or VCR. If you connect the white plug, the sound is L (left) signal. If you connect
the red plug, the sound is R (right) signal.
• You can edit precisely by connecting a LANC cable (not supplied) to this camcorder
and other video equipment having fine synchro-editing function, using this
camcorder as a player.
Starting editing
(1) lnsert a blank tape (or a tape you want to record over) into the VCR, and insert your
recorded tape into the camcorder.
(2) Play back the recorded tape on the camcorder imtil you locate the point just before
where you want to start editing, then press II to set the camcorder in playback pause
mode.
(3)On the VCR, locate the recording start point and set the VCR in recording pause
"mode.
(4) First press II on the camcorder, and after a few seconds press II on the VCR to start
editing.
To edit more scenes
Repeat steps 2 to 4.
To Stop editing
Press ■ on both the camcorder and the VCR.