Removing the server module partitions – Dell PowerEdge VRTX User Manual
Page 56
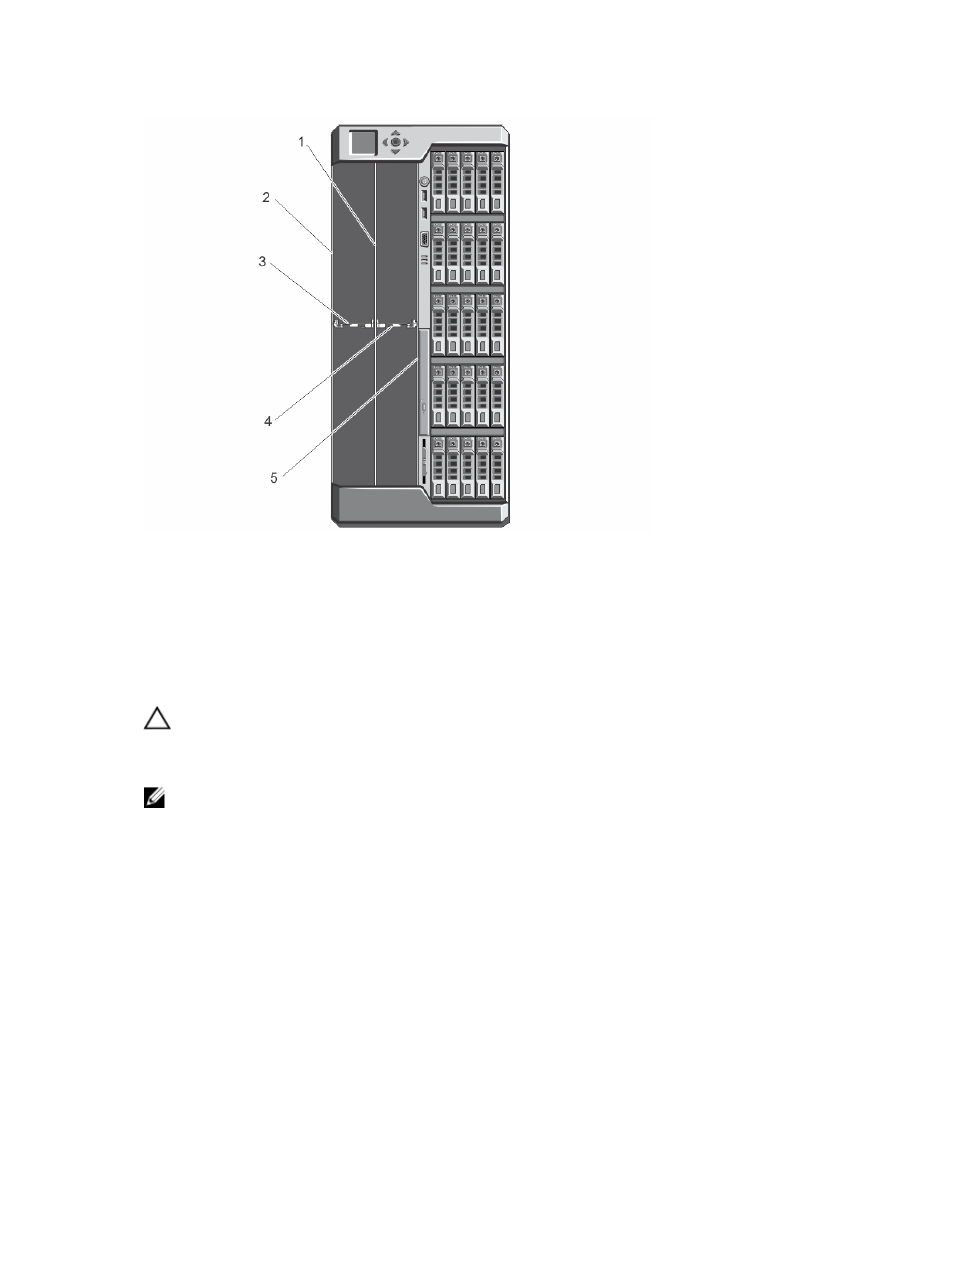
Figure 38. Server module partitions
1.
metal partition
2.
outer chassis wall
3.
server module partition between Slots 1 and 3
4.
server module partition between Slots 2 and 4
5.
inner chassis wall
Removing the server module partitions
CAUTION: Many repairs may only be done by a certified service technician. You should only perform
troubleshooting and simple repairs as authorized in your product documentation, or as directed by the online or
telephone service and support team. Damage due to servicing that is not authorized by Dell is not covered by your
warranty. Read and follow the safety instructions that came with the product.
NOTE: You must remove the server module partitions to install full-height server modules.
1.
If installed, remove the front bezel.
2.
Turn off the server modules using the operating system commands or the CMC.
3.
Turn off the enclosure, including any attached peripherals, and disconnect the enclosure from the electrical outlet.
4.
Remove the server modules or server module blanks.
5.
To remove the server module partition between Slots 1 and 3:
a. Hold the release tab on the server module partition and pull it out from the chassis wall to disengage the
locking tab from the slot on the chassis wall.
b. Holding the release tab, pull the partition toward the front of the system until it stops sliding.
The tabs on the partition move to unlock position.
c. Rotate the partition upward in the counter-clockwise direction to disengage the tabs from the slots on the metal
partition.
d. Slide the partition out from the system, and save for future use.
56