Installing a blower module – Dell PowerEdge VRTX User Manual
Page 71
CAUTION: To maintain optimum thermal conditions, ensure that there are no obstructions to airflow on the front
and back of the enclosure. The front and back of the enclosure must have at least 30 cm (12 inches) and 61 cm (24
inches) of unobstructed space respectively.
1.
Identify the failed blower module using the back-panel blower module indicators.
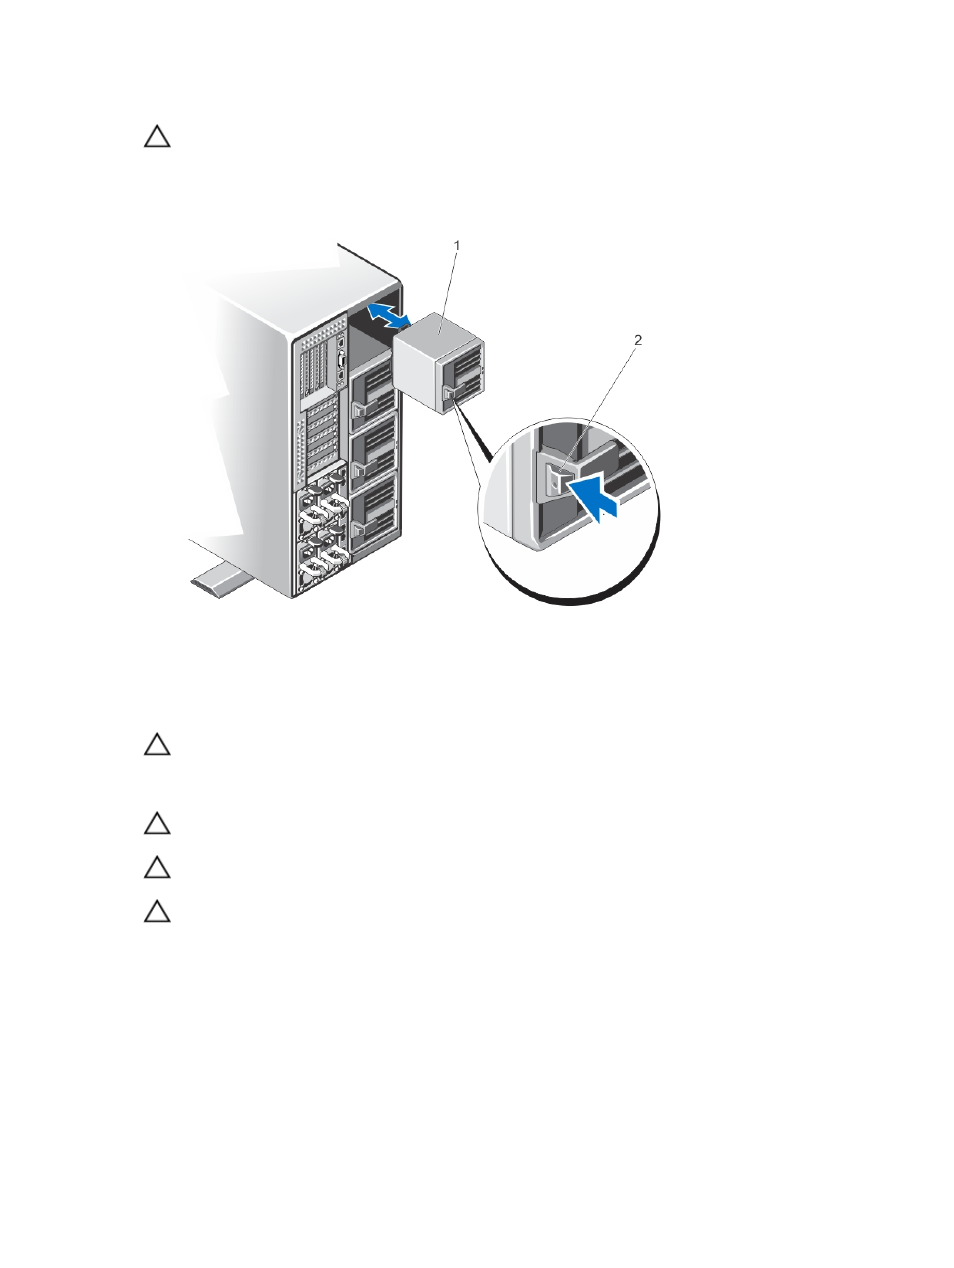
2.
Press the release tab on the blower module handle and slide the blower module out of the chassis.
Figure 50. Removing and installing a blower module
1.
blower module
2.
release tab
Installing a blower module
CAUTION: Many repairs may only be done by a certified service technician. You should only perform
troubleshooting and simple repairs as authorized in your product documentation, or as directed by the online or
telephone service and support team. Damage due to servicing that is not authorized by Dell is not covered by your
warranty. Read and follow the safety instructions that came with the product.
CAUTION: Exercise care while handling the blower module to prevent damage to the connector on the blower
module.
CAUTION: The blower closeout door is spring loaded. To prevent injury, exercise care when placing your hand or
fingers inside the blower module bay.
CAUTION: When replacing a blower module when the enclosure is on, install the replacement blower module
within 30 seconds to prevent server module cooling problems.
1.
Align the blower module with the slot on the chassis.
2.
Holding the blower module by its handle, slide it into the chassis until it clicks into the slot and is fully seated.
71