Remove all dimms, Removing dimms, Figure 1 – Dell OptiPlex GX1 User Manual
Page 37
System Memory: Dell OptiPlex GX1 Small-Form-Factor System User's Guide
file:///C|/infodev/2013/eDoc/OpGX1/UG/memory.htm[2/21/2013 11:47:13 AM]
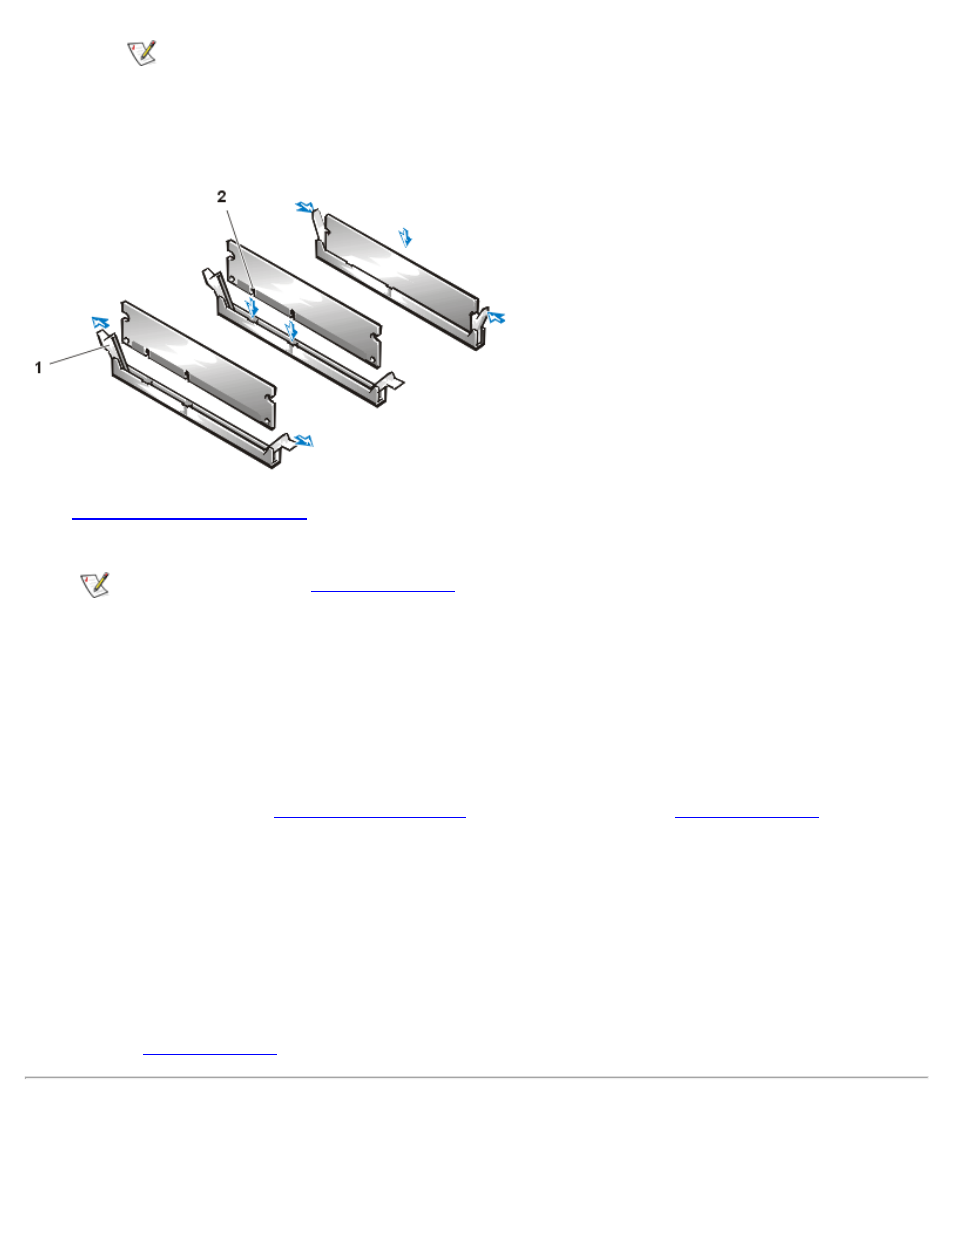
NOTE: Press the top center of the DIMM, and then press the top corners of the
DIMM. This action firmly seats the DIMM in the socket, which allows the securing
clips to snap into place around the end of the DIMM.
Figure 1. Installing a DIMM
1 Securing clips (2)
2 Slots (2)
4.
, and reconnect your computer and peripherals to their electrical outlets
and turn them on.
NOTE: If Enabled, the
option will cause the following message to be displayed
at the next system start-up:
ALERT! Cover was previously removed.
The system detects that the new memory does not match the existing system configuration information
and generates the following message:
The amount of system memory has changed.
Strike the F1 key to continue, F2 to run the setup utility
5. Press
, and check the value for
.
The system should have already changed the value of System Memory to reflect the newly installed
memory modules. Verify the new total. If it is correct, skip to step 7.
6. If the memory total is incorrect, turn off and disconnect your computer and peripherals from their
electrical outlets. Remove the computer cover, and check the installed DIMMs to make sure that they
are seated properly in their sockets. Then repeat steps 4 and 5.
7. When the System Memory total is correct, press
to verify that the DIMMs are operating properly.
Removing DIMMs
To remove a DIMM, press the securing clips outward simultaneously until the DIMM disengages from the