Chassis intrusion switch, Removing the chassis intrusion switch – Dell OptiPlex 755 User Manual
Page 194
Chassis Intrusion Switch
Removing the Chassis Intrusion Switch
1.
Follow the procedures in
Before You Begin
.
2.
Remove the computer cover (see
).
3.
Disconnect the chassis intrusion switch cable from the system board by using two fingers to squeeze the release mechanism on one side of the
connector as you pull to disconnect the cable connector.
4.
Slide the chassis intrusion switch out of its slot in the metal bracket, and then push it down through the square hole in the bracket to remove the switch
and its attached cable from the computer.
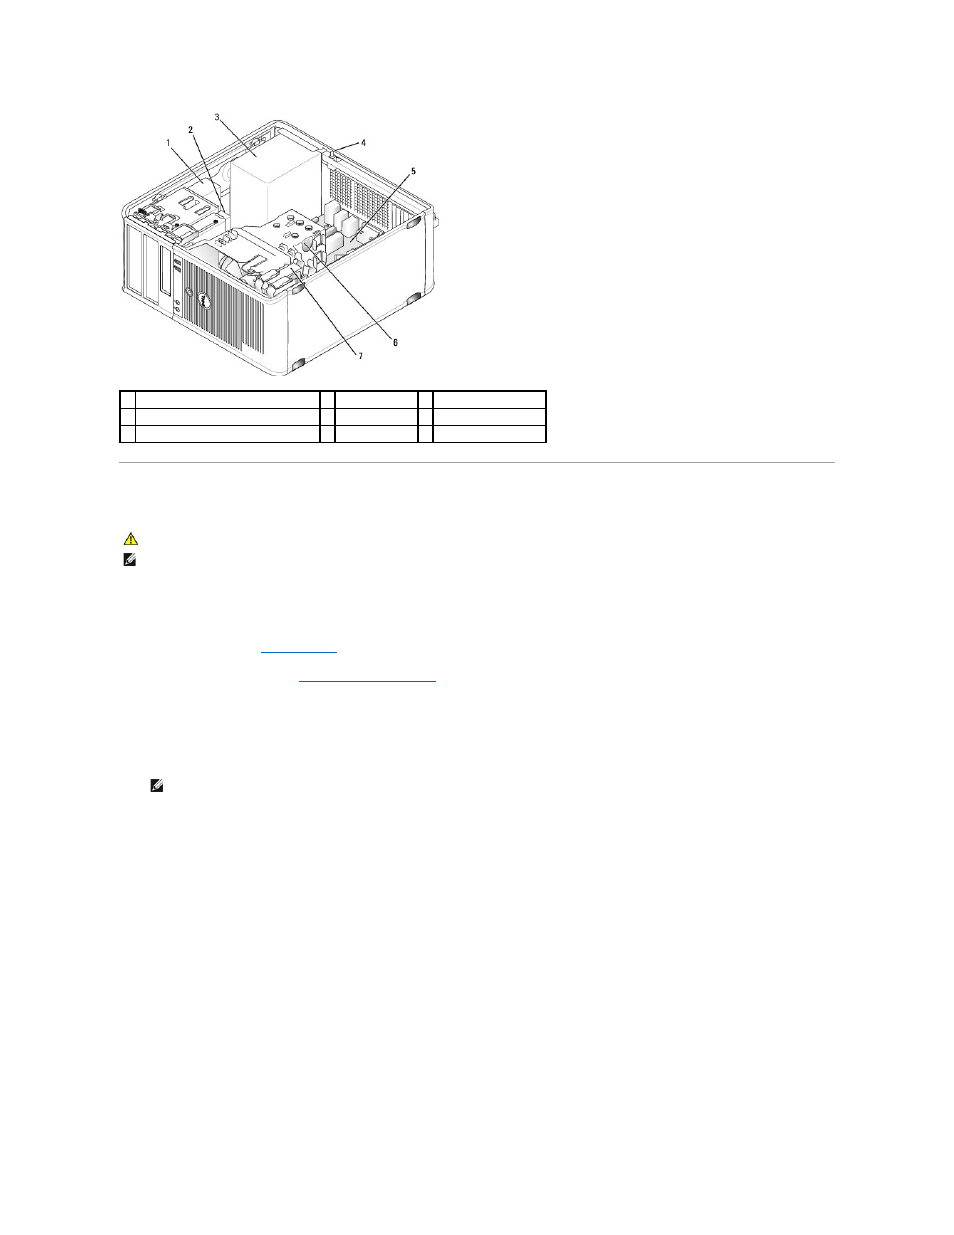
1 optical drive
2 disk drive
3 power supply
4 optional chassis-intrusion switch
5 system board
6 heat sink assembly
7 hard drive
CAUTION:
Before you begin any of the procedures in this section, follow the safety instructions located in the Product Information Guide.
NOTE:
The chassis intrusion switch is standard on the ultra small form factor computer but is optional on mini tower, desktop and small form factor
computers; it may not be present on your computer.
NOTE:
You may feel a slight resistance as you slide the switch out of the slot.