I/o panel, Removing the i/o panel – Dell OptiPlex 755 User Manual
Page 167
Back to Contents Page
User's Guide
I/O Panel
Removing the I/O Panel
1.
Follow the procedures in
Before You Begin
.
2.
Remove the computer cover (see
Removing the Computer Cover
).
3.
Remove the optical drive and floppy drive from the drive bays, if installed (see
Drives
).
4.
Remove the hard drive (see
Removing a Hard Drive
).
5.
Remove the processor heat sink (see
Processor
).
6.
Remove the system board.
l
Unscrew all retaining screws on the system board (see
Small Form Factor System Board Screws
).
l
Gently lift the system board out of the chassis.
7.
Remove the front fan:
Press the tab that secures the fan to the interior base of the computer and lift the fan from the computer; set the fan aside in the chassis.
8.
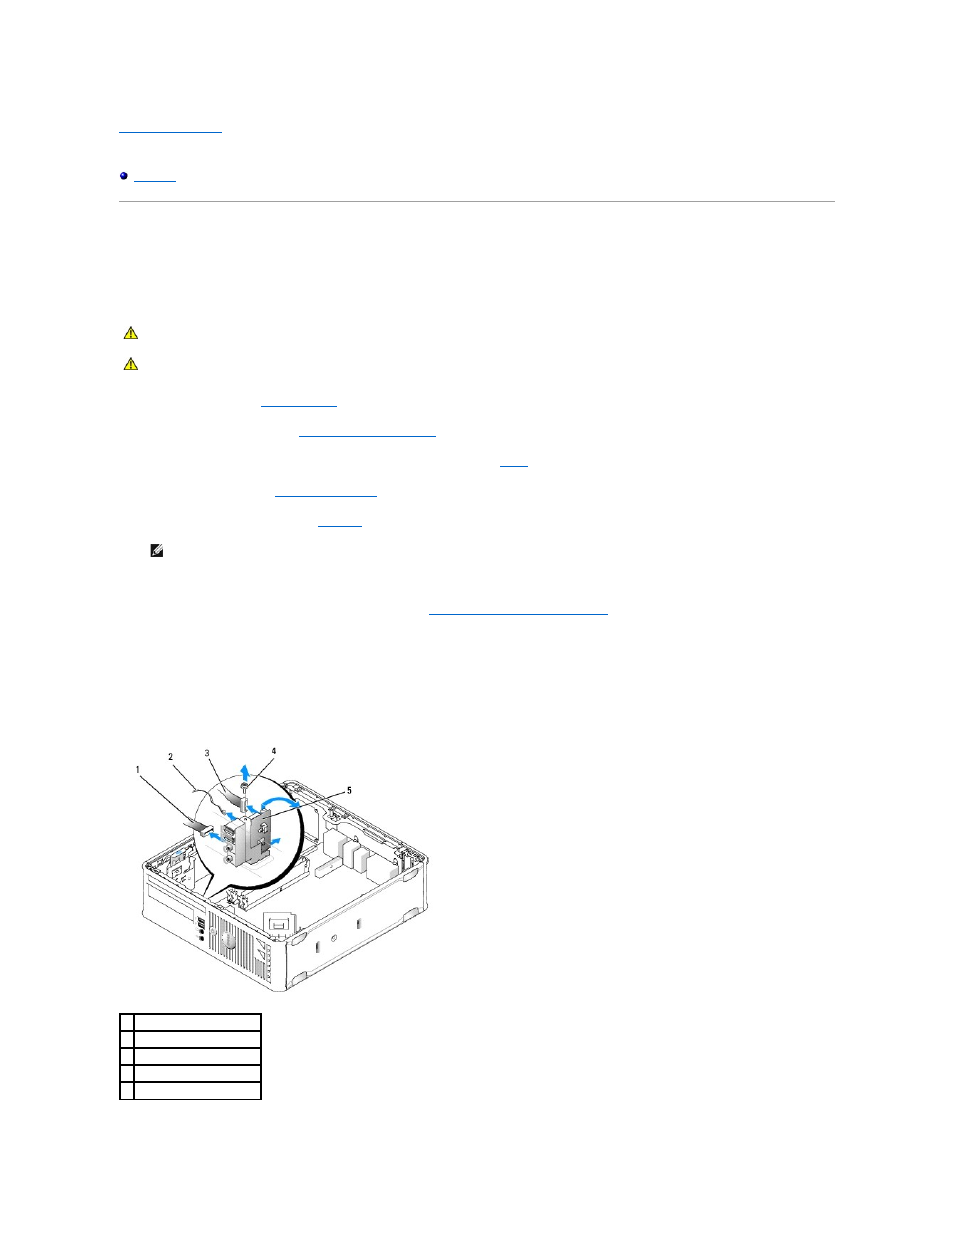
Remove cables from the IO panel.
Note the routing of the cables as you lay them aside, so that you can replace them correctly.
CAUTION:
Before you begin any of the procedures in this section, follow the safety instructions located in the Product Information Guide.
CAUTION:
To guard against electrical shock, always unplug your computer from the electrical outlet before removing the computer cover.
NOTE:
You'll also have to remove the heat sink base.
1 LED board
2 air temperature sensor
3 I/O cable connector
4 mounting screw
5 I/O panel