07 servicing machine torch components, Servicing machine torch components -9, Pak 200i – Tweco PAK 200i User Manual
Page 77
PAK 200i
Manual 0-5335
TORCH INFORMATION
7-9
7.07 Servicing Machine Torch Components
WARNINGS
Disconnect primary power to the system before disassembling the torch or torch leads.
DO NOT
touch any internal torch parts while the AC indicator light on the front panel of the Power Supply is ON.
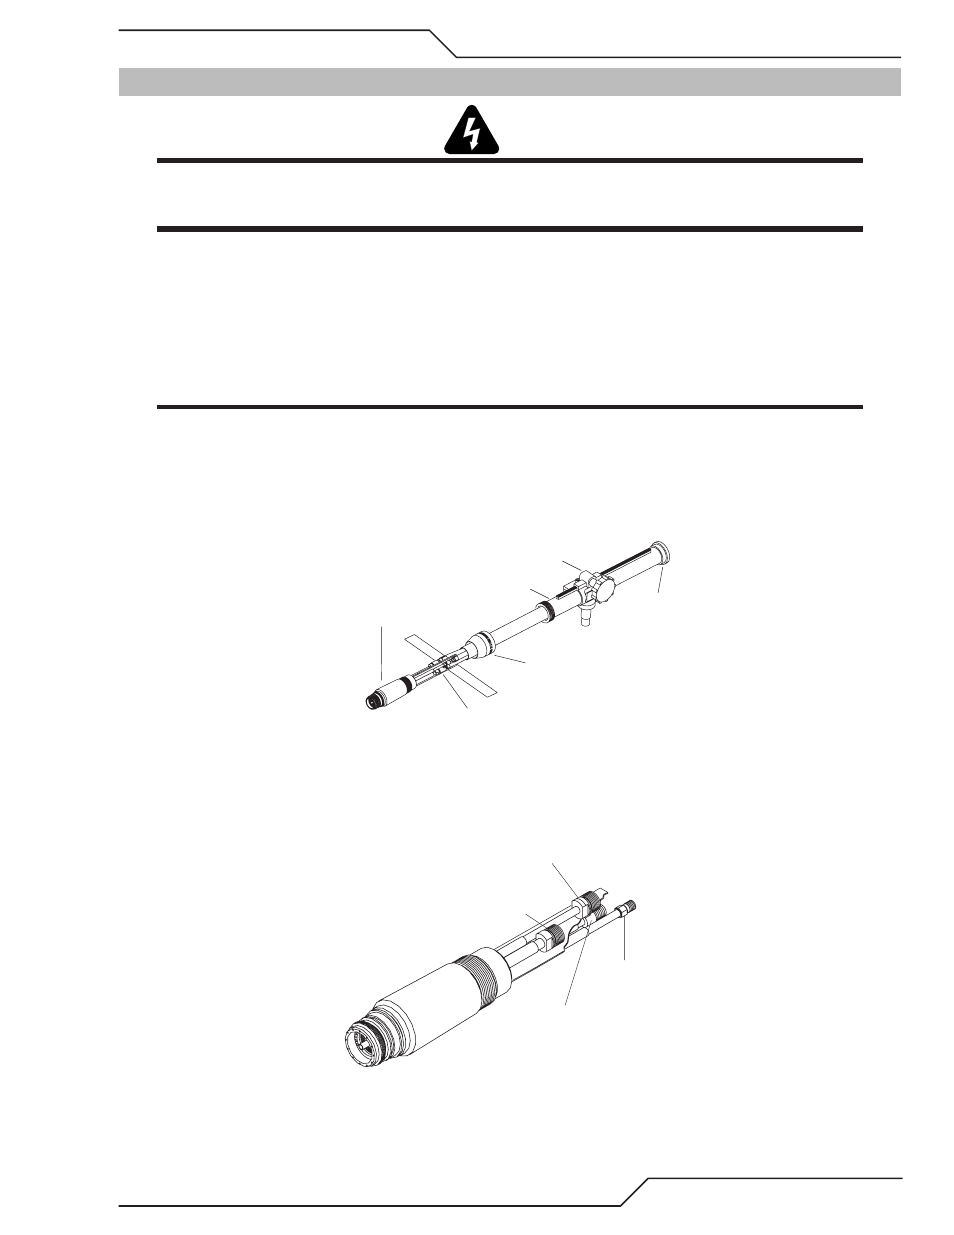
A. Removing Machine Torch Head
1. Remove the shield cup, tip, gas distributor and electrode from the Torch Head assembly.
�. Remove shrink on tubing.
3. Locate the tape at the back end of the torch positioning tube. Remove the tape from the torch lead sleeving
and slide the sleeving back (see NOTE).
NOTE
The positioning tube will not slide over the torch lead sleeving.
4. Unscrew the positioning tube from the torch adaptor on the Torch Head assembly and slide the positioning
tube back over the leads.
5. Unscrew the torch adaptor from the Torch Head assembly. Slide the torch adaptor back over the leads to
expose the plasma (+), secondary, coolant supply (-), and coolant return connectors.
Positioning Tube
Torch Adaptor
Lead Connections
A-00663
Bushing
Pinion Assembly
Machine
Torch Head
Figure 7-7: Torch Mounting Assembly
6. Disconnect the plasma (+), secondary, coolant supply (-), and coolant return connectors to allow removal
of the Torch Head. Note the location of the torch leads insulator which separates the negative and positive
leads.
Plasma Lead (+)
Coolant Return Lead
(LH Threads)
Secondary Lead
Coolant (-)
Supply Lead
A-02198
Figure 7-8: Torch Head Removal