Speed control installation, rc/cl options – E-flite PT-19 450 ARF User Manual
Page 25
25
E-flite PT-19 ARF Assembly Manual
Speed Control Installation,
RC/CL Options
Required Parts
Fuselage Assembly Speed control
CL Timer (optional) Hook and loop tape
Required Tools and Adhesives
Scissors
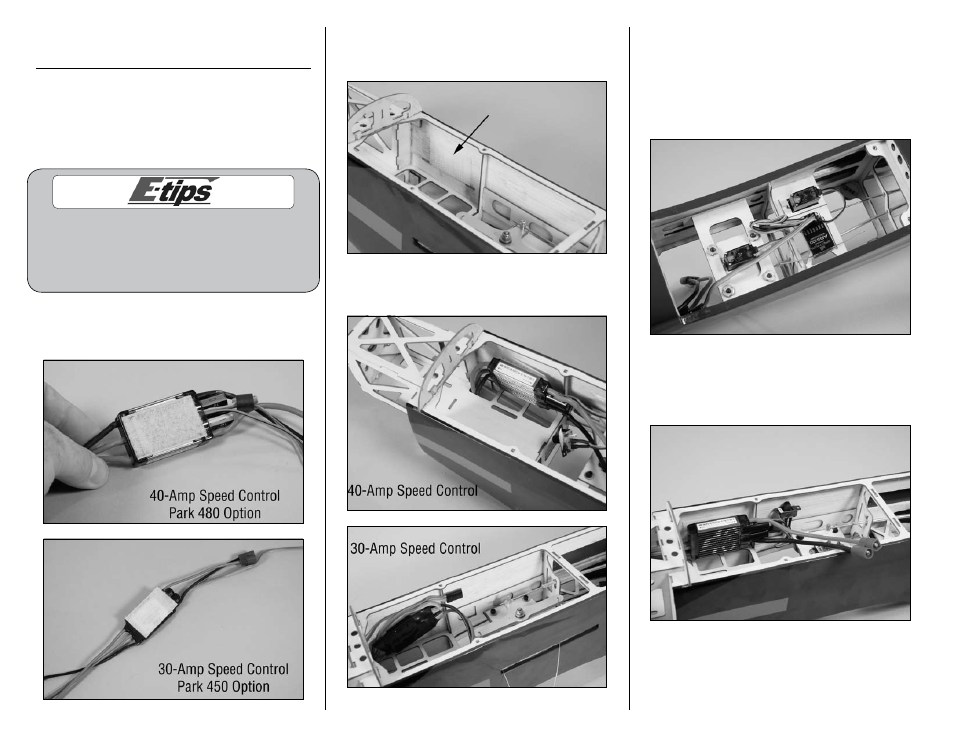
We show the installation of the E-flite 30A and
40A Pro SB ESC in the photos. We recommend
the 40Amp Lite Pro SB ESC for the Park 480
option. Either 40A ESC can be used. The 40A
lite is mounted similar to the 30A ESC.
1. Use scissors to cut a piece of hook and loop
tape the size of your speed control. Apply one side
of the tape to the speed control.
2. Apply the remaining side of the hook and
loop tape from Step 1 to the inside of the fuselage
as shown.
3. Attach the speed control to the fuselage using
the hook and loop tape.
4. You will need to plug the lead from the speed
control into the receiver for the radio controlled
version. Route the lead back and plug it into the
throttle port of your receiver. If you are building the
control line option you will plug the ESC into the
CL Timer (EFLA172). This is shown in step 6 on the
next page.
5. You will also need to mount the switch for the
radio controlled version if using the 40-Amp
controller. Use hook and loop material to place it in
a convenient location inside the fuselage.