Rudder servo installation rc option – E-flite PT-19 450 ARF User Manual
Page 18
18
E-flite PT-19 ARF Assembly Manual
8. Use a #1 Phillips screwdriver and 2mm x 4mm
machine screw to secure the rudder pushrod in the
brass pushrod connector.
Rudder Servo Installation
RC Option
Required Parts
Rudder servo
Brass pushrod connector
Fuselage assembly Connector backplate
Radio system
2mm x 4mm machine screw
Required Tools and Adhesives
Pin drill
Drill bit: 1/16-inch (1.5mm)
Pencil
Thin CA
Pliers
Phillips screwdriver: #1
Ruler
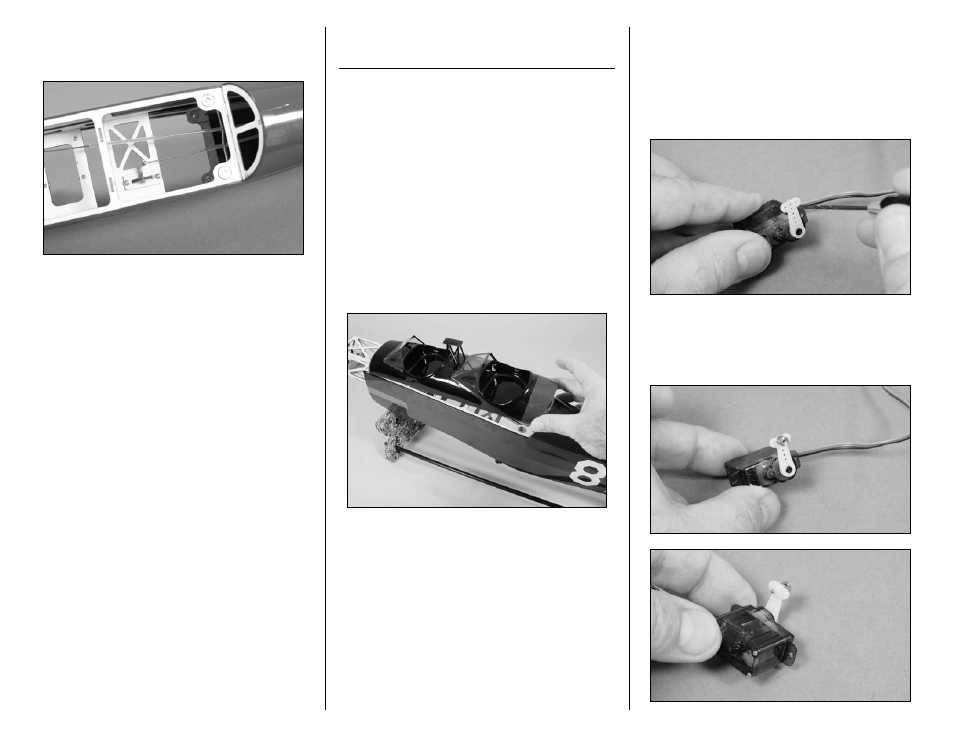
1. Remove the cockpit hatch by lifting it upward at
the rear and sliding it back slightly to release the
pegs at the front. Set the cockpit hatch aside.
2. Plug the rudder servo into the receiver. Power
up the receiver and transmitter to center the rudder
servo. Make sure the rudder trim at the radio
has been centered and the end points (if using a
computer radio) have been set to 100%. Use a pin
drill and 1/16-inch (1.5mm) drill bit to enlarge the
center outer hole of the servo arm as shown.
3. Insert the brass pushrod connector into the hole
drilled in the previous step. Use pliers and the
connector backplate to secure the brass pushrod
connector to the servo arm.