E-flite PT-19 450 ARF User Manual
Page 23
23
E-flite PT-19 ARF Assembly Manual
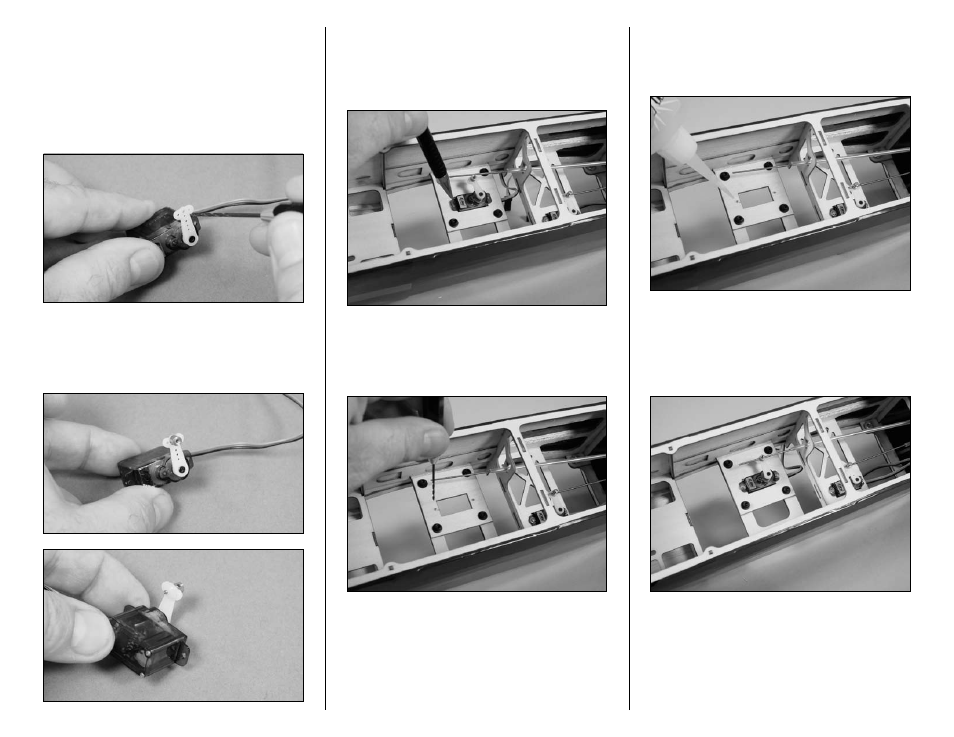
2. Plug the elevator servo into the receiver.
Power up the receiver and transmitter to center
the elevator servo. Make sure the elevator trim
at the radio has been centered and the end
points (if using a computer radio) have been set
to 100%. Use a pin drill and 1/16-inch (1.5mm)
drill bit to enlarge the center outer hole of the
servo arm as shown.
3. Insert the brass pushrod connector into the hole
drilled in the previous step. Use pliers and the
connector backplate to secure the brass pushrod
connector to the servo arm.
4. Insert the elevator servo into the opening in the
servo tray inside the fuselage with the output the
shaft toward the tail of the fuselage. Use a pencil
to mark the positions for the servo mounting screws
onto the servo tray.
5. Remove the elevator servo. Use a pin drill
and 1/16-inch (1.5mm) drill bit to drill a hole
in the servo tray at the position marked in the
previous step.
6. Place 2–3 drops of thin CA into each of the
holes to harden the surrounding wood. This will
provide a harder surface for the screws to bite into
and make them more secure when installed.
7. Slide the pushrod into the brass connector and
insert the servo into the servo tray. Mount the servo
to the servo tray using the two screws provided
with the servo. Use a #1 Phillips screwdriver to
tighten the screws.