Elevator servo installation rc option – E-flite PT-19 450 ARF User Manual
Page 22
22
E-flite PT-19 ARF Assembly Manual
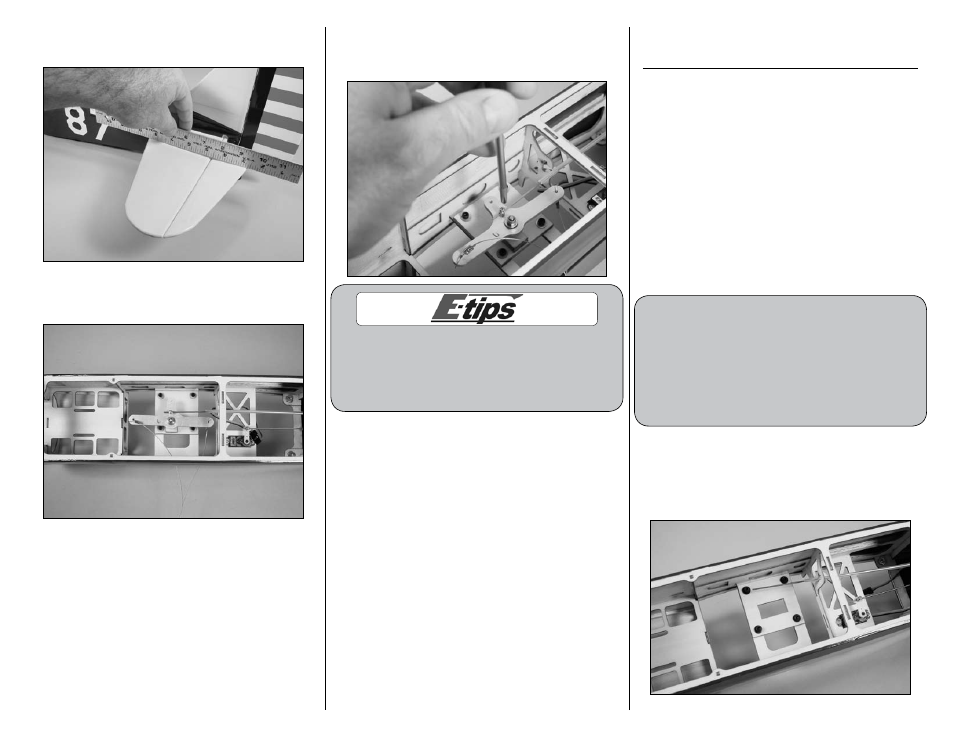
10. Use a ruler placed against the stabilizer and
elevator to align the stabilizer with the elevator.
11. Align the elevator bellcrank with the center line
of the fuselage.
12. Use a #1 Phillips screwdriver and 2mm x 4mm
machine screw to secure the elevator pushrod in
the brass pushrod connector.
If you have opted to fly the PT-19 as both a Control
Line and Radio Control model you will need to
remove the bellcrank at this time to prepare for
the elevator servo installation as these two items
are interchangeable and use the same mount.
Elevator Servo Installation
RC Option
Required Parts
Elevator servo
Brass pushrod connector
Fuselage assembly Connector backplate
4-40 x 1/2-inch socket head screw (4)
#4 washer (4)
Elevator servo tray
Radio system
2mm x 4mm machine screw
Required Tools and Adhesives
Pin drill
Drill bit: 1/16-inch (1.5mm)
Pencil
Thin CA
Pliers
Phillips screwdriver: #1
Ruler
Hex wrench or ball driver: 3/32-inch
This section details the installation of the elevator
servo for the radio controlled version of the PT-19.
If you are building the control line version and
have installed the elevator bellcrank, please skip
to the Motor Installation section of the manual.
Please note the hardware to mount the bellcrank
platform in the airplane is the same as used to
mount the elevator servo plate in the airplane.
1. Use a 3/32 inch hex wrench or ball driver to
install four 4-40 x 1/2-inch socket head screws
and four #4 washers to secure the elevator servo
tray inside the fuselage. Note that the opening for
the servo faces to the left side of the fuselage.