Installation instructions – Brandmotion 1013-9531-V2 User Manual
Page 8
INSTALLATION INSTRUCTIONS
9530 & 9531 Instructions 1-14-13.doc
Page 8 of 16
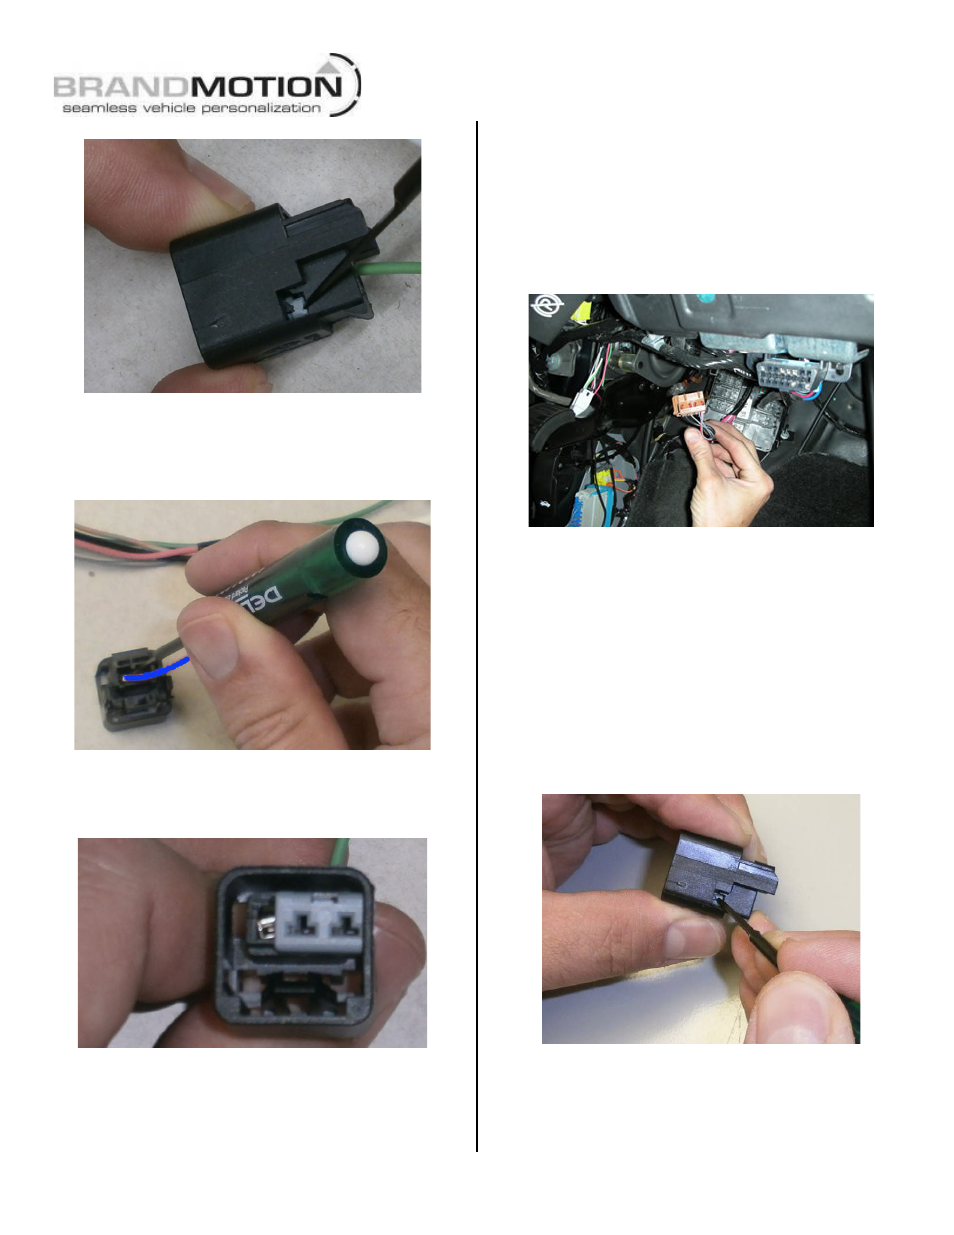
Figure 31
B. Remove the dark blue wire from Connector C11/
X11 or C10/ X10, and insert the terminal into the
other cavity of the black connector on supplied
Mirror Harness. (Figure 32)
Figure 32
C. Use Delphi Terminal Tool 12094429 or a small flat
blade screwdriver to press the terminal of the dark
blue wire into the connector. (Figure 33)
Figure 33
D. Slide gray TPA inside the black connector to lock
green and blue wires into place.
E. Snap supplied Jumper Harness into black
connector on supplied Mirror Harness. (Figure 30)
43. Connect green wire of Jumper Harness to Cavity 5 of
the C11/ X11 Connector OR Cavity 8 of the C10/ X11
Connector where the dark blue wire was removed
(see Figure 17). Re-insert TPA and plug C11/ X11 or
C10/ X10 Connector into M-BEC. (Figure 26)
44. Remove brown C12/ X12 Connector (Figure 34) from
the M-BEC connector (Figures 25 & 26) located in
the bolster stud by pulling it out with your fingers.
Figure 34
45. Remove TPA from C12/ X12 Connector. (Figure 27)
46. If a pink wire does NOT exist in Connector C12/
X12 Cavity 7, connect the pink wire from the
supplied Mirror Harness to Cavity 7. (Figure 27)
Proceed to Step 49.
If a pink wire exists in C12/ X12 Cavity 7:
A. Remove the pink wire from C12/ X12.
B. Unlock the larger connector of the supplied Denali
Jumper Harness by using Delphi Terminal Tool
12094429 or a small flat blade watch repair
screwdriver to slide gray TPA device over to
accommodate the pink wire. (Figure 35)
Figure 35
C. Insert pink wire from the supplied Mirror Harness
into the larger connector of the Denali Jumper
Harness by using Delphi Terminal Tool 12094429
or a small flat blade screwdriver to press the
terminal fully into the connector. (Figure 36)