Installation instructions – Brandmotion 1013-9531-V2 User Manual
Page 14
INSTALLATION INSTRUCTIONS
9530 & 9531 Instructions 1-14-13.doc
Page 14 of 16
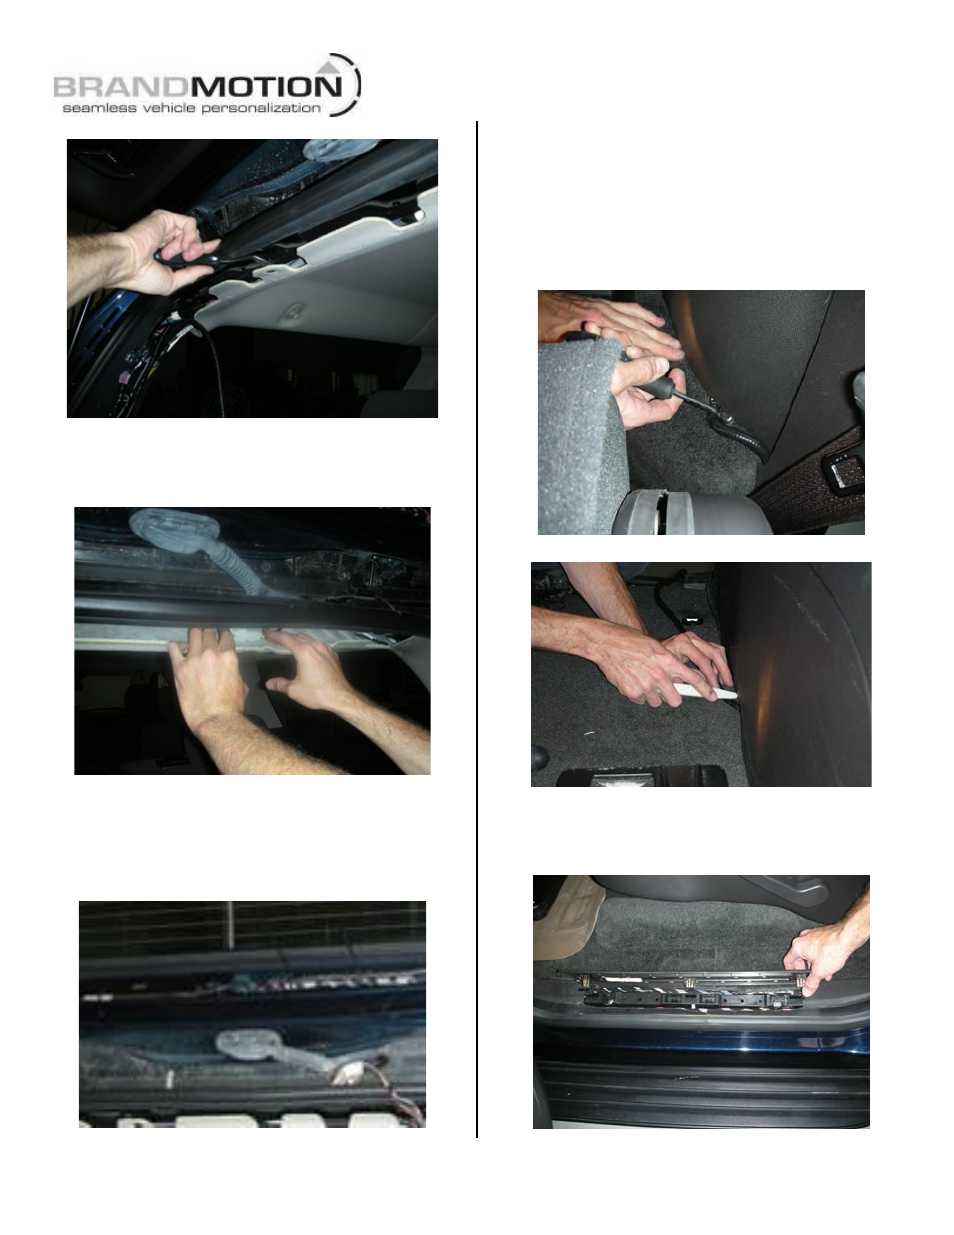
Figure 65
78. Pull trailing edge of headliner down to route Chassis
Harness under leading edge of headliner and
towards the driver’s side D-pillar. (Figure 66)
Figure 66
79. Remove both ends of the electrical bridge between
the liftgate and rear of the vehicle. Route the front
connector (identifiable by the presence of a green
lock tab) of the supplied Chassis Harness through
the bridge. (Figure 67)
Figure 67
80. Route the supplied Chassis Harness down the D-
Pillar behind the trim.
81. Remove the driver’s side third row seat.
82. Starting from the middle of the driver’s side rear
quarter trim panel, use a plastic trim tool to tuck the
supplied Chassis Harness under the trim panel. Work
towards the rear, then towards the front. (Figures
68 & 69)
Figure 68
Figure 69
83. Remove the rear driver’s side sill plate by lifting it at
the front and working your way back with your
hands to release the mounting clips. (Figure 70)
Figure 70