Brandmotion 1013-9531-V2 User Manual
Page 4
"#$%&''&%"(#!"#$%)*+%"(#$
9530 & 9531 Instructions 1-14-13.doc
Page 4 of 16
19. Remove the front driver’s side sill plate by lifting it at
the rear and working your way forward with your
hands to release the mounting clips. (Figure 13)
Figure 13
20. Remove the front driver’s side kick panel by lifting at
the bottom and working your way upwards to
release the mounting clips. (Figure 14)
Figure 14
21. Disengage Terminal Position Assurance (TPA) device
(rectangular white tab) from the vehicle’s mirror
connector. Use Delphi Terminal Tool 12094429 or a
small flathead watch repair screw driver to pry up
the notches in the TPA. The tab will only lift about
1/10
”
. (Figure 15)
Figure 15
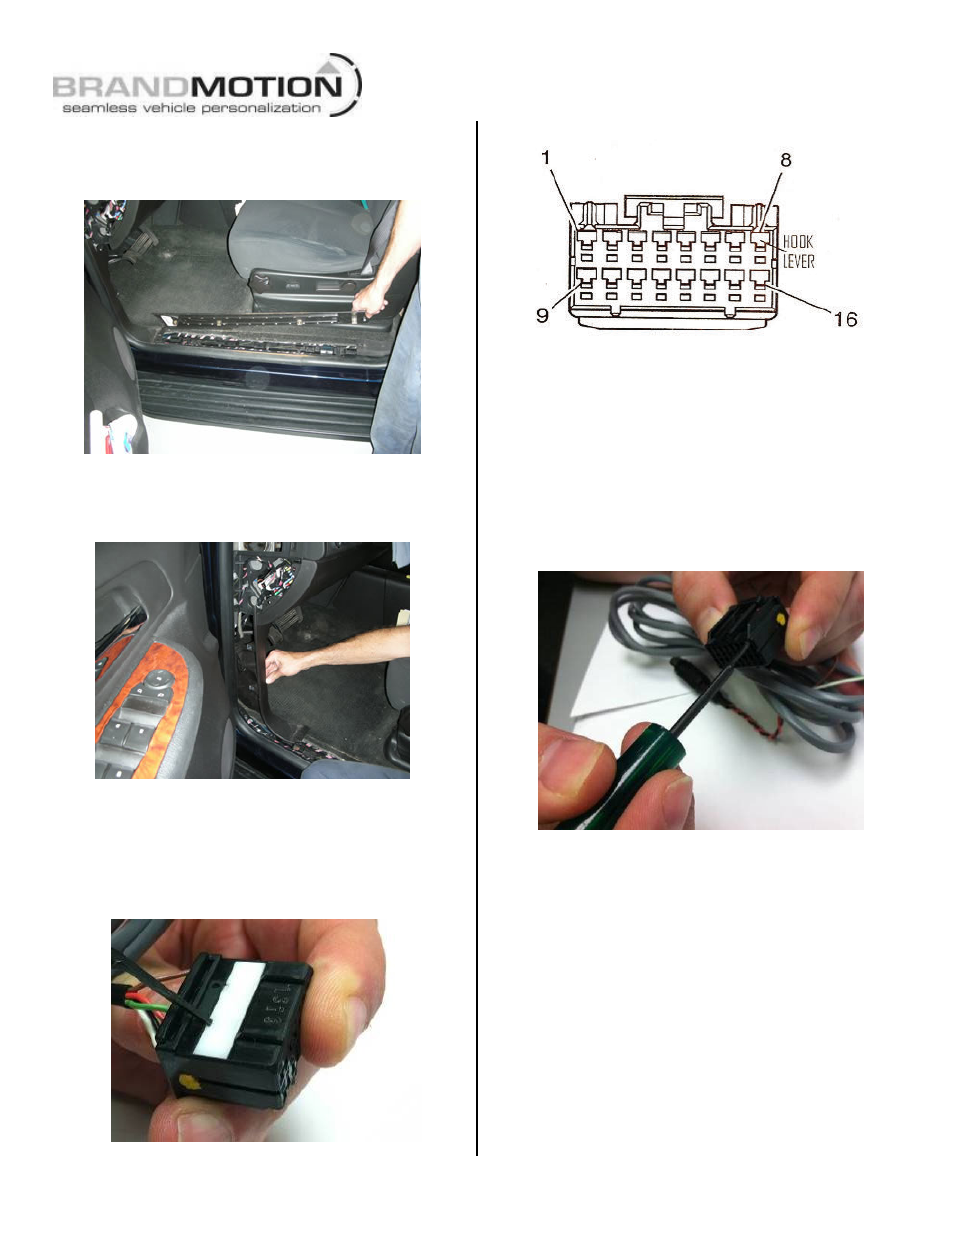
Figure 16
Note: Cavities are numbered on the back side of the
mirror connector. Additionally, Brandmotion identifies
the #1 pin position with a white mark.
22. Locate supplied foam-wrapped Mirror Harness.
23. Insert Gray/Dark-Blue wire of the supplied Mirror
Harness into the vehicle’s mirror harness connector.
Use cavity 1 for Kit 9531 with comp/temp or cavity 6
for Kit 9530. (Figure 16)
Note: If a wire exists in this cavity, remove and
isolate with electrical tape. (Figure 17)
Figure 17
To remove any extra wires, insert the Delphi
Terminal Tool or small watch repair screw driver into the
hook lever on face of the mirror harness connector and
press the selected pin out through the back of the
connector.
24. Insert Gray/Orange wire from supplied Mirror
Harness into the mirror harness connector. Use
cavity 2 for Kit 9531 with comp/temp or cavity 7 for
Kit 9530. (Figure 16)
Note: If a wire exists in this cavity, remove and
isolate with electrical tape (Figure 17)
25. IMPORTANT: If a wire exists in cavity 3 of the
vehicle mirror harness connector, remove and
isolate with electrical tape. Otherwise the vehicle will
not be able to start.