Reinstall the bottom plate – Rockwell Automation 6155F-NPWEDC Compact Non-display Computer User Manual
Page 32
32
Rockwell Automation Publication 6155R-UM002E-EN-P - February 2014
Chapter 4
Component Replacement
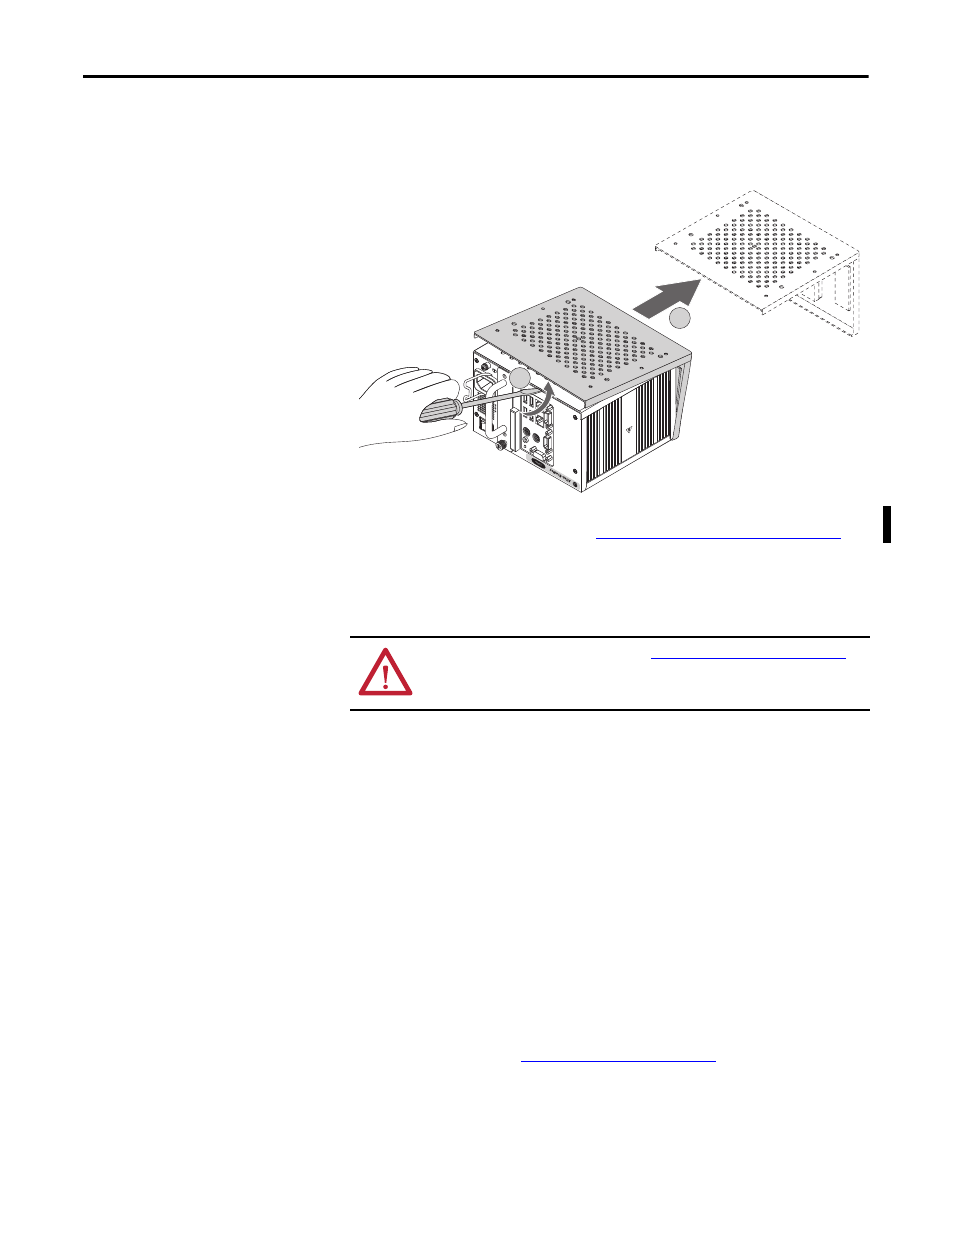
5. Insert a slot-head screwdriver into the gap between the top and bottom
plates and push the screwdriver to slide the bottom plate forward (C).
6. Detach the bottom plate from the computer (D).
7. After installing, replacing, or upgrading internal computer components,
reinstall the cover as detailed in
Reinstall the Bottom Plate on page 32
Reinstall the Bottom Plate
Follow these steps to reinstall the bottom plate.
1. Align the computer on the bottom plate.
2. On a flat surface, turn over the computer so the bottom side is facing up.
3. Reinstall the bottom plate on the bottom side and hand tighten the five
screws.
4. Turn over the computer so the top side is facing up.
5. Install the five screws that secure the bottom plate to the top side.
Torque the screws to 0.678 N•m (6 lb•in).
6. On a flat surface, turn over the computer so the bottom side is facing up.
7. Torque the five screws to 0.678 N•m (6 lb•in).
8. Follow the steps for
.
C
D
ATTENTION: Refer to the illustrations in
Remove the Bottom Plate on page 31
for where mounting screws are located and how to align the bottom plate and
computer.
TIP
One screw is larger than the other screws. Install the larger screw in
the middle of the bottom plate.