Post-configuration, Required tools, Remove the bottom plate – Rockwell Automation 6155F-NPWEDC Compact Non-display Computer User Manual
Page 31
Rockwell Automation Publication 6155R-UM002E-EN-P - February 2014
31
Component Replacement
Chapter 4
Post-configuration
Follow these steps after installing or removing a hardware component.
1. Make sure all components are installed according to instructions.
2. Make sure that no tools or loose parts are left inside the computer.
3. Reinstall any expansion boards, peripherals, and system cables that were
previously removed.
4. Reinstall the bottom plate according to the instructions on
.
5. Reconnect all external cables and power to the computer.
6. Press the computer’s power switch to start the computer.
Required Tools
The following tools are required for component replacement:
• #2 cross-head screwdriver
• Slot-head screwdriver
• Antistatic wrist strap
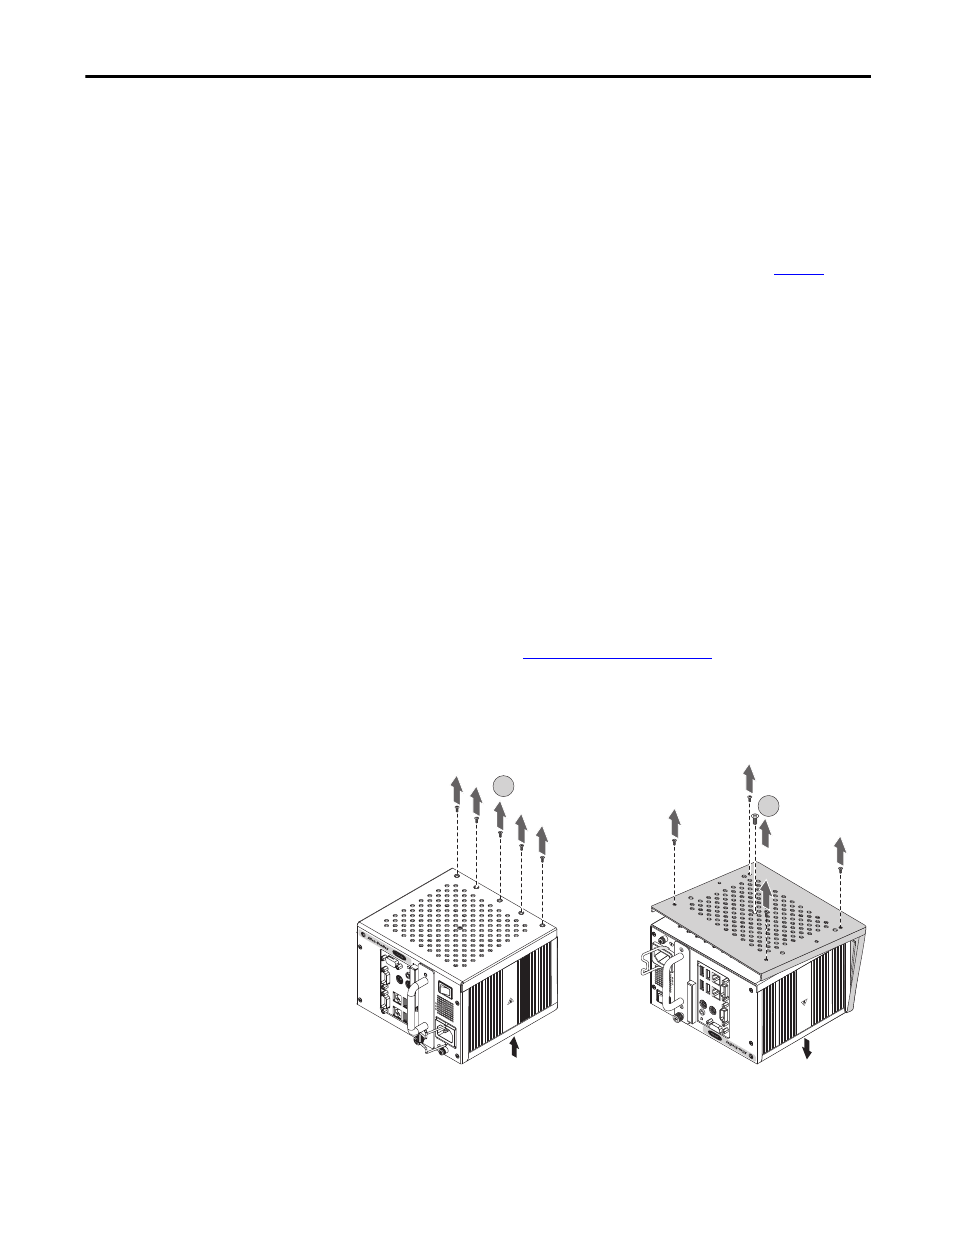
Remove the Bottom Plate
To install, replace, or upgrade internal computer components, you must first
remove the bottom plate.
Follow these steps to remove the bottom plate.
1. Follow the steps for
2. Remove the five screws that secure the bottom plate to the top side (A).
3. On a flat surface, turn over the computer so the bottom side is facing up.
4. Remove the five screws that secure the bottom plate to the bottom side (B).
Top of Computer
Top of Computer
A
B