Mount the 2706-p92c and 2706-p94c sign, Mount the 2706-p92c and 2706-p94c sign -17 – Rockwell Automation 2706-P42_P43_P44_P72_P74_P92_P94 InView Marquee Message Display User Manual User Manual
Page 25
Publication 2706-UM016D-EN-P - March 2006
Install InView Marquee Message Display 1-17
P1 can be used for incoming RS-232 only, although it is optional
and not recommended.P1 is intended for RS-232 application
downloads and RS-485 terminating resistor connection.
See publication 2706-IN007 for more information on RS-485
termination.
8. Carefully close the front of the sign case and turn the
quarter-turn latches to the right with a large screwdriver.
Mount the 2706-P92C and
2706-P94C Sign
To mount the sign:
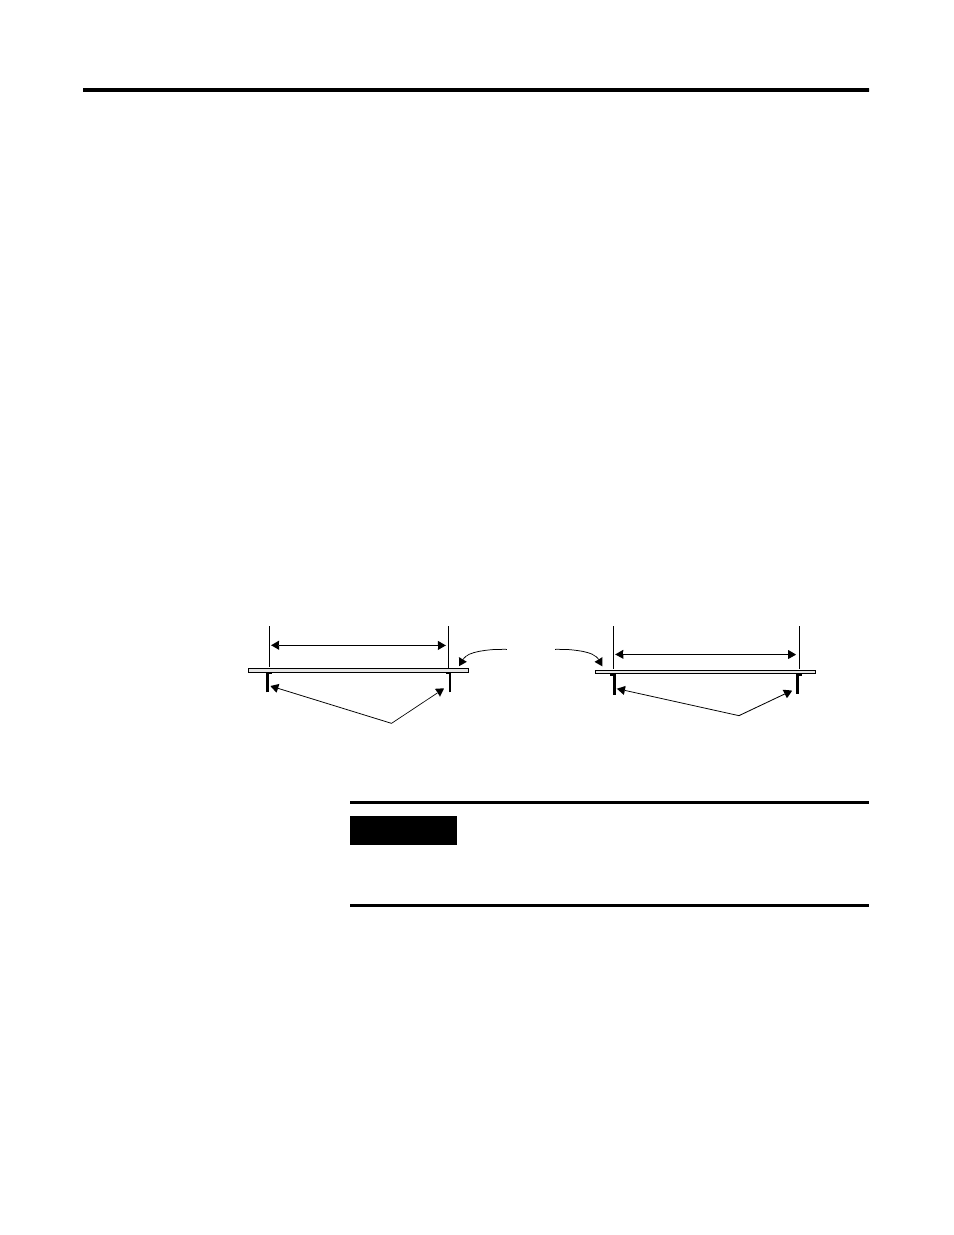
1. Attach the two sign brackets to a wall, ceiling, or other surface.
Be sure to place the brackets so the bracket flanges face
appropriately as shown below. Mount the brackets the following
distance apart (measured from the center of the mounting holes
in each bracket).
2. Mount the sign on the sign brackets using the hex bolts
supplied.
3. Insert the bolts into the far single holes first, until the desired
viewing angle is determined.
Wall
or
ceiling
Sign brackets, facing
in behind the sign
Sign brackets, facing
out from the sign
Mounted so flanges are hidden behind the sign
2706-P92C 103.0 cm (40.55 in.)
2706-P94C: 194.4 cm (76.55 in.)
Mounted so flanges show on the sides of the sign
2706-P92C: 107.8 cm (43.22 in.)
2706-P94C: 201.2 cm (79.22 in.)
IMPORTANT
Do not install the sign directly to drywall or
plasterboard. The sign must be fastened to a surface
capable of supporting at least four times the weight
of the sign.