Rockwell Automation 2706-P42_P43_P44_P72_P74_P92_P94 InView Marquee Message Display User Manual User Manual
Page 16
Publication 2706-UM016D-EN-P - March 2006
1-8 Install InView Marquee Message Display
8. Attach the two remaining wall mounting brackets to a wall so
that they align with the brackets on the sign.
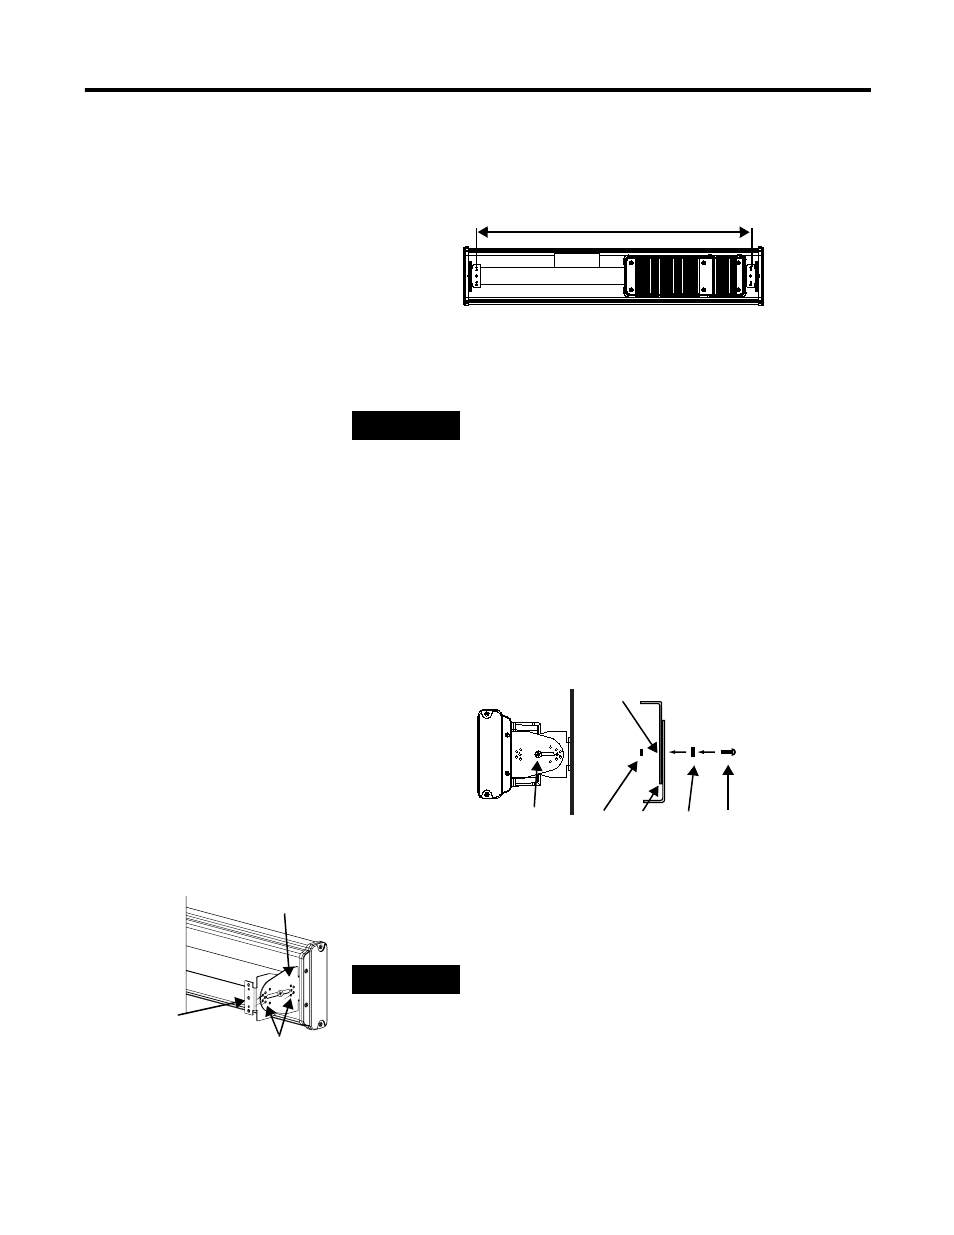
9. Connect the mounting brackets on each end of the sign together
using a 5/16 Phillips screw and a 5/16 washer through the
mounting holes, as shown below, securing with a 5/16 nut.
Do not tighten the nut at this time.
10. Match the alignment holes of the brackets on the sign with the
alignment holes of the brackets on the wall so that the sign is at
the desired viewing angle.
11. Fasten the mounting brackets together using two 10-32 x 3/4
Phillips screws, two 10-32 washers, and two 10-32 lock nuts
through selected alignment holes on each end of the sign.
12. Torque to 2.7 Nm (24 lb-in).
TIP
Do not install the sign directly to drywall or
plaster-board. The sign must be fastened to a wall
capable of supporting at least four times the weight
of the sign.
94 cm (37 in.) for 2706-P42
183 cm (72.2 in.) for 2706-P43
185.4 cm (73 in.) for 2706-P44
Top view
Side view
Washer Screw
Screw and
washer through
mounting holes
Brackets
Mounting
holes
Nut
Alignment holes
Mounting
bracket on the
wall
Mounting bracket
on the sign
TIP
The second mounting bracket is shown here for
illustration only. It is actually mounted to the wall.