Before using this unit, Installation procedure – Yamato Scientific SQ 510 Autoclave, Sterilizers User Manual
Page 13
10
Before Using This Unit
Installation Procedure
1 Determine the installation site
• If there is a bump on the floor, the casters may receive excessive load and get damaged. In
this case, lift and move carefully by two or more persons.
Install the equipment referring to 1 to 5 of "Requirements for Installation" in Page 6.
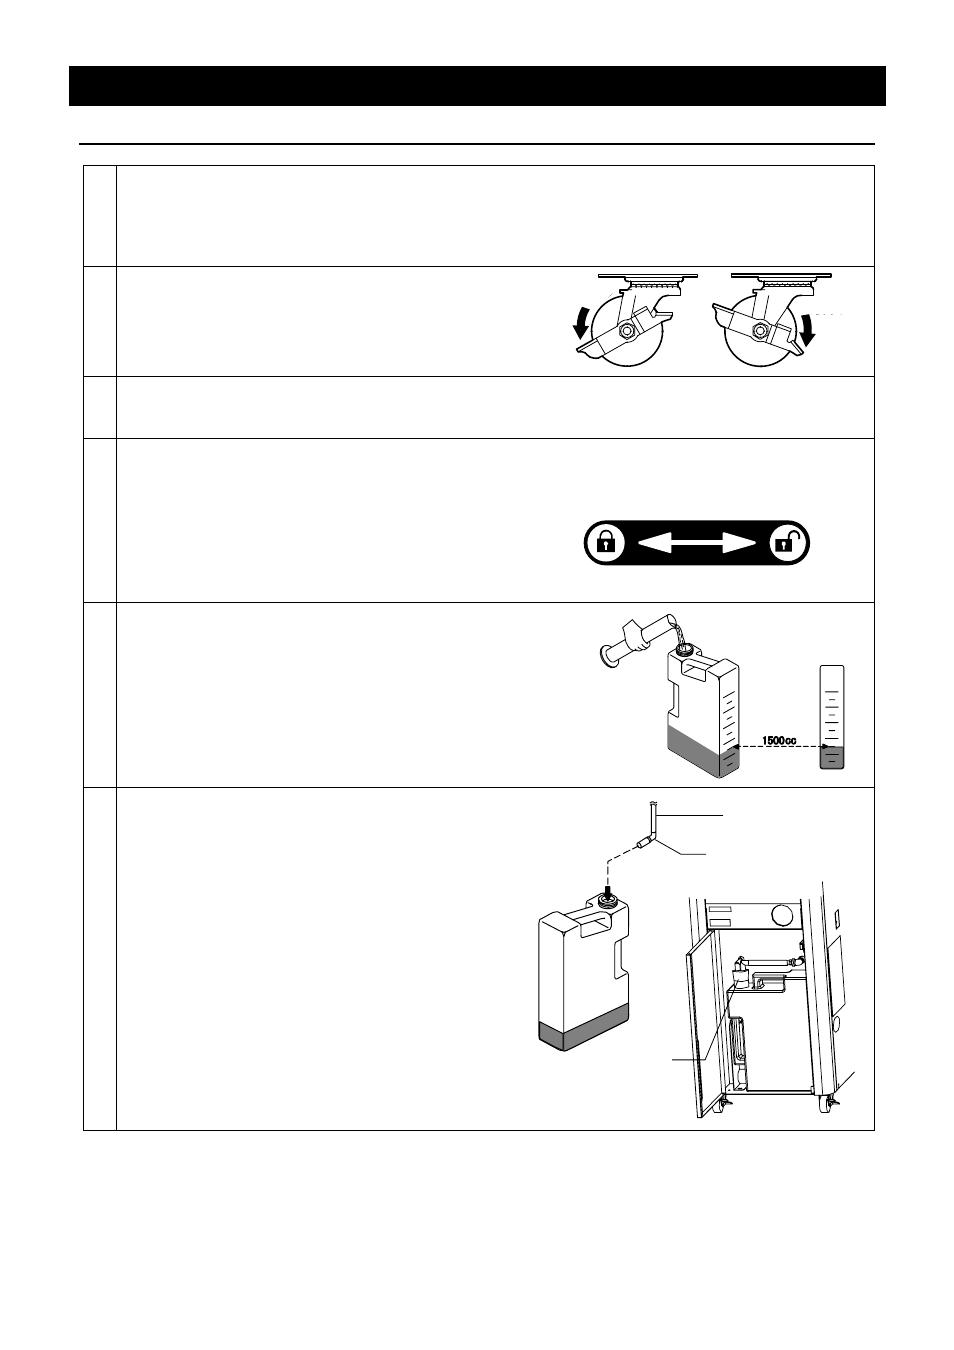
2 After the unit is placed in the desired position,
lock the stopper button of the casters
• Only the two casters on the front side of the unit
are equipped with a stopper.
3 Connecting the power
• Connect the power referring to 7 to 10 of "Requirements for Installation" in Page 6.
4 Open the cover
• Turn on the electric leakage breaker at the right
side of equipment and turn on the power to
open the cover. The safety lock is released
and the cover can be opened.
• Slide the lock lever on the cover to the right and
grasp the handle of cover to open it.
Turn the lock lever to the left to close the cover.
Turn the lock lever to the right to open the cover.
5 Pour water into the drain bottle
• Pour 1500cc of water into the drain bottle. The water
is used to cool down the high-temperature vapor
generated inside the chamber.
6 Set the drain bottle
• During operation, high-temperature vapor blows
out from the equipment. Make sure to set the
drain bottle. If the bottle is not set, the safety
device (micro switch) functions to prevent the
equipment from operating.
①
Open the door in the front face of equipment.
②
Put the exhaust hose silencer into the drain
bottle which contains 1500cc of water in it.
③
Set the bottle to the inside of door. Insert the
exhaust hose into the bottle and fix the silicon
plug onto the opening of bottle.
④
The micro switch is pressed and the equipment
is ready to operate. The temperature display
screen and time display screen are displayed.
Lock
Release
Exhaust hose
Silencer
Silicon plug