Installation instruc tio ns – Poison Spyder JK EVAP SKID User Manual
Page 5
INSTALLATION INSTRUC
TIO
NS
Poison Spyder Customs • JK EVAP SKID INSTALLATION
Page 5
©2014 POISON SPYDER CUSTOMS, INC. • 951-849-5911 • WWW.POISONSPYDER.COM
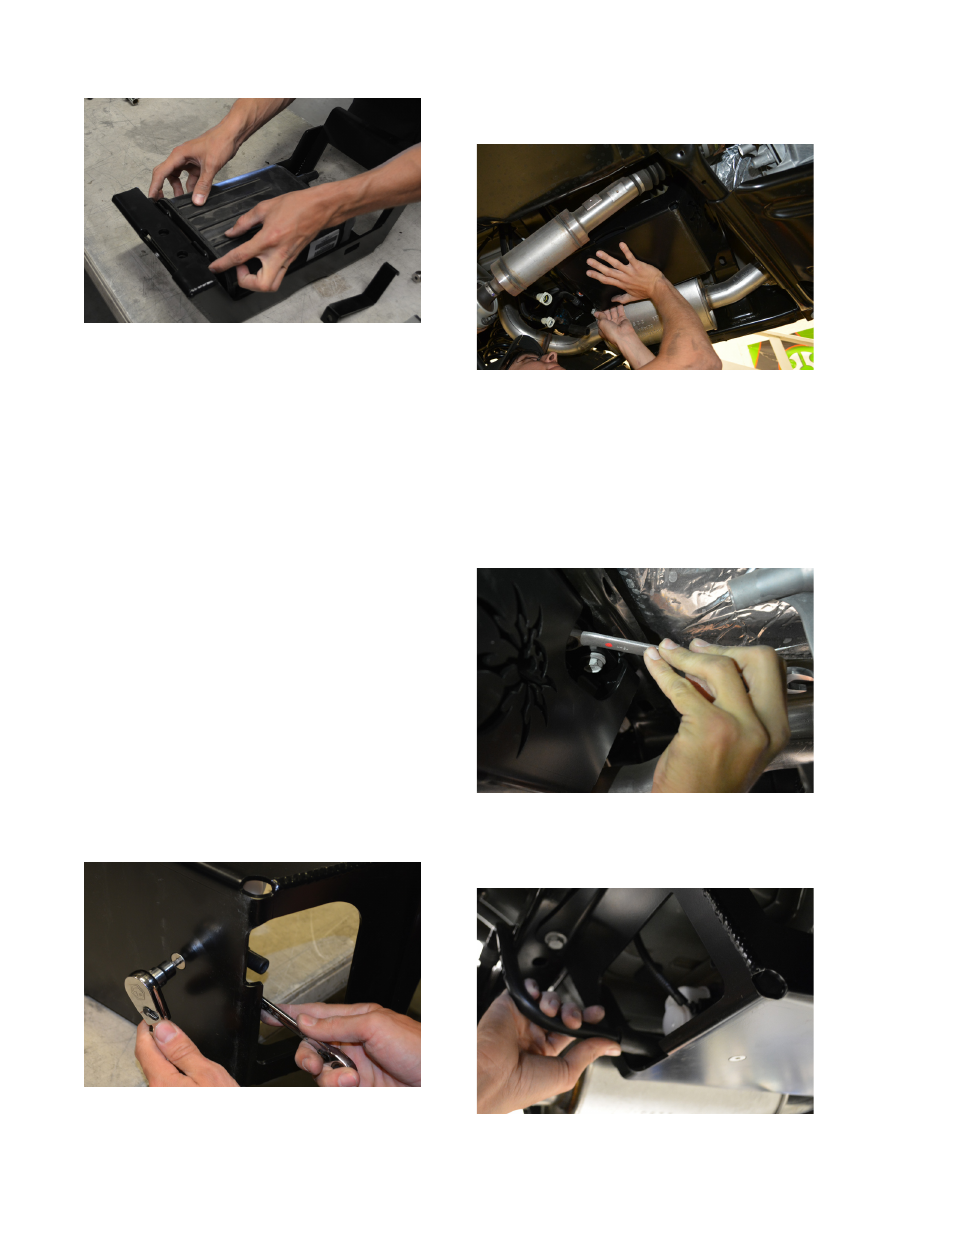
FIGURE 16
8. Slide the Evap Skid/canister assembly
to the edge of the table to access the
countersunk hole at the bottom of the skid,
without turning it on it’s side and disturbing
the location of the canister within the skid.
Slide the 5/16 X 3/8 Nylon Spacer into place
between the bottom of the Evap Skid and the
hold-down tab protruding from the rear of the
evap canister.
9. Insert the provided 5/15-18 X 1 SS Flat
Head Cap Screw through the countersunk
hole in the bottom of the Evap Skid, through
the center of the Nylon Spacer, and through
the hole in the hold-down tab that is part of
the plastic evap canister. Put a 5/16 Flat
Washer and 5/16-18 Nylon Insert Lock Nut
over the protruding end of the flat head cap
screw, and finger-tighten.
10. Once the flat head cap screw and nut are
finger-tight, the Evap Skid and canister
assembly may be tilted on its side to more
easily reach both sides. Tighten the nut with
a 1/2” end wrench while holding the flat head
cap screw with a 3/16” hex key.
FIGURE 17
11. Install the Evap Skid with evap canister
into the location on the Jeep where the
evap canister was removed from its factory
location.
FIGURE 18
12. Re-use the three OE evap skid mounting
bolts, and use the 18mm end wrench to
tighten them (two at the front, one at the
back). Note that the two bolts at the front will
pass through the Front Hold Down Bracket,
then through the top flange of the Evap Skid,
then into the threaded holes in the Jeep’s
body.
FIGURE 19
13. Reconnect all lines to the back of the evap
canister, by reversing the process used
during their removal.
FIGURE 20