Installation instruc tio ns – Poison Spyder JK EVAP SKID User Manual
Page 2
INSTALLATION INSTRUC
TIO
NS
Poison Spyder Customs • JK EVAP SKID INSTALLATION
Page 2
©2014 POISON SPYDER CUSTOMS, INC. • 951-849-5911 • WWW.POISONSPYDER.COM
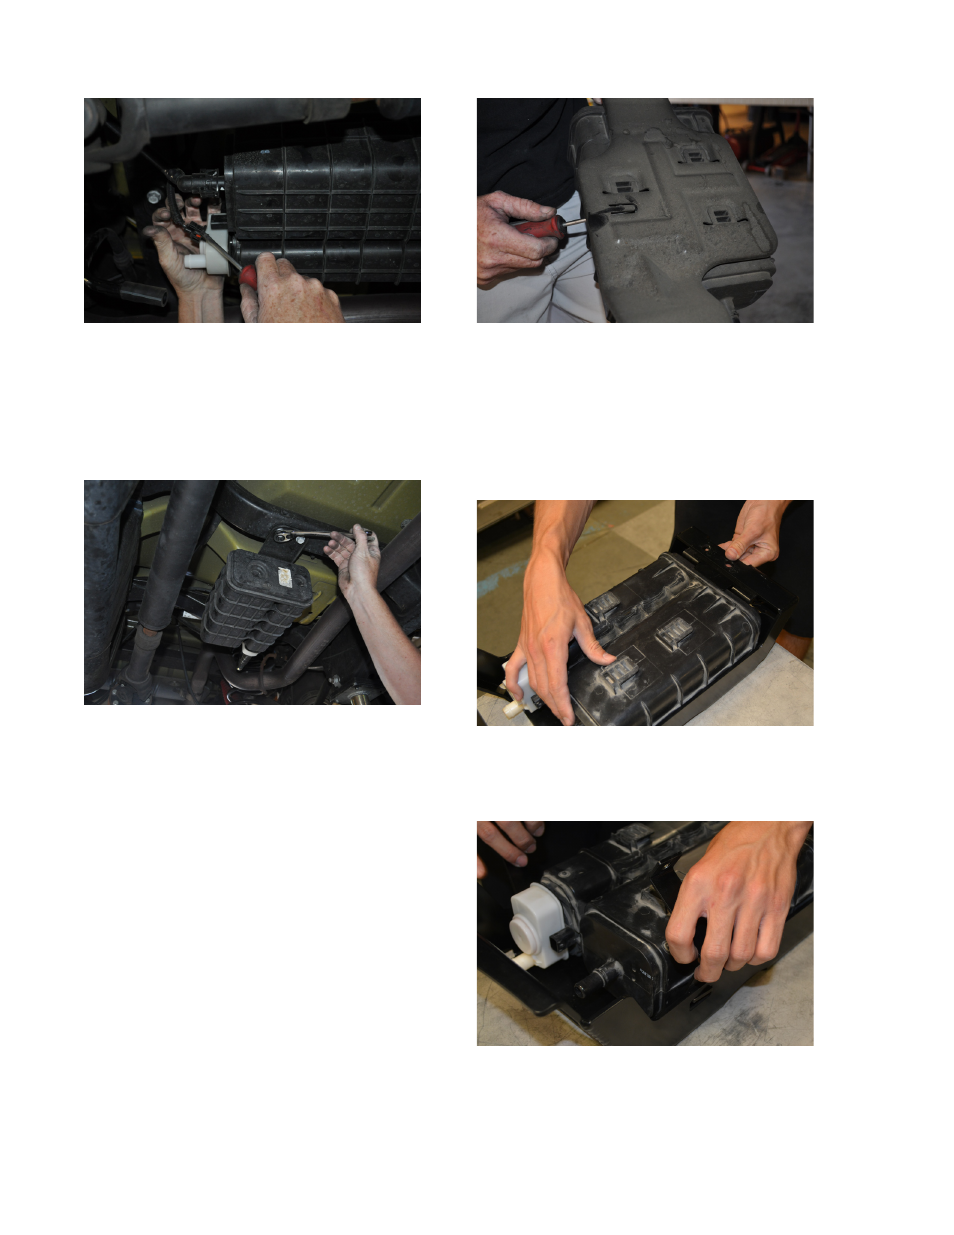
FIGURE 1
3. Use a 16mm end wrench to unbolt the OE
canister mount from the underside of the
Jeep. There are two bolts at the front of the
canister mount, and one at the rear. Keep
these bolts handy as they will be re-used to
install the Skid.
FIGURE 2
4. With the canister/mount assembly
removed from the vehicle, observe the top
surface of the mount bracket that was against
the underside of the Jeep. Note that there
are three slide-tabs holding the canister to
the mount bracket. Only one of these slide-
tabs is located on the driver’s side of the
mount bracket, and located directly rearward
from it is a metal tab that is pushed inward
to lock the canister into place. Slide a small
flat screwdriver between the canister and the
mount, from the side, to bend the tab flat or
outward. With the tab bent out of the way,
slide the canister forward to release it from
the mount bracket.
FIGURE 3
5. Place the 07-11 Front Hold-Down Bracket
inside the front edge of the Evap Skid as
shown in the photo, holding it in place with
the two bolt holes in the bracket aligned with
the holes in the skid. Place the evap canister
into the skid and push it forward agains the
Front Hold-Down Bracket.
FIGURE 4
6. Insert the hooked ends of the 07-11 Rear
Hold-Down Straps into the slots in the side of
the Evap Skid as shown.
FIGURE 5
7. With both 07-11 Rear Hold-Down Straps in
place, insert the supplied 3/8-16 X 1-1/2 Gr8
Hex Head Cap Screw through the two holes
in the adjacent 90° flanges of the two straps.