Installation instruc tio ns – Poison Spyder JK EVAP SKID User Manual
Page 3
INSTALLATION INSTRUC
TIO
NS
Poison Spyder Customs • JK EVAP SKID INSTALLATION
Page 3
©2014 POISON SPYDER CUSTOMS, INC. • 951-849-5911 • WWW.POISONSPYDER.COM
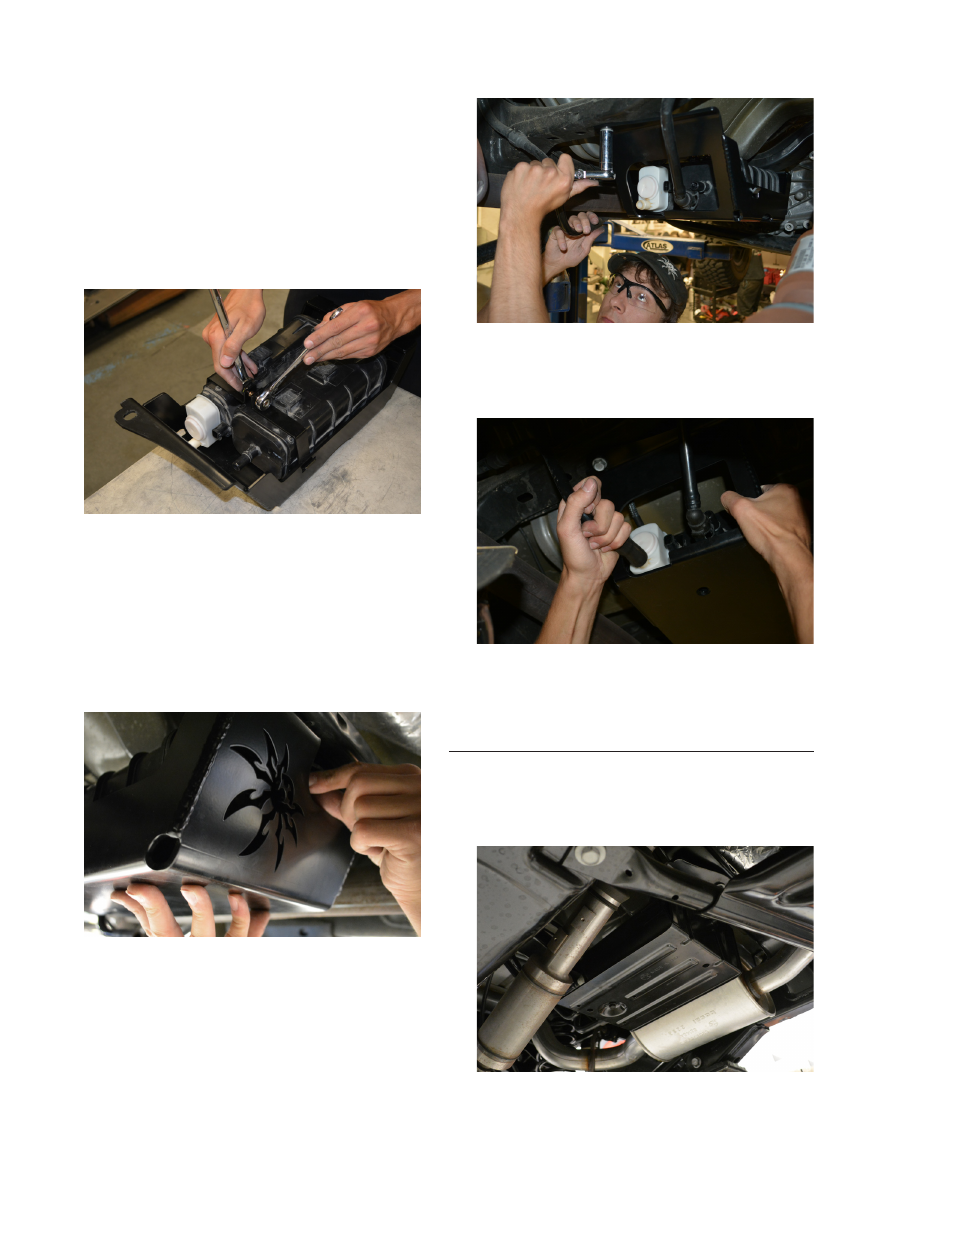
Install the 3/18-16 Nylon Insert Lock Nut on
to the bolt and tighten with a pair of 9/16”
end wrenches. DO NOT OVER TIGHTEN.
The straps are not designed to completely
touch, so do not try to tighten them until
they do. Only tighten the bolt/nut enough
to securely hold the evap canister in place.
Over tightening may risk cracking the plastic
case of the canister.
FIGURE 6
8. Install the Evap Skid back into the same
location the evap canister was removed from.
Re-use the OE bolts to secure the Evap Skid
(two at the front, one at the back). Note that
the two bolts at the front will pass through
the Front Hold Down Bracket, then through
the top flange of the Evap Skid, then into the
threaded holes in the Jeep’s body.
FIGURE 7
9. Tighten the three OE evap canister bolts
with an 18mm wrench.
FIGURE 8
10. Reconnect the hoses/lines that were
disconnected at the beginning of these
procedures.
FIGURE 9
Congratulations, you have completed the
installation of your Poison Spyder JK Evap Skid!
‘12+ INSTALLATION PROCEDURE
1. Park vehicle on a level surface, place the
transmission in gear or park, and set the
emergency brake. Wear safety glasses from
this point on.
FIGURE 10
2. Remove the lines from the back of the evap
canister. The upper-right one may be tricky.