Installation instruc tio ns – Poison Spyder JK EVAP SKID User Manual
Page 4
INSTALLATION INSTRUC
TIO
NS
Poison Spyder Customs • JK EVAP SKID INSTALLATION
Page 4
©2014 POISON SPYDER CUSTOMS, INC. • 951-849-5911 • WWW.POISONSPYDER.COM
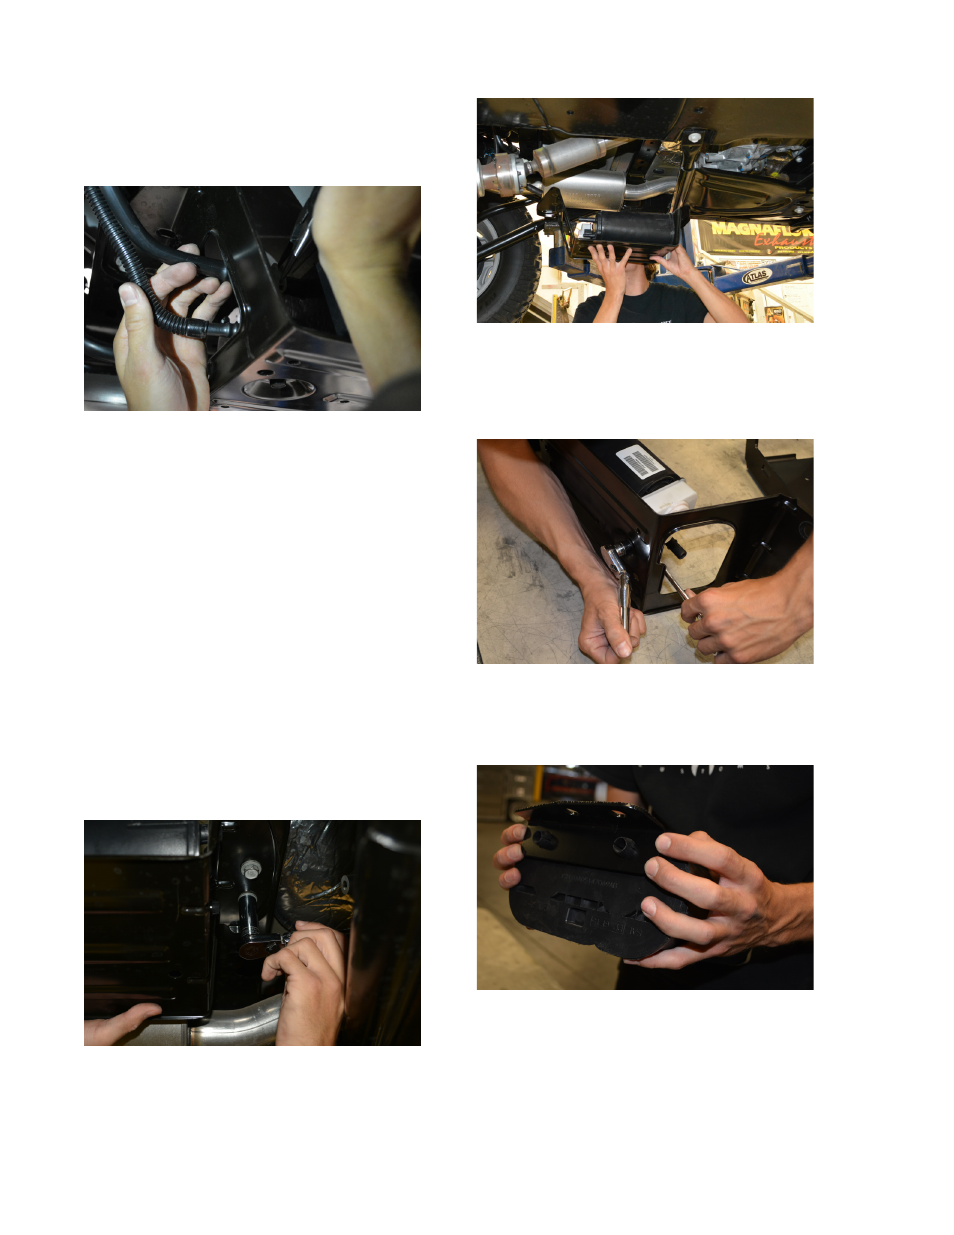
We have found that using needle-nose pliers
to carefully loosen the retaining clip works
well. The other lines may be removed by
simply pulling them by hand.
FIGURE 11
IMPORTANT: It has been reported that the
small plastic retaining clip that keeps the vapor
line attached to the canister on 2012+ JK’s can
easily break when removing. Because of this,
use extra care when removing these lines, or
better yet try to remove the sheetmetal guard
and install the Poison Spyder Evap Skid without
disconnecting these lines. If you do break that
clip, there is a suitable replacement available at
auto parts stores. Dorman P/N 800-015 Ford
Retaining Clip Assortment includes a 3/8” clip
that is reported to work (Thanks to “Cactus Red”
on JKOwners.com for this tip!). Alternatively a
small zip-tie may work.
3. Use an 18mm wrench or socket to remove
the three bolts that hold the OE evap skid
plate to the underside of the Jeep. There are
two bolts at the front, one at the back.
FIGURE 12
4. Remove the evap canister and skid from
the Jeep together and place the assembly on
a work bench.
FIGURE 13
5. Use a 13mm socket and ratchet, and 13mm
end wrench to remove the rear retaining bolt,
as shown, and remove the evap canister
from the OE bracket.
FIGURE 14
6. Place the 12+ Front Hold-Down Bracket
over the two round protrusions at the front-
top edge of the evap canister, as shown.
FIGURE 15
7. While holding the 12+ Front Hold-Down
Bracket in place against the front-top edge
of the evap canister, place the evap canister
into the skid and push it forward until the two
bolt holes in the Hold-Down Bracket align
with the holes in the Evap Skid, as shown.