Installation instruc tio ns – Poison Spyder JK ROCKER KNOCKERS User Manual
Page 5
INSTALLATION INSTRUC
TIO
NS
Poison Spyder Customs • JK ROCKER KNOCKERS INSTALLATION
Page 5
©2009 POISON SPYDER CUSTOMS, INC. • 951-849-5911 • WWW.POISONSPYDER.COM
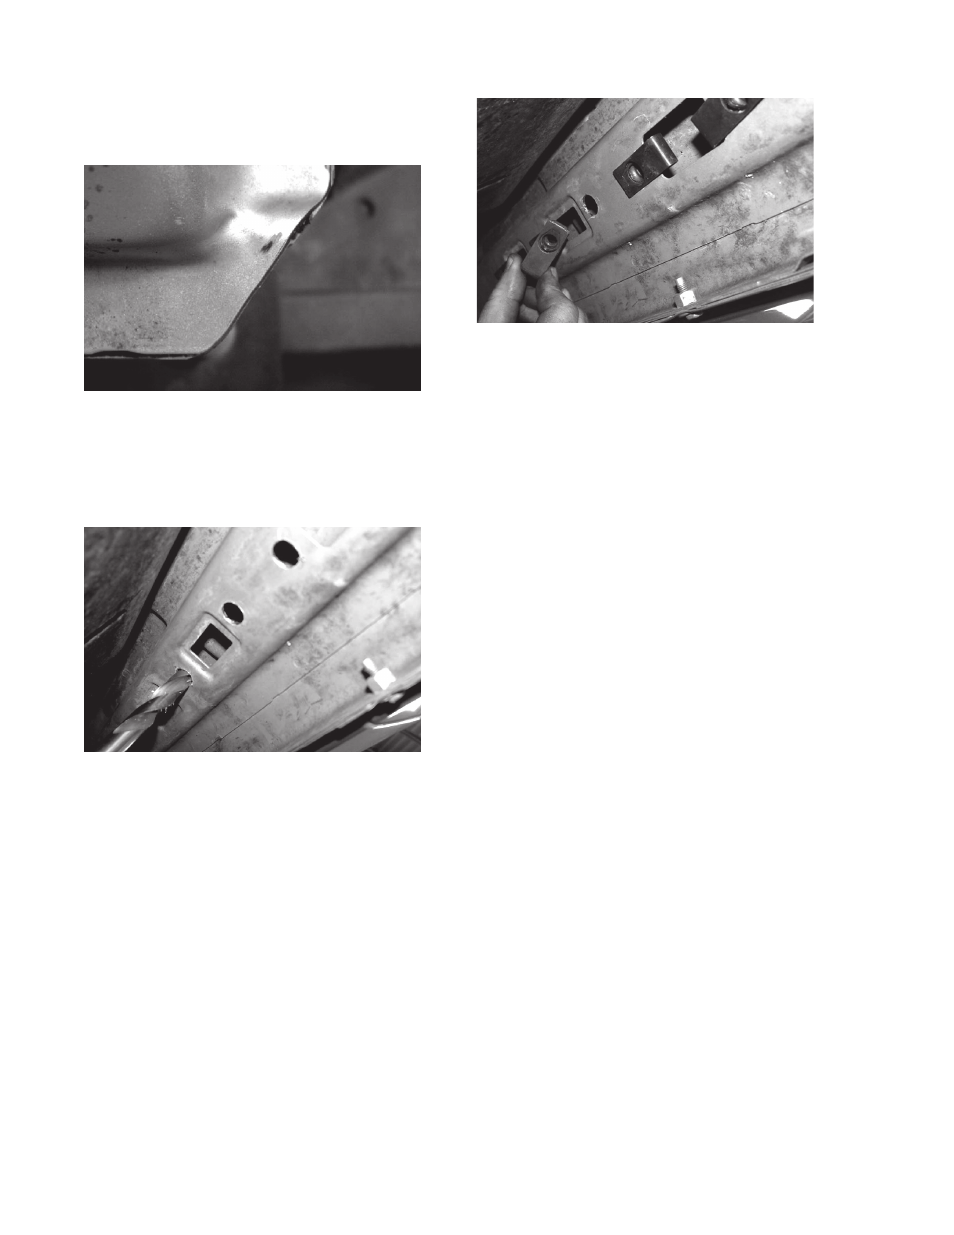
Use a file to remove burrs, then apply some
aerosol clear coat paint to the cut edge to
prevent rust.
FIGURE 14
10. Remove the Rocker Knocker and set it
aside. Center-punch and drill 1/4” holes
at each of the ovals you traced into the
underside of the Jeep in step 8. Then use
the 9/16” drill to open the same holes further.
FIGURE 15
11. Use some aerosol clear coat or paint color
of your choice to coat the cut edges of the
drilled holes to prevent rust. Do this for the
holes made in step 10 as well as those made
earlier in the pinch weld flange in step 3.
12. Locate the 3/8-16 U-nut clips that are
supplied in the hardware kit. Note that some
are flat along their edges while others are
bulged. The flat-edged ones are referred
to as “skinny” nut clips, while the bulge-
edged ones are referred to as “fat” nut clips.
For each side you will use three (3) skinny
clips and five (5) fat clips. These nut clips
will slip into the rectangular holes along the
underside of the Jeep as shown in Figure 16,
allowing the nut portion of the clip to locate
at the round holes you just drilled adjacent to
the rectangular holes.
FIGURE 16
Note that some of the rectangular holes are
narrower than others, specifically at the 4th,
5th and 6th bolt locations (counting back from
the front of the Jeep). These are where you
will use the “skinny” clips, while you will use
the “fat” clips in the wider rectangular holes.
13. If installing Rocker Knockers with the
optional Slider bar, re-install the dimpled
panel that was removed in an earlier step.
Used the 1/4-20X3/4 SS flat head cap screws,
1/4 flat washers and 1/4-20 nylon insert lock
nuts that were included with the hardware kit.
There will be 22 of each of these for 2-door
JK’s, 28 of each for 4-doors. Use the 1/4”
drive ratchet, extension and 7/16” socket,
along with the 5/32” hex key, to tighten these
fasteners. CAUTION: hold the screw head
stationary with the hex key as you tighten the
nut with the ratchet. If you let the bolt head
spin it may damage the paint or powder coat.
Tighten these fasteners to 15 ft./lbs.
14. Reinstall the Rocker Knocker onto the
Jeep, this time for final installation. Carefully
align the studs with the mounting holes in the
pinch weld flange, as before. Install a 5/16”
flat washer and 5/16-18 nylon insert lock nut
onto each of the Rocker Knocker’s mounting
studs, where they protrude through the pinch
weld flange. Only finger-tighten the nuts at
this time.
15. Insert a 3/8” SS button socket head cap
screw with 3/8” split lock washer and 3/8”
flat washer (in that order, under the head
of the screw) through each of the eight (8)
elongated holes in the Rocker Knocker
mounting flange along the underside of the
Jeep, and thread into the 3/8-16 U-nut clips
previously installed at each location. Be