Installation instruc tio ns – Poison Spyder CJ-7 FULL CAGE KIT User Manual
Page 5
INSTALLATION INSTRUC
TIO
NS
Poison Spyder Customs • CJ-7 FULL CAGE KIT INSTALL
Page 5
©2011 POISON SPYDER CUSTOMS, INC. • 951-849-5911 • WWW.POISONSPYDER.COM
15. This step is kind of tricky, you’ll definitely
need the help of at least one friend, but two
will make it much easier. Locate the C-Hoop
10
, C-Pillar L&R
14
, and Rearward Stringer
L&R
16
. All five of these components must
be fit together at the simultaneously and
tacked into place. Begin by placing the
U-shaped C-Hoop into place at the back of
the cage. The odd-shaped laser-cut notches
at either end will fit onto the downward curve
of each Main Side Hoop. There are no
positioning marks here, but the marks on the
rest of these parts will be enough to properly
position everything. Position each C-Pillar
into place, with the lower end on the Main
Side Hoop near the rearward Mount Plate,
and the upper end intersecting the bend of
the C-Hoop. Finally, position the Rearward
Stringers between the B-Hoop and the
insides of the bends in the C-hoop. With one
or more friends to help hold everything in
place, make sure all joints are firmly seated
in their notches and positioned in the laser-
etched marks. Then tack all of these pieces
into place. Again, do not tack to the Mount
Plates at this time.
FIGURE 10
16. Position the Seat Belt Bar
17
between the
two B-Pillar bars, with the bends toward the
rear of the Jeep. There are laser-etched
locating marks on the B-pillars, but you may
wish to select a custom height/location for the
Seat Belt Bar. If you wish, place one of the
seats back into the Jeep to properly position
this bar in relation to the seat back. Make
sure the Seat Belt Bar is properly positioned
and square, then tack it into place. At this
point all of the main components of the cage
have been tacked together.
FIGURE 10
17. Make final adjustments to the positioning of
the six (6) Mount Plates, as well as the ends
of the tubes of the cage where they meet
the Mount Plates. You will want to measure
and compare the position of the Mount
Plates on either side in order to achieve
symmetry. Also re-check the positioning
of the cage itself to make sure everything
is still straight, symmetrical, and correctly
centered/positioned all the way around the
Jeep. Finally, tack the ends of the Main Side
Hoops and the B-Pillars to the Mount Plates.
FIGURE 10
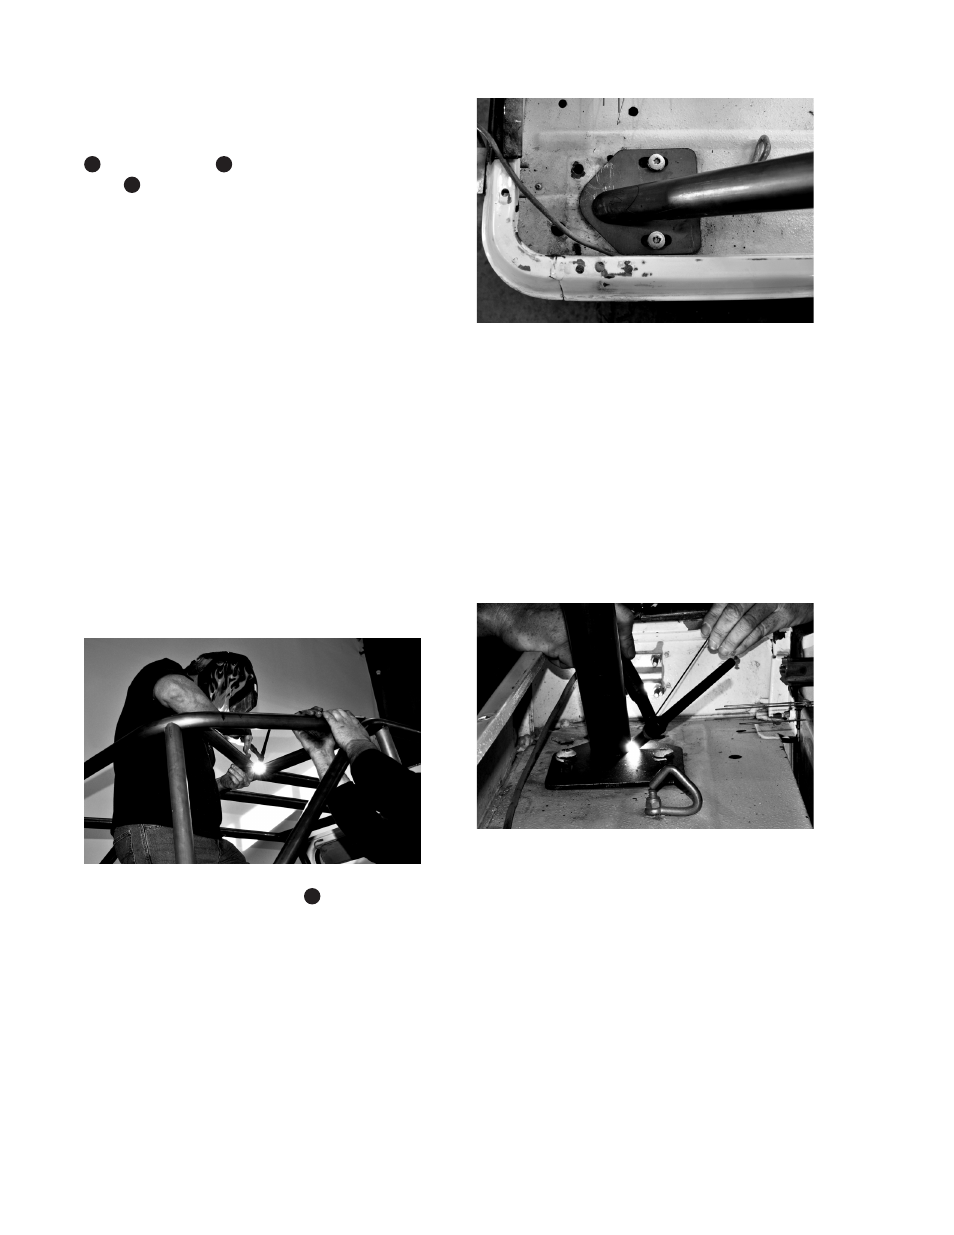
18. Drill the four (4) mounting holes through
the floor beneath each A-Pillar Mount Plate,
using the holes in the plates as your drill
guide. Bolt these mount plates down, and
snug up the bolts on the other four Mount
Plates as well.
19. Before welding the cage further, test-fit
any components that will come close to the
cage, such as doors, tops, etc., for proper
clearances. If you need to break any tack
welds and re-position anything in order to
fit around your specific equipment, do that
at this time. If any further adjustments are
made, re-measure all around the entire cage