Installation instruc tio ns – Poison Spyder CJ-7 FULL CAGE KIT User Manual
Page 3
INSTALLATION INSTRUC
TIO
NS
Poison Spyder Customs • CJ-7 FULL CAGE KIT INSTALL
Page 3
©2011 POISON SPYDER CUSTOMS, INC. • 951-849-5911 • WWW.POISONSPYDER.COM
4. Clean ALL bare metal pieces provided in the
kit, using a clean rag and brake cleaner. This
will ensure an easier, cleaner installation and
better welds later in the installation.
5. Position the A-Pillar Mount Plates
1
,
B-Pillar Mount Plates
2
, and C-Pillar Mount
Plates
3
into their approximate locations.
Use the OE hardware to bolt the B- and
C-Pillar Mount Plates into place, but leave
the bolts loose so that slight adjustment may
be made to the plates’ position. You will have
to drill holes for the A-Pillar Mount Plates, but
wait until later steps to do this.
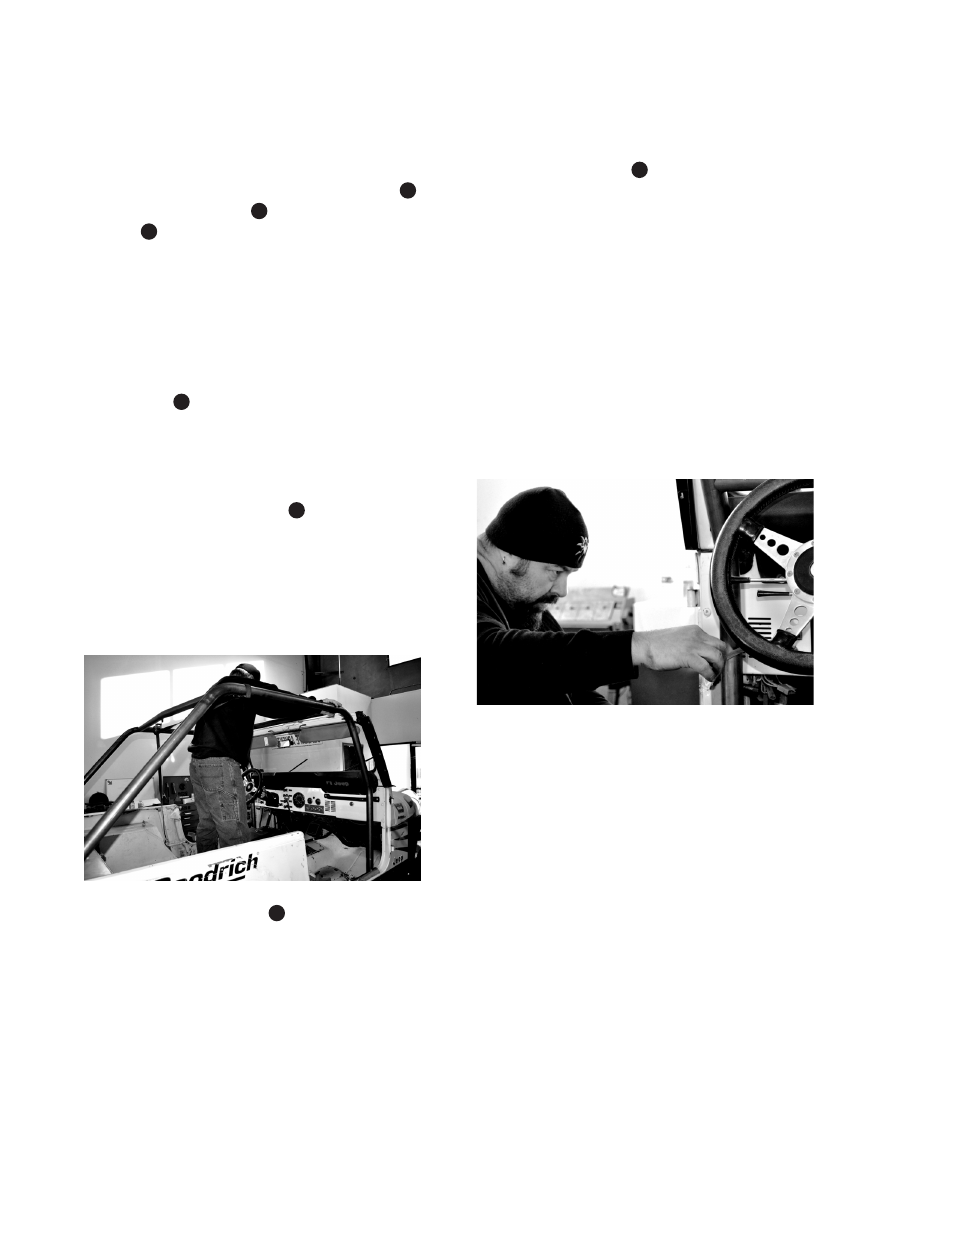
6. With the help of a friend, place the Main Side
Hoop L&R
8
into the Jeep on either side.
The bend of the hoop that closely follows
the line of the Jeep’s dash and windshield
will rough positioning easy. Have your friend
continue to hold each hoop roughly in place.
7. Place the A-Crossbar
4
between the
two Main Side Hoops near the top of the
windshield frame. Use a ratchet strap to
snug the two Main Side Hoops toward each
other, with the A-Crossbar holding them
apart. Have your friend continue to hold up
this 3-piece assembly.
FIGURE 10
8. Place the B-Crossbar
12
between the two
Main Side Hoops near the rearward bends in
the Side Hoops. Apply another ratchet strap
to tighten this end of the assembly. Have
your friend continue to hold up the assembly.
9. Inspect the surface of each Main Side
Hoop, on the interior side of the tube, looking
for the circular tube placement marks which
have been laser-etched into the tubing. Use
a soft dead-blow hammer to tap each end
of the two Crossbars into alignment with
these etched marks. It may be necessary to
slightly loosen the ratchet straps to allow the
tube ends to slide into place.
10. Place the Dash Bar
18
between the two Main
Side Hoops just above the dash of the Jeep,
and secure it into place with another ratchet
strap, and use the dead-blow hammer to
tap it into alignment with the laser-etched
placement marks. Note that if your Jeep is
not equipped with the factory dash pad, you
may be able to lower the Dash Bar to obstruct
less of the windshield. If you do this, make
sure to take proper measurements to ensure
placement and squareness of the Dash Bar.
At this point the cage assembly, though held
together entirely with ratchet straps, should
stand on its own, so you may relieve your
friend of his holding duties.
FIGURE 10
11. Fine-tune the position of the cage within
the Jeep. Start by making sure it is close
to the dash with a quarter inch or so of
clearance. Then measure between the edge
of the Jeep’s tub and the Main Side Hoop,
ensuring that this distance is equal on either
side of the Jeep. Repeat this at the rear
section of the Main Side Hoops and at either
end of the A-Crossbar and B-Crossbar.