Brother HL-2400Ce User Manual
Page 174
CHAPTER 5 MAINTENANCE
5-27
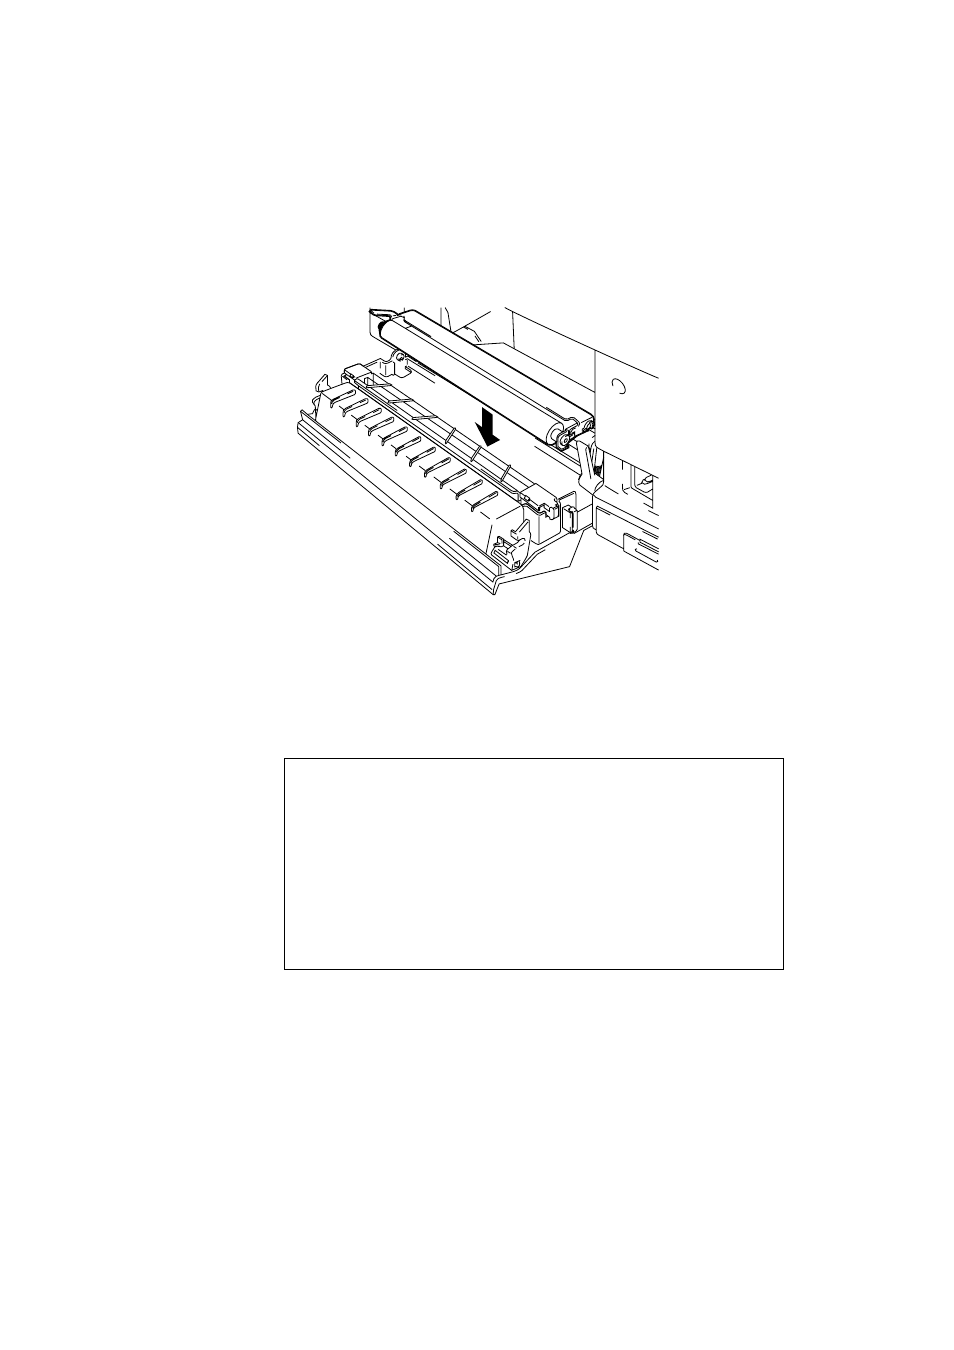
3. Install the new Transfer Roller by inserting the left side opening of
the Transfer Roller into the pin on the left rear side of the unit.
Adjust the position of the Lock lever to allow the right side of the
Transfer Roller to slip into the holder.
Fig. 5-33 Installing the Transfer Roller
4. Lock the Transfer Roller with the Transfer Roller Lock Lever.
5. Close the Rear Access Cover.
6. Plug the power cord into the power outlet and press the
Power
button to turn on the printer.
✒ Note
•
•
•
•
User replacement of some of these parts by is not recommended.
•
•
•
•
For replacement of the Paper Feeding Roller, Separator Pad and
the Transfer Drum, consult your local dealer/retailer.
•
•
•
•
Actions 7 to 10 should only be carried out by your dealer or
Brother authorized service center when they have replaced the
Paper Feeding Roller, Separator Pad and the Transfer Drum.
•
•
•
•
Replacement of only the Paper Discharger and the Transfer
Roller is not a full 120K service and the counter should not be
reset until these additional parts are replaced.
7. Press the
Sel
button and take the printer Off Line.
8. Press the
Reset
button while holding down the
Shift
button.
9. When you see “RESET PRINTER” on the LCD panel, press the ▲
(UP) or ▼ (DOWN) button and select “RESET PARTS LIFE” . Press
the
Set
button and select “120K KIT” with the ▲ (UP) or ▼ (DOWN)
button.
10. Press the
Set
button, the printer is now On Line.