Hydraulic side-brush relief (attachment), Stop side-brush lift up (only 2-brush system), Move in/out the side-brush – Karcher ICC 2 D ECO 2SB STAGE IIIa User Manual
Page 30: Sweeping in larger objects, Sweeping dry floors, Sweeping damp or wet floors, Sweeping plane surfaces
-
8
Press the toggle switch upward. Side
brushes lift up.
2-brush system:
Press the toggle switch downward. The
side-brushes will be lowered.
(see console ).
Press the toggle switch upward. Side
brushes lift up.
–
The hydraulic side-brush relief reduces
the contact pressure of the brush on the
track.
–
The floor is protected against friction
and wear if the brushes are relieved
and this also increases the life of the
brushes.
–
The relief can be adjusted in infinitely
variable steps depending on the track
surface and the dirt that appears.
Raise/lower side-brushes:
Press the toggle switch downward. The
side-brushes are lowered; the relief is
deactivated.
(see console ).
Toggle switch in central position. The
side-brushes are lowered; the relief is
activated.
Press the toggle switch upward. Side
brushes lift up.
Setting the hydraulic side-brush relief:
Setting the relief of the brushes at the
speed regulator.
The side-brushes can individually be
stopped in a raised position.
Close the ball tap when the side-brush-
es are lifted up.
Move joystick to position (2). Side-
brushes are driven out.
Move joystick to position (4). Side-
brushes are drawn in.
Note
Only 2-brush system: The side-brushes
can only be driven out when they are rotat-
ing.
Note
To sweep in larger objects such as bever-
age cans or larger quantities of leaves, it is
necessary to briefly raise the bulk waste
flap.
Raising bulk waste flap:
Press the pedal for the bulk waste flap
forwards and keep pressed down.
To lower it, take foot off pedal.
Note
An optimum cleaning result can only be
achieved if the bulk waste flap has been
lowered completely.
To avoid deposits in the suction channel
and durst formation, the water supply to the
brush nozzles must be on.
Switch on the spray water.
(see console ).
Switch off the water supply to the brush
nozzles if there is practically no dust forma-
tion.
Switch-off spray water.
(see console ).
Note
To achieve an optimum cleaning result, the
driving speed or rahter the sweeping width
should be adjusted to take specific situa-
tions into account.
The front side-brushes can be driven in or
out depending on how dirty the plane sur-
face is.
Drive out the side-brushes (2).
Drive in the side-brushes (4).
Note
The sweeping width should be adjusted ac-
cording to how dirty the plane surface is so
that the waste can be sucked in completely.
The inclination of the front side-brushes
can be adjusted according to the geometry
of the driving path.
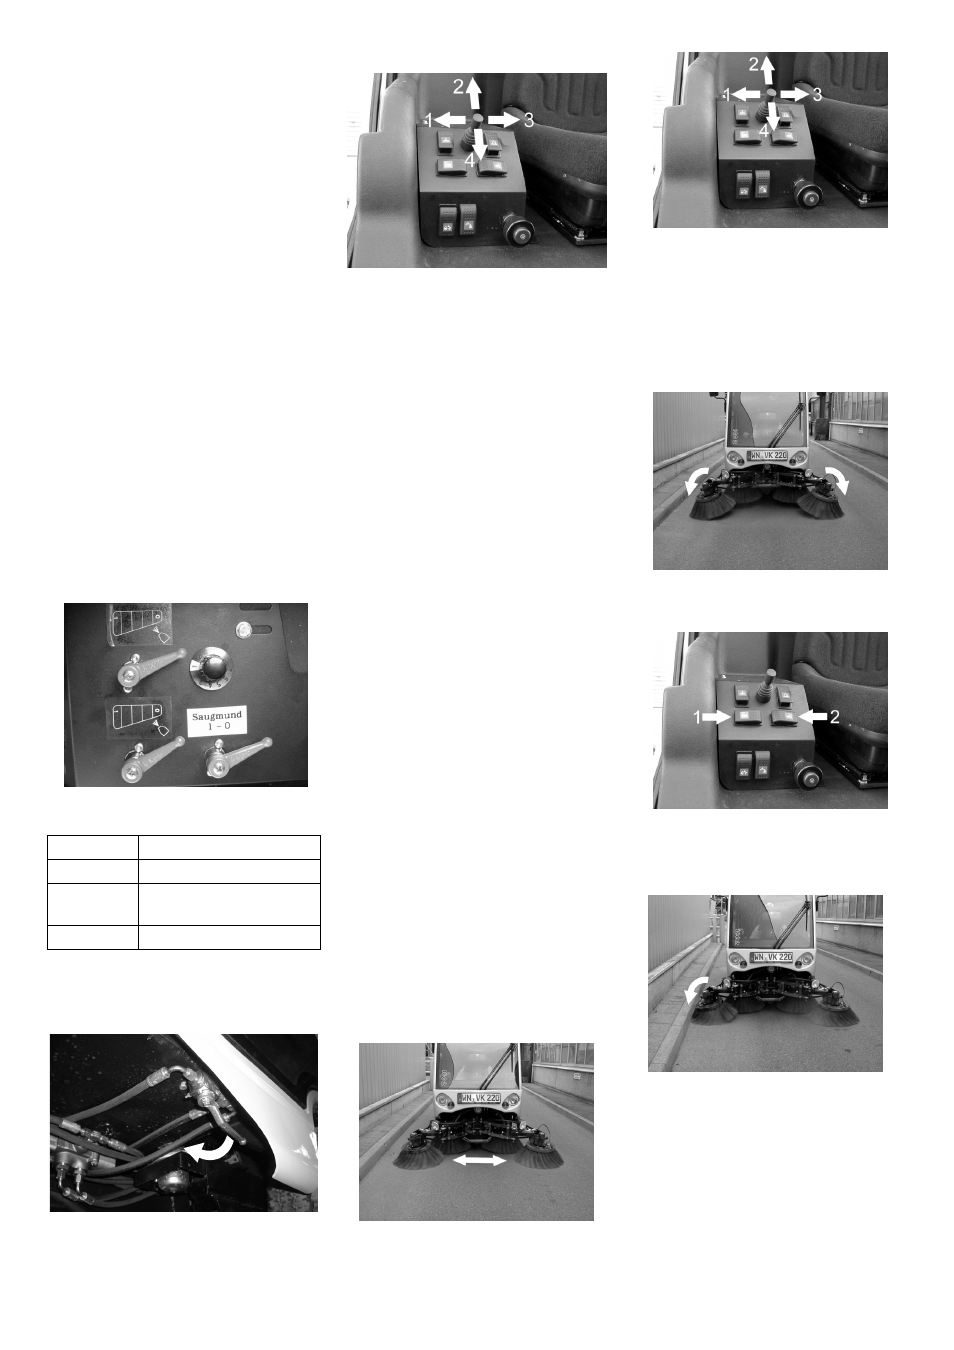
Tilt the right side-brushes (1).
Tilt the left side-brushes (2).
Tilt the right side-brushes if required.
Hydraulic side-brush relief (attachment)
Position
Relief on the brushes
1
minimum
5-8
medium (recommended
setting)
11
maximum
Stop side-brush lift up (only 2-brush
system)
Move in/out the side-brush
Sweeping in larger objects
Sweeping dry floors
Sweeping damp or wet floors
Sweeping plane surfaces
Inclination of the front side-brushes (on-
ly 4-brush system)
Sweeping along the limitations of the
driving path (only 4-brush system)
30
EN