Step 1 connect, 1 what you need before getting started, V1000 or v2000 – HID VertX V100, V200, V300, V1000, and V2000 Installation Guide User Manual
Page 6: 3 mounting instructions, V100, v200, or v300, Step 1, Connect, What you need before getting started, Mounting instructions
VertX Installation Guide
Step 1 Connect
1.1 What you need before getting started
Prior to starting the installation, completely read this guide.
Reference the
, page 21, and gather the information before proceeding with these
instructions.
CAUTION: VertX controllers and panels are sensitive to Electrostatic Discharges (ESD). Observe
precautions while handling the circuit board assembly by using proper grounding straps and
handling precautions at all times.
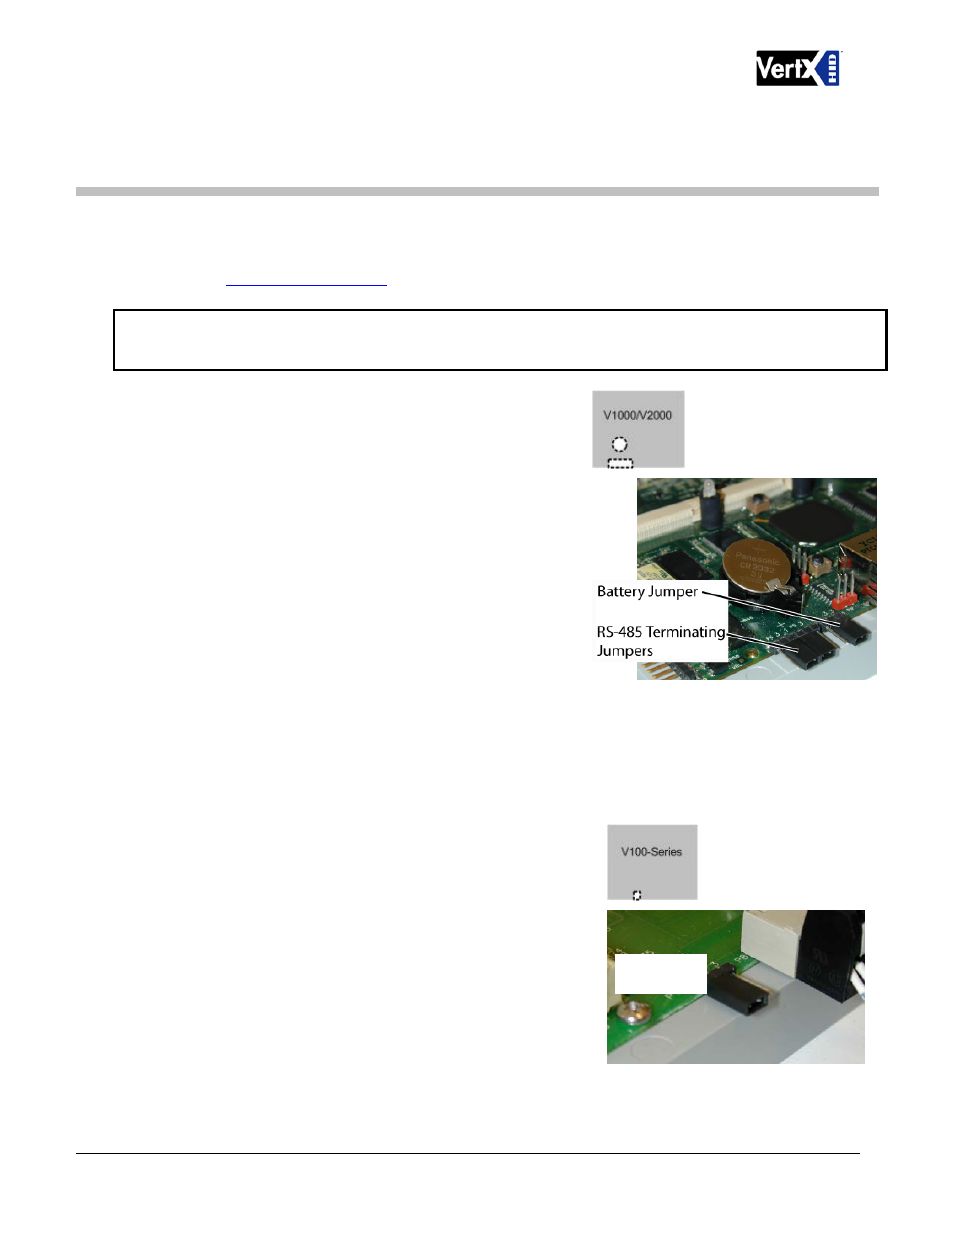
1.2 V1000 or V2000
1. Verify the battery jumper is installed in the ON position
(or OUT position on old covers), P15 connector
(V1000).
2. If installing a V1000 - Verify the termination jumper is in
the Out position when there are no panels attached to
the port. If there are downstream interface panels
attached then the termination jumper should be in the In
position. The V1000 is shipped with jumpers in the Out
positions
1.3 Mounting Instructions
1. The controllers and interface panels should always be
mounted in a secure area.
2. Mount using the four mounting screws (provided) or
other appropriate fasteners. Place the fasteners in the
corner holes of the base.
3. The VertX devices can be stacked with or without the cover. Do not remove the plastic base. Make
sure you position the VertX devices in such a way as to provide room for wiring, air-flow and cable
runs.
1.4 V100, V200, or V300
1. If the V100-Series panel will be attached to the end of the
RS-485 bus, install a terminating jumper to the In position
on the termination resistor pins, P8 on the cover (P10 on
the PCB) of the V100, V200 and V300.
2. If the V100-Series panel is being installed as part of an
array, or in a third party enclosure, follow the directions
provided by the Integrator or Dealer.
Terminating
Jumper
December 2010
Page 6 of 24
© 2003 - 2010 HID Global Corporation. All rights reserved.