3 host communication setup, 4 confirmation, Step 4 communicate – HID VertX V100, V200, V300, V1000, and V2000 Installation Guide User Manual
Page 16: Host communication setup, Confirmation, Step 4, Communicate
VertX Installation Guide
3.1.3 Host Communication Setup
Enter the Host Name, and the Here I Am Interval collected on the
3.1.3.1
Controller Login Password
During your first instance of accessing the Configuration GUI, you must change the password (located at the
bottom of the screen). Enter a new password, and reenter the password in the second field.
Note
: This step is not necessary during any consecutive Configuration GUI sessions. However on consecutive
sessions the password may be changed.
Once configuration changes have been made, click Submit, and the Confirmation page (see 3.1.4
Confirmation, page 16) will display.
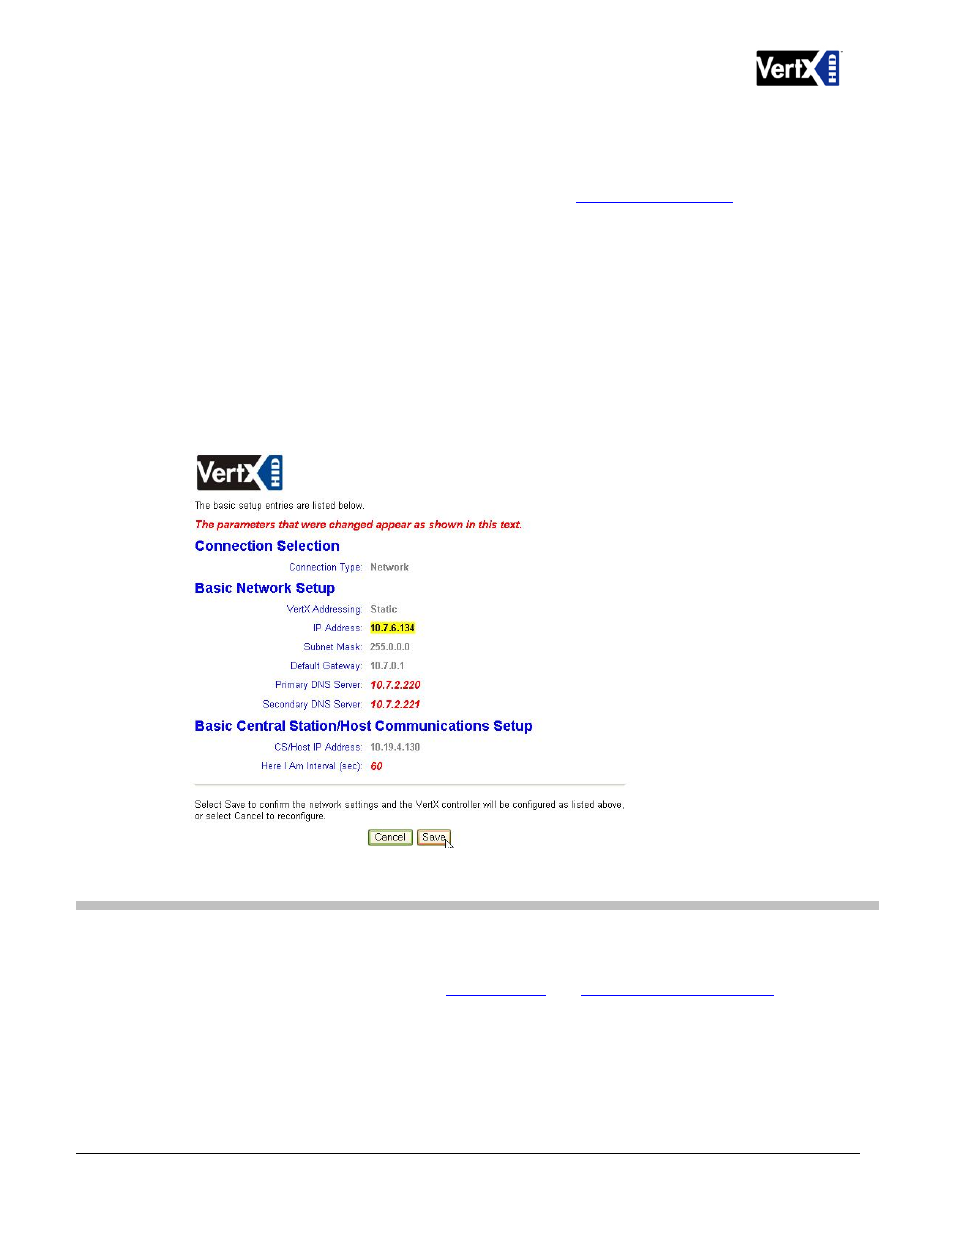
3.1.4 Confirmation
Once configuration changes are complete and submitted, the Confirmation screen will display. Verify that the
changes submitted are accurate, and click Save. If the changes submitted are not accurate, click Cancel and
adjust the settings appropriately.
Step 4 Communicate
Now that the controller is connected, contacted and configured, contact the host to test the system.
Basic setup is now complete!
Additional trouble-shooting tools are available on the
and
screens.
December 2010
Page 16 of 24
© 2003 - 2010 HID Global Corporation. All rights reserved.