Secure the interface between the replacement ap, Slide the replacement appliqué into the port ca, Snap the corresponding plastic appliqué cover p – Allied Telesis AT-TS24TR User Manual
Page 39
Hardware Installation
22
3.
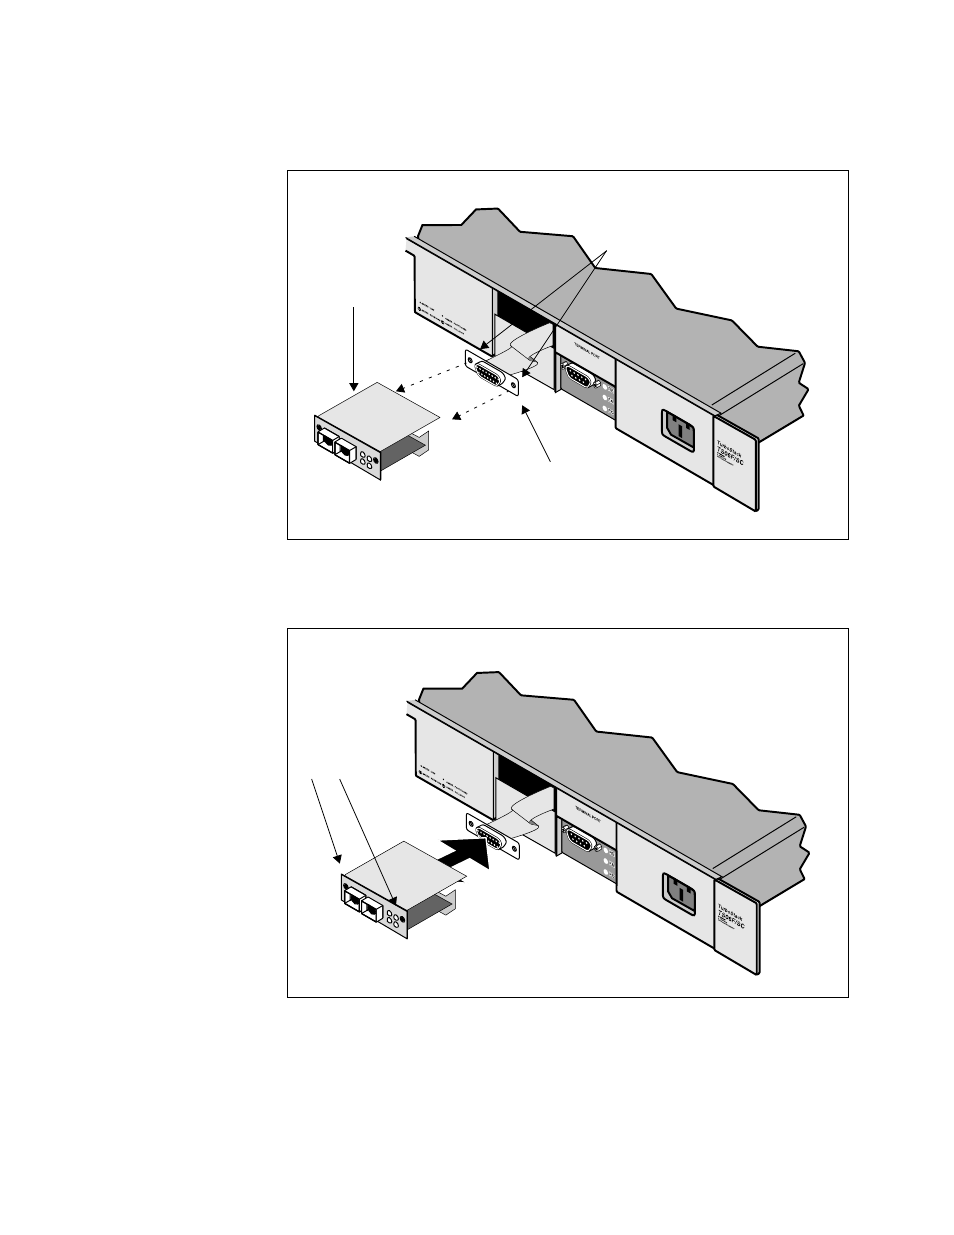
Secure the interface between the replacement appliqué and the AUI
connector by using 4-40 pan-head screws as shown in Figure 18. Note
that these screws connect the AUI connector to the back section of the
replacement appliqué, which is not shown in Figure 18.
4.
Slide the replacement appliqué into the port cavity and screw it down
with the two M3x6 flat-head screws shown in Figure 19. Do not
overtighten.
5.
Snap the corresponding plastic appliqué cover plate in place on the hub
faceplate. (See Figure 11 on page 17.)
Figure 18: AUI Connector
Interface
Figure 19: Module Faceplate
Interface
Replacement
appliqué
AUI connector
4-40 pan-head
screw holes
M3x6
flat-head
screws
This manual is related to the following products: