Detach the aui appliqué assembly from the hub f, Do not unscrew the aui slide kit screws that secur, Carefully pull the aui appliqué assembly from t – Allied Telesis AT-TS24TR User Manual
Page 37: Remove the slide-kit screws shown in figure14
Hardware Installation
20
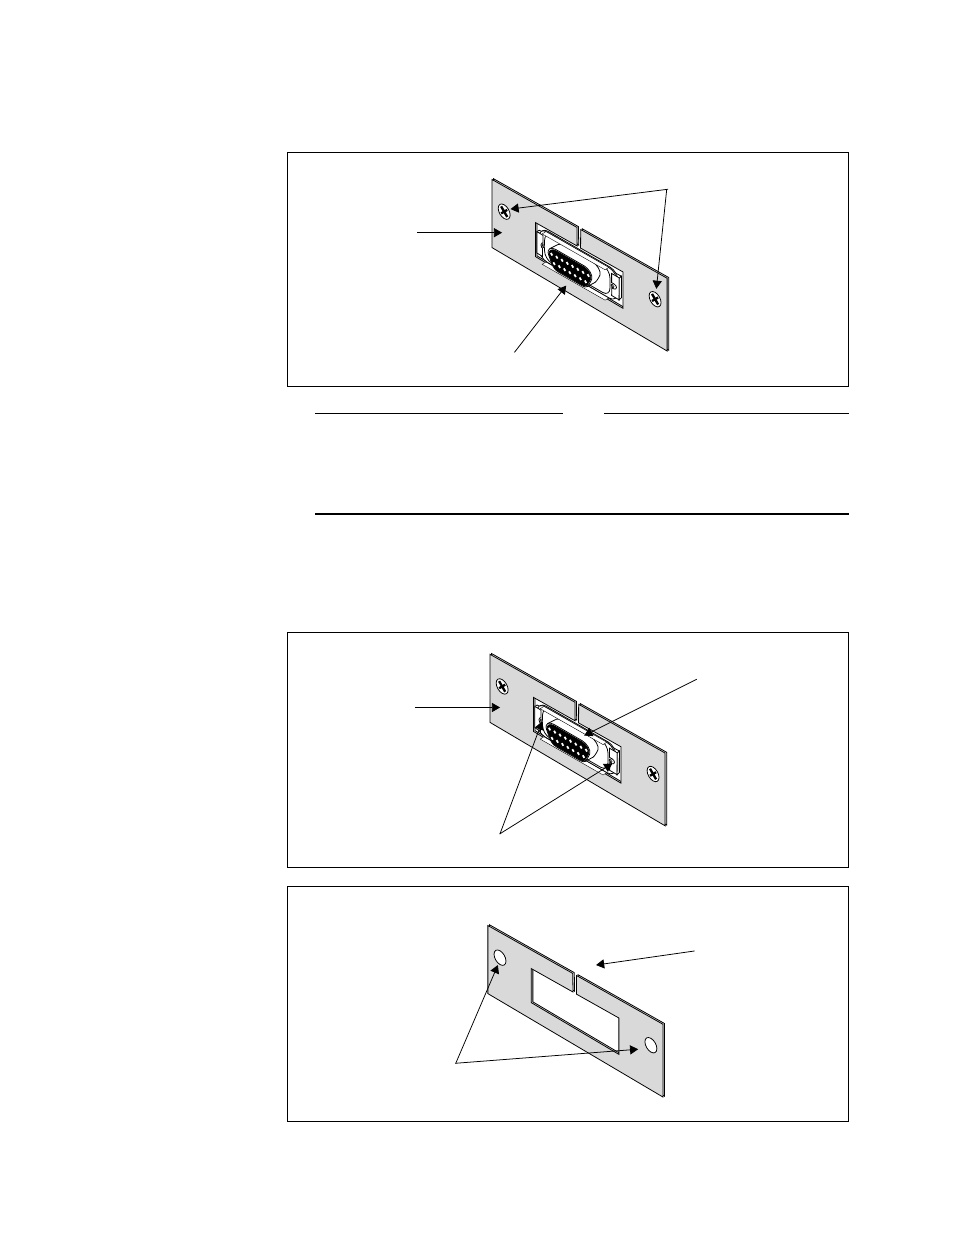
2.
Detach the AUI appliqué assembly from the hub faceplate by loosening
the two M3x6 flat-head screws to the far right and left on the connector
plate, shown in Figure 13.
Note
Do not unscrew the AUI slide kit screws that secure the AUI connector to
the appliqué plate until the entire appliqué assembly (i.e., AUI connector,
connector plate, and attached ribbon cable) pops out. The washers and nuts
on the back of the slide kit may fall inside the hub module and will be
difficult to retrieve.
3.
Carefully pull the AUI appliqué assembly from the hub faceplate to
expose the ribbon cable (shown in Figure 14 below).
4.
Figure 13: AUI Appliqué
Assembly
Figure 14: AUI Appliqué
Figure 15: AUI Appliqué
Connector Plate
M3x6 flat-head screws
Connector
plate
AUI connector
Slide-kit screws
Appliqué
AUI connector
connector
plate
Slot enabling
pass-through
of ribbon cable
Connector
plate screw holes