Removing a blower, Installing a blower, 35 power supply/blower status indicator – HP 3000 Enterprise Virtual Array User Manual
Page 92: 36 removing a blower
1.
In the Navigation pane, select Storage system > Hardware > Rack > Disk enclosure
2.
In the Content pane, select the Power tab or the Cooling tab then the appropriate component (1
or 2). The Operational state should be
Failed.
3.
To help identify the correct enclosure, click Locate > Locate On to flash the status indicators
on the front of the disk enclosure.
•
Check the power supply/blower status indicator. See
. It should be off.
1
2
3
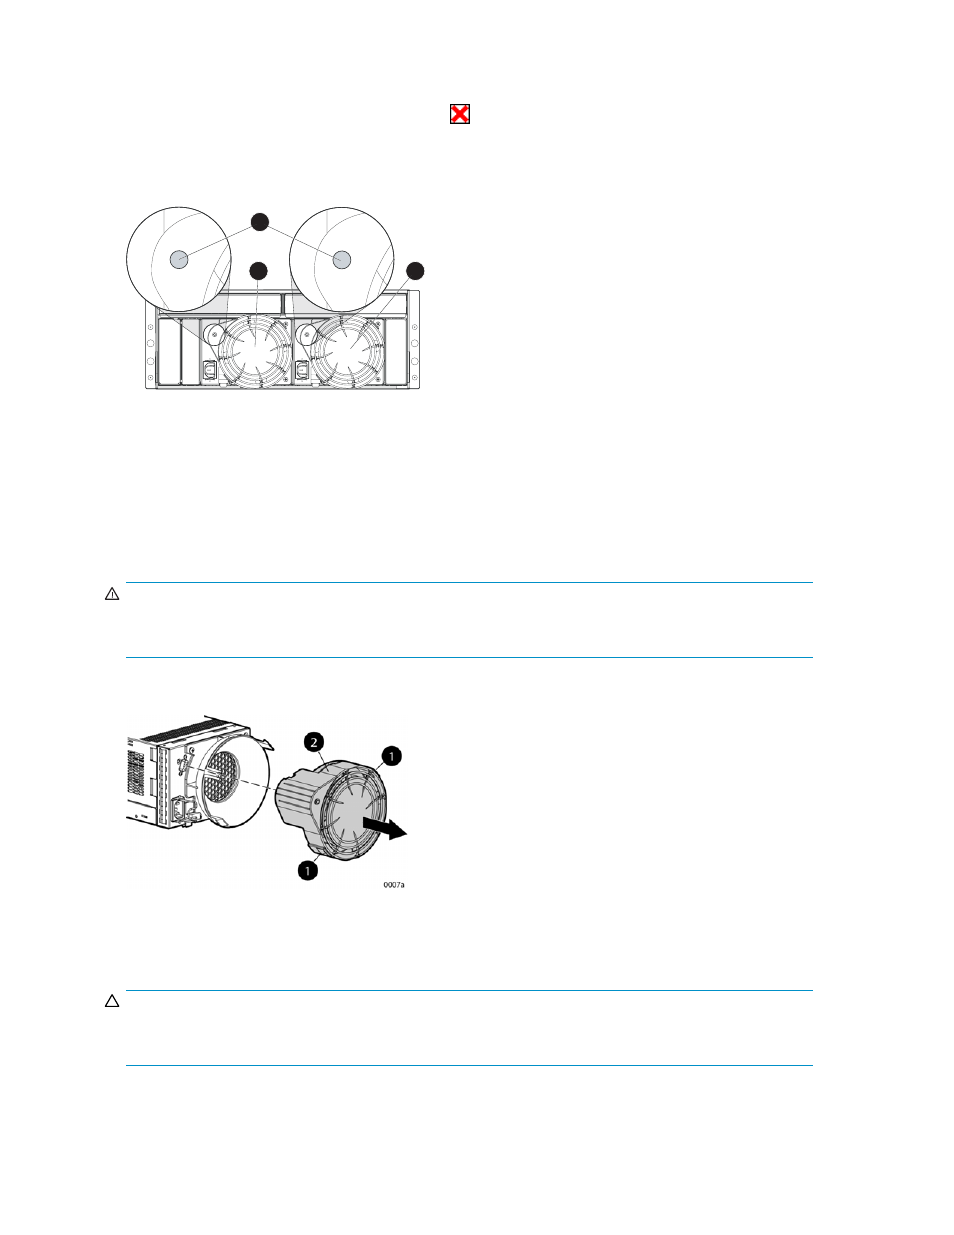
Figure 35 Power supply/blower status indicator
1. Status indicator
2. Power supply/blower 1
3. Power supply/blower 2
Removing a blower
It is not necessary to remove the power supply to replace a failed blower.
WARNING!
The blower motor does not stop immediately when the blower is removed. Keep your fingers away from
the blower blades until the motor stops.
•
While pushing in on the two wine-colored mounting tabs (1,
), pull the blower (2)
away from the power supply.
Figure 36 Removing a blower
Installing a blower
CAUTION:
Pressing on the center section of the blower can damage the blades or the housing. Only press on
the outer edge of the blower when installing it.
92
Customer replaceable units