Sending raw data file to hp, Manually emailing raw data files to hp, Cimom server setting window – HP SAN User Manual
Page 38
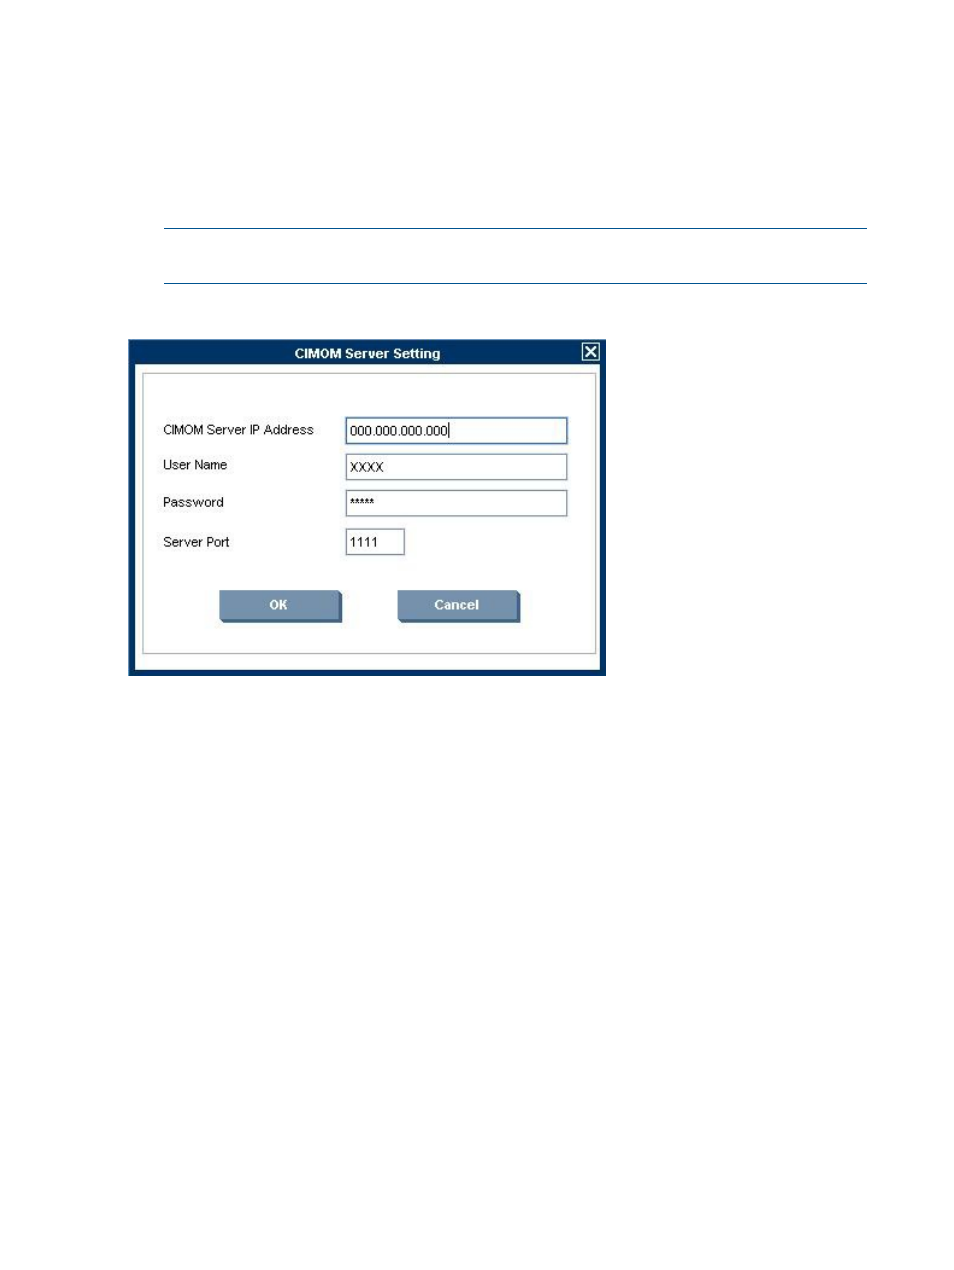
2.
Enter the CIMOM server IP address in the CIMOM Server IP Address box.
3.
Enter the user name in the User Name box.
4.
Enter the password in the Password box.
5.
Enter the server port number in the Server Port box (default: 5988 for http and 5989 for https).
6.
Click Ok.
The authorized user setting is saved, and the credentials entered is used to communicate with
the Brocade SMI-Agent during the next data collection.
NOTE:
For configuring Brocade SMI-Agent user authentication, see the Brocade SMI-Agent
user guide.
Figure 25 CIMOM server setting window
Sending raw data file to HP
SAN Visibility provides an option to either automatically or manually send the raw data files to
HP for processing.
If you want to view the contents of the raw data before sending it to HP for processing, see
Manually emailing raw data files to HP
To manually send the raw data file to HP for processing, complete the following steps:
1.
Click Data Collection option from the navigation area of the SAN Visibility GUI to view the
Data Collection details.
2.
Click Start Data Collection to initiate data collection for a specific component group, or for all
the component groups depending on the requirement.
Wait for the message to be displayed in the message area on successful completion of the
data collection. The Raw Data window is displayed as shown in
3.
Review the content of the raw data and click Close to send the raw data to HP for processing.
4.
Click Default Mail Client. Your default email client opens.
5.
Attach the
is the name of your SAN.
38
Using SAN Visibility