Replacement procedure, Caution – IAI America IX-UNN3515H User Manual
Page 59
53
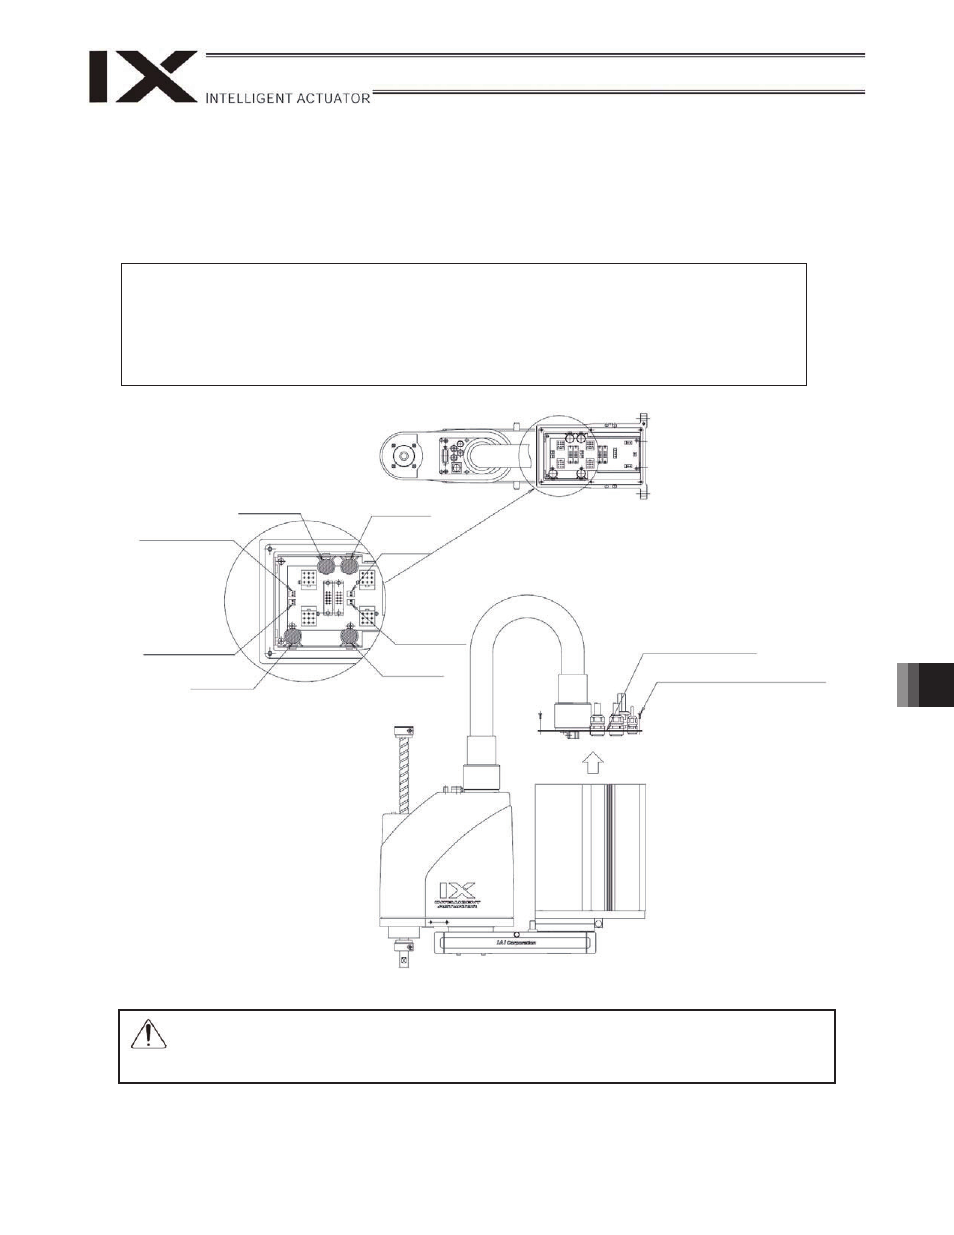
13. Inspection/Maintenance
Replacement Procedure
(1) Remove the six low-head cap screws (1) and remove the rear panel (base).
(2) Remove the batteries from the battery holder.
(3) Remove the connectors between the extension cable from the BAT connector and the battery and connect
new batteries.
x After removing the old batteries, quickly connect new batteries (roughly within 5 minutes x
number of batteries).
x If new batteries are not connected for a longer period, the rotation data will be lost and an
absolute reset will become necessary.
x Replace batteries one axis at a time. If the batteries for all axes are replaced at once, the work
may not be completed within the specified time.
(4) Install the batteries into the battery holder.
(5) Affix the rear panel (base) using the six low-head cap screws (1).
z When installing the rear panel (base), be careful not to pinch the cables inside.
Battery connector 1
(for axis 1)
Battery connector 2
(for axis 2)
Battery
(for axis 1)
Battery
(for axis 2)
Battery connector 4
(for axis 4)
Battery
(for axis 4)
Battery
connector 3
(for axis 3)
Battery
(for axis 3)
Caution
Rear panel (base)
[1] Low-head bolt CAP4 x 8 (6 pieces)