Connecting a microphone, Connecting a cd drive, Attaching a cd drive – Roland RM-700 User Manual
Page 24: Used for connecting microphones (p. 25), Connect a usb cd drive here (p. 25), Connecting a microphone connecting a cd drive
25
Before You Start Playing
You can connect a microphone to the Mic jack, and enjoy sing-
alongs or tell a story while you play.
1.
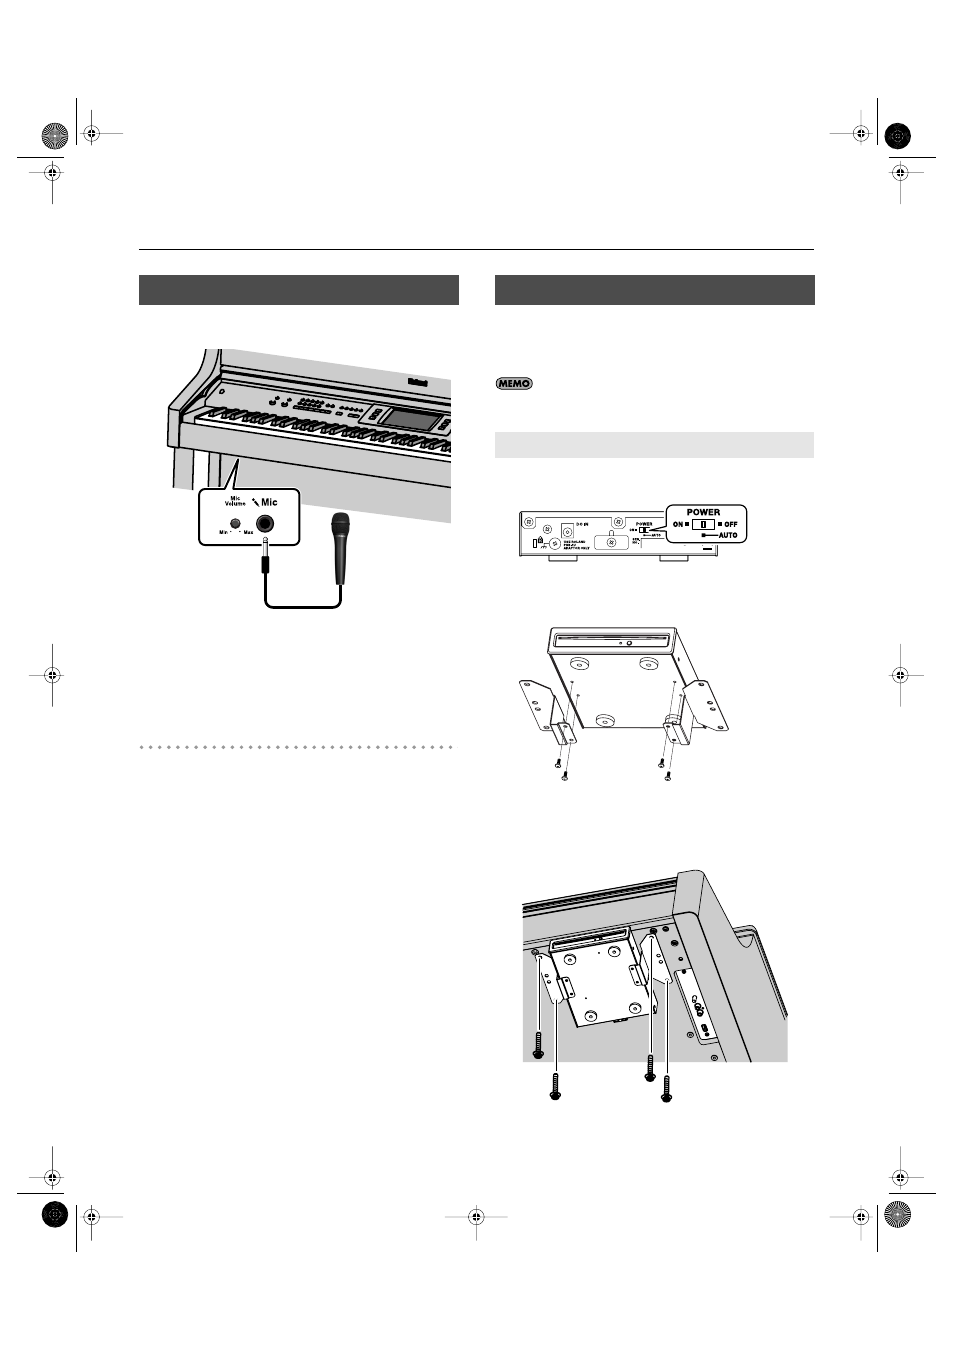
Connect a microphone (sold separately) to the Mic jack
on the lower-left area of the instrument.
2.
Rotate the [Mic Volume] knob on left side of the Mic jack
to adjust the volume level for the microphone.
Some Notes on Using a Microphone
• Be careful of high volume levels when using microphone late at
night or early in the morning.
• When connecting a microphone to the RM-700, be sure to lower the
volume. If the volume control is too high when the microphone is
plugged in, noise may be produced by the speakers.
• Howling could be produced depending on the location of
microphones relative to speakers. This can be remedied by:
• Changing the orientation of the microphone.
• Relocating microphone(s) at a greater distance from speakers.
• Lowering volume levels.
You can connect a separately available CD drive (CD-01A) and play
back music CDs or CD-ROMs containing SMF music data. You can
also write songs for which the audio has been recorded to a CD to
create a music CD.
You can also play songs on VIMA TUNES (VIMA CD-ROMs) sold
by Roland.
1.
Turn the CD drive’s power “AUTO.”
2.
Use the screws (3 x 8 mm) to attach the holders to the CD
drive.
3.
As shown in the illustration, fasten the CD drive using the
screws (4 x 16 mm) and the screw holes located on the
bottom of the RM-700.
Connecting a Microphone
Connecting a CD Drive
Attaching a CD Drive
Screws (3 x 8 mm)
Screws (4 x 16 mm)
RM-700_e.book 25 ページ 2009年3月18日 水曜日 午前11時5分