Scsi cable kit installation – Gateway ALR 8300 User Manual
Page 57
Installing Components 45
SCSI cable kit installation
The following section describes how to install the SCSI cable kit from the
integrated onboard SCSI connector on the system board to the rear panel of
the chassis.
The following tools are required to complete the installation:
•
Phillips screwdriver
•
Straight blade screwdriver
•
Anti-static wristband
To install the SCSI cable kit:
1.
Power down the system and remove the power cord(s).
2.
Remove the parts from the SCSI Cable Kit.
3.
Remove the two screws from the rear of the left side cover.
4.
Slide the side cover back slightly, then lift it out and off.
5.
Using the straight bladed screwdriver, remove the punchout section
(insert the blade of the screwdriver into the slot in the punchout, then
pry back and fourth until loose).
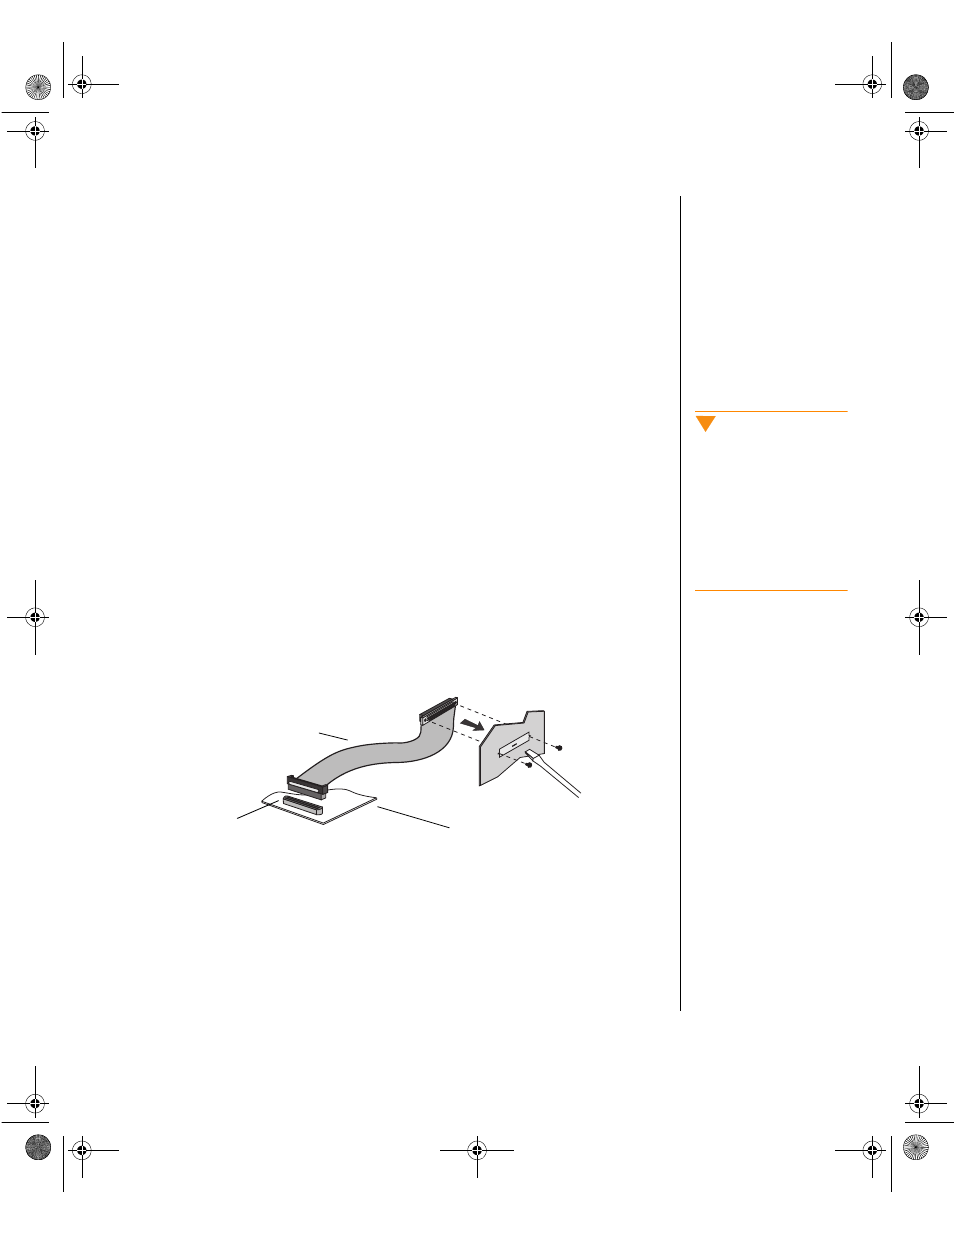
Figure 24: Installing the SCSI Cable Kit
6.
One end of the SCSI cable is attached to a bracket containing two
threaded holes. From the inside of the system, hold this end of the
cable up to the opening created when the punchout was removed.
Caution!
To help avoid possible
damage to your computer
from static electricity, follow
the anti-static procedures
outlined in the Maintenance
and Troubleshooting Guide
for your system every time
you work inside your
computer.
Integrated SCSI
connector
System board
SCSI cable
4081TL.book Page 45 Tuesday, December 22, 1998 1:27 PM