Test run & break-in, Notice – Grizzly G0509 User Manual
Page 22
-20-
G0509 & G0509G 16" x 40" Lathe
test run & break-in
the purpose of the test run is to make sure the
lathe and its safety features operate correctly. if
you encounter any problems, stop the lathe and
refer to
troubleshooting on page 43 for correc-
tions.
to begin the test run & break-in procedure:
1. Make sure the lathe is lubricated and the
headstock oil level is full. refer to
lubrication
on
page 41.
2. Make sure the chuck is correctly secured to
the spindle. refer to
mounting chuck and
faceplate on page 35 for details.
3. disengage the feed and half-nut levers, and
move the spindle on/oFF lever to the neutral
position, as shown in
figure 9.
NOTICE
never shift lathe gears when lathe is
operating, and make sure both the half-nut
lever and the feed lever are disengaged
before you start the lathe! otherwise the
lathe will feed the apron into the chuck or
tailstock, causing severe lathe damage.
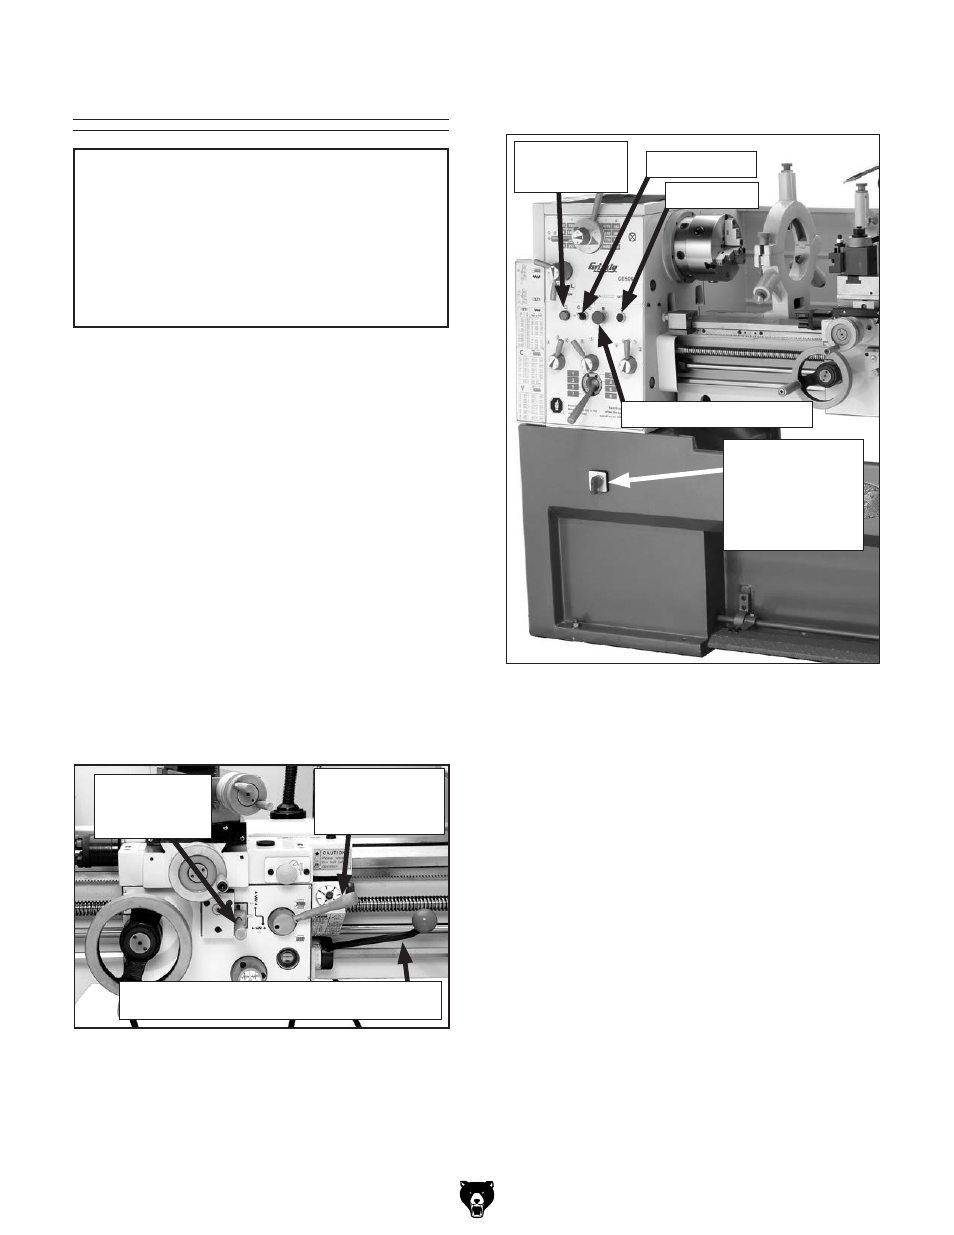
figure 9. Apron controls positioned for test run.
Feed lever is
horizontal
(disengaged)
half-nut lever
is pulled up
(disengaged)
spindle rotation on/oFF lever in
Central position (Motor OFF)
figure 10. Motor high/low range switch.
Motor high/low
range switch:
1 = low
i = off
2 = high
green power
lamp
Jog Button
pump switch
Emergency stop Button
5. on the g0509g lathe, make sure the four
spider bolts are either removed or they are
tight in the spindle so they will not rattle out
and contact the lathe end cover, causing
damage when the lathe is running.
6. Make sure the pump switch is OFF, and turn
the motor high/low range switch (
figure 10)
to "
1" and the green power lamp will glow.
7. put on safety glasses, tie back longhair,
sleeves, and loose clothing.
8. turn the work lamp ON and OFF.
9. point the coolant nozzles into the chip pan,
turn the pump switch
ON, make sure coolant
flows, and then turn the pump switch
OFF.
10. push the jog button (figure 10) a few times
and the spindle motor will turn
ON and the
chuck will rotate.
4. rotate the red emergency stop button (figure
10) clockwise so it pops out.