Icw i ccw, Ccw cw – Epson 4003353 User Manual
Page 96
Stylus Color Service Manual
Adjustments
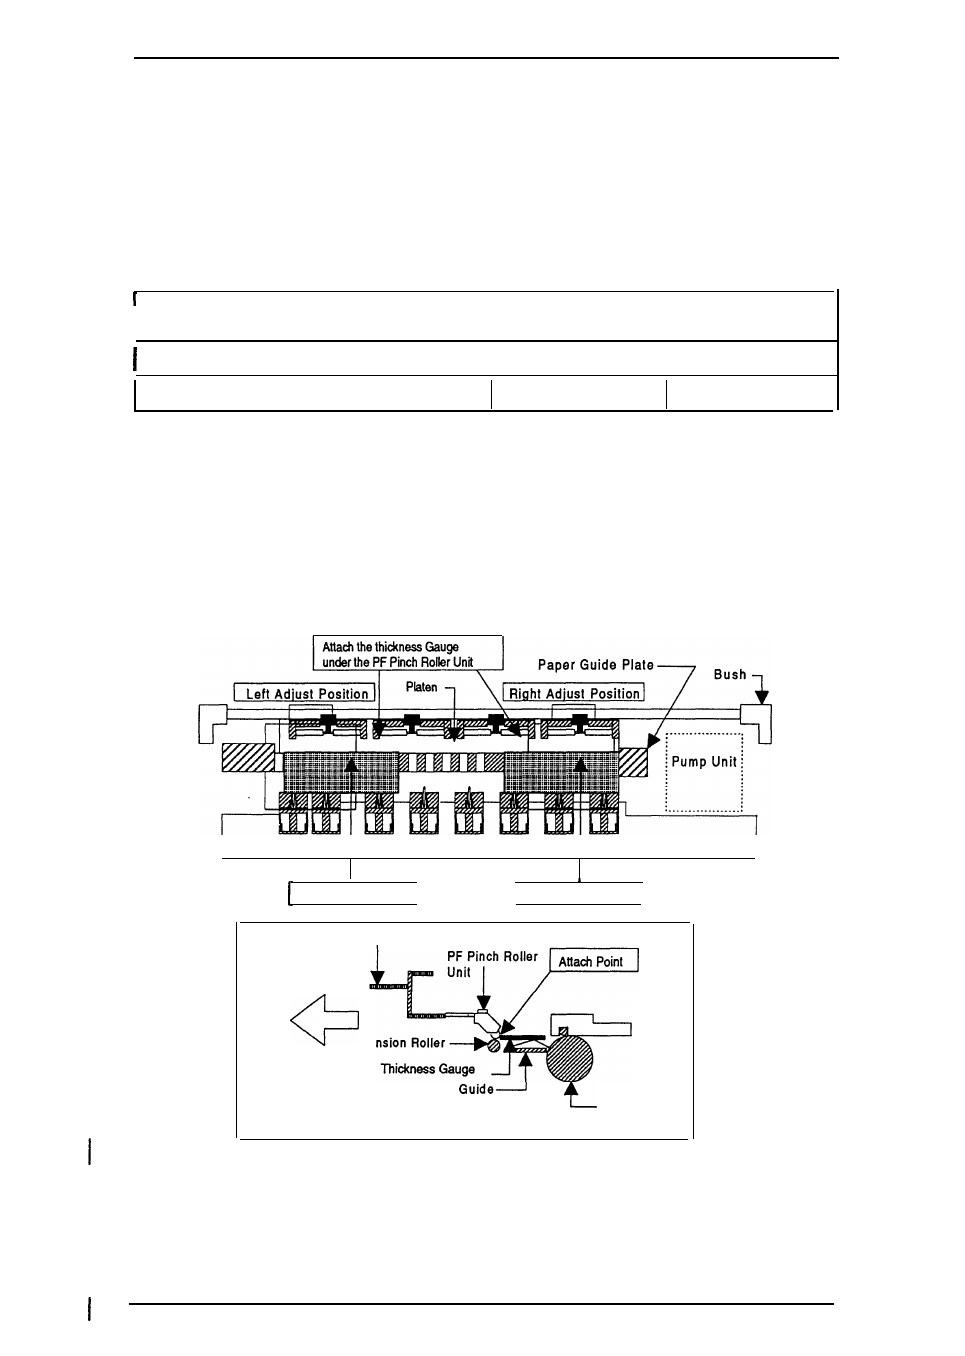
4.1.7 Platen Gap Adjustment
This adjustment is required when replacing or removing the carriage unit from the printer
mechanism.
The distance between the printhead nose and the paper surface should be adjusted to 1.1 mm.
1. Attach the thickness gauge (marketing gauge) at the left side adjust position (on the paper
guide plate) shown in the figure below so that one side hooks a paper feed pinch roller unit.
2. Move the carriage unit manually onto the thickness gauge.
Table 4-2. Gap and Adjustment Direction
I
I
I
Gap between head nose and gauge surface
I
Left Bushing
I
Right Bushing
Narrow
I
Cw
I
Ccw
Spread
Ccw
Cw
.
3. Rotate the parallel adjust bushing that is attached at the left and right end of the carriage guide
shaft as the black and color printhead contact the thickness gauge.
4. After attaching the printhead to the gauge surface, verify that the gap between the carriage
roller and the front frame is less than 0.04 mm. (See Figure 416.)
5. Attach the thickness gauge (marketing gauge) at the right side adjust position (on the paper
guide plate) shown below as the one side edge hooks a paper feed pinch roller unit.
Note:
When checking the gap between the carnage roller and the front frame, use a thickness
gauge or the paper guide plate. If the gap is correct the gauge cannot be installed into the
gap. If the gap is incorrect, the gauge can be inserted in the gap.
I
I
Front Frame
I
I
Thickness Gauge
Thickness Gauge
Front Frame —
FRONT
Te
Paper
Platen
Figure 4-18. Adjusting the Paper Gap
4-16
Rev. D