Epson 4003353 User Manual
Page 70
Stylus Color service Manual
Disassembly and Assembly
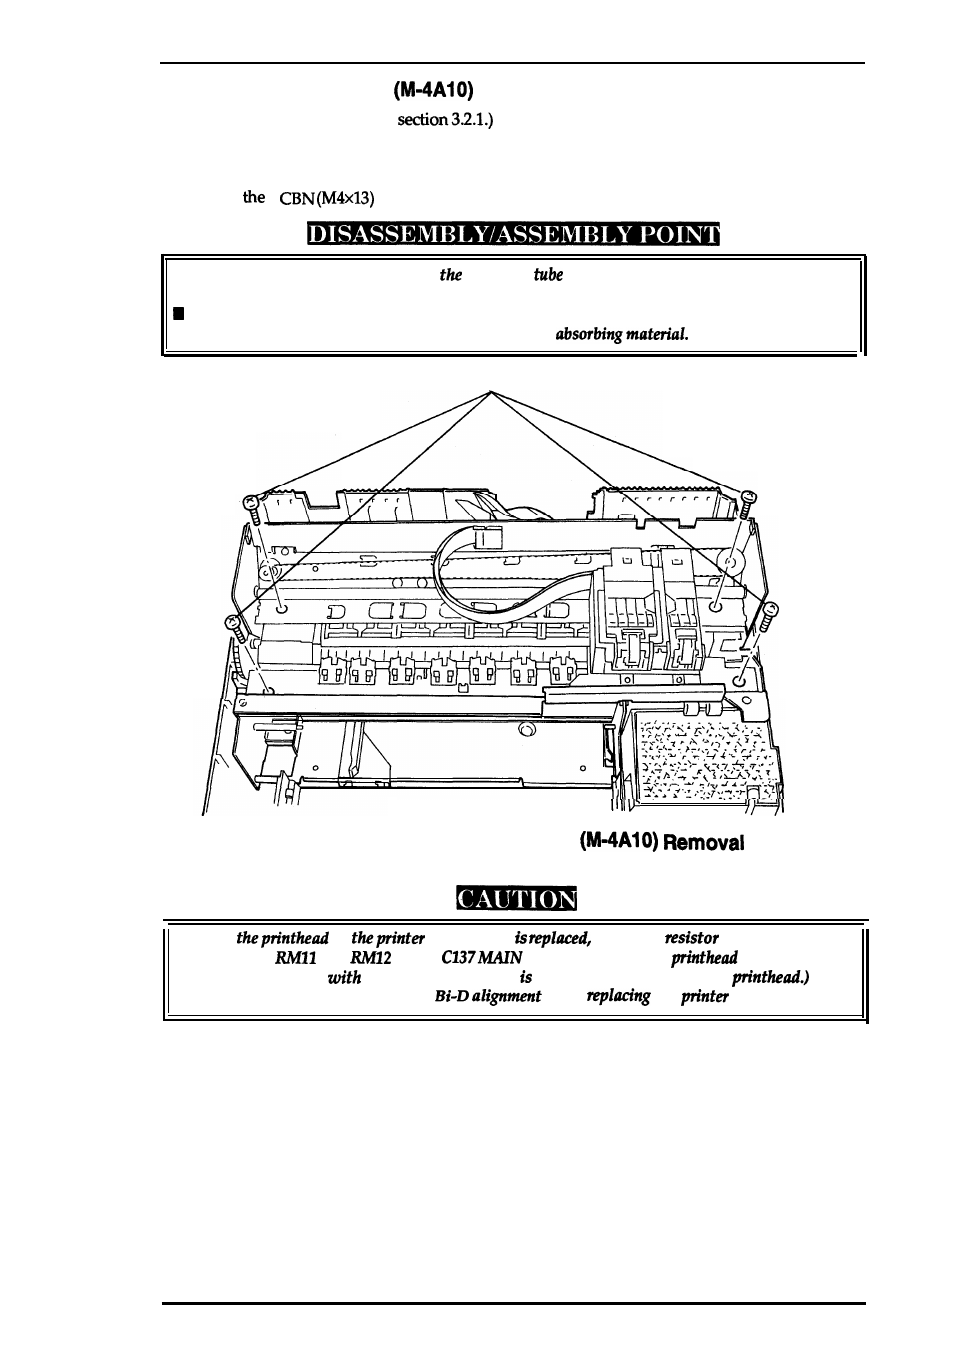
3.2.4 Printer Mechanism
Removal
1. Remove the uppercase. (See
2. Remove the power supply unit. (See section 3.2.2.)
3. Remove the main controller. (See section 3.2.3.)
4. Remove
4
screws and take out the printer mechanism.
■
Wipe off any ink around the end of
ink drain
when you remove the printer
mechanism.
When reinstalling the printer mechanism, check that the waste ink drain tube is properly
inserted between the
lower case
and
the waste ink
CBN(M4X13)
“
.
Figure 3-7. Printer Mechanism
■
When
or
mechanism
the block
must be replaced
at location
and
on the
board. (Every spare
or spare printer
mechanism comes
a block resistor that specially selected for each
■
Adjust both the head gap and the
when
the
mechanism.
Rev. A
3-7
- Stylus Pro 7800 (11 pages)
- Stylus Pro 4000 (49 pages)
- Stylus Photo R300 (2 pages)
- Stylus Pro 7000 (147 pages)
- AcuLaser C3000 (316 pages)
- Stylus Pro 7900 (24 pages)
- Stylus Pro 4450 (21 pages)
- 1000 (272 pages)
- T034120 (4 pages)
- T580300 (4 pages)
- 300 (91 pages)
- B 510DN (190 pages)
- B 510DN (218 pages)
- Stylus NX510 (8 pages)
- Stylus Photo RX580 (95 pages)
- T549300 (4 pages)
- B 500DN (168 pages)
- AculaserCX11NF (5 pages)
- 480SXU (24 pages)
- 4500 (317 pages)
- STYLUS RX500 (99 pages)
- 2100 (13 pages)
- Stylus NX215 (2 pages)
- T098320 (4 pages)
- T041020 (4 pages)
- R210 (8 pages)
- All-In-One Stylus Photo RX600 (164 pages)
- 777I (53 pages)
- T033120 (4 pages)
- Stylus CX7000F (8 pages)
- 60 (113 pages)
- T034220 (4 pages)
- WorkForce 40 Series (36 pages)
- T054220 (4 pages)
- Stylus CX3200 (11 pages)
- Stylus CX7800 (18 pages)
- T060220 (4 pages)
- 2500 (180 pages)
- AcuLaser CX11N (32 pages)
- AcuLaser CX11N (4 pages)
- 2000P (16 pages)
- T606600 (4 pages)
- Stylus CX6000 (18 pages)
- FS-4000DN (2 pages)
- MSDS T544700 (4 pages)