Epson 4003353 User Manual
Page 86
Adjustments
Service Manual
1. Connect the PC to the target printer and turn the printer on.
2. Execute BASIC on the PC and run the program
1. Destination Setting
2. Head Angle
Pattern Printing
(Head Front/Rear Vertical Position Printing)
3. Head Front/Rear Vertical Position Confirmation
4. Head Gap Adjustment
5. Bi-D Adjustment
6. Internal Timer Reset
7. END
3. When the main menu appears, choose “Head Angle Confirmation Pattern Printing” by
entering “2” from the keyboard. (The printer prints the check pattern with a sample name. )
■
When replacing
the blackhead and the
head, always adjust the color head angle
first. The black head
based upon
angle.
you replace the blackhead and
the black head angle pattern, you only have to
insert the angular spacer the pattern incorrect.
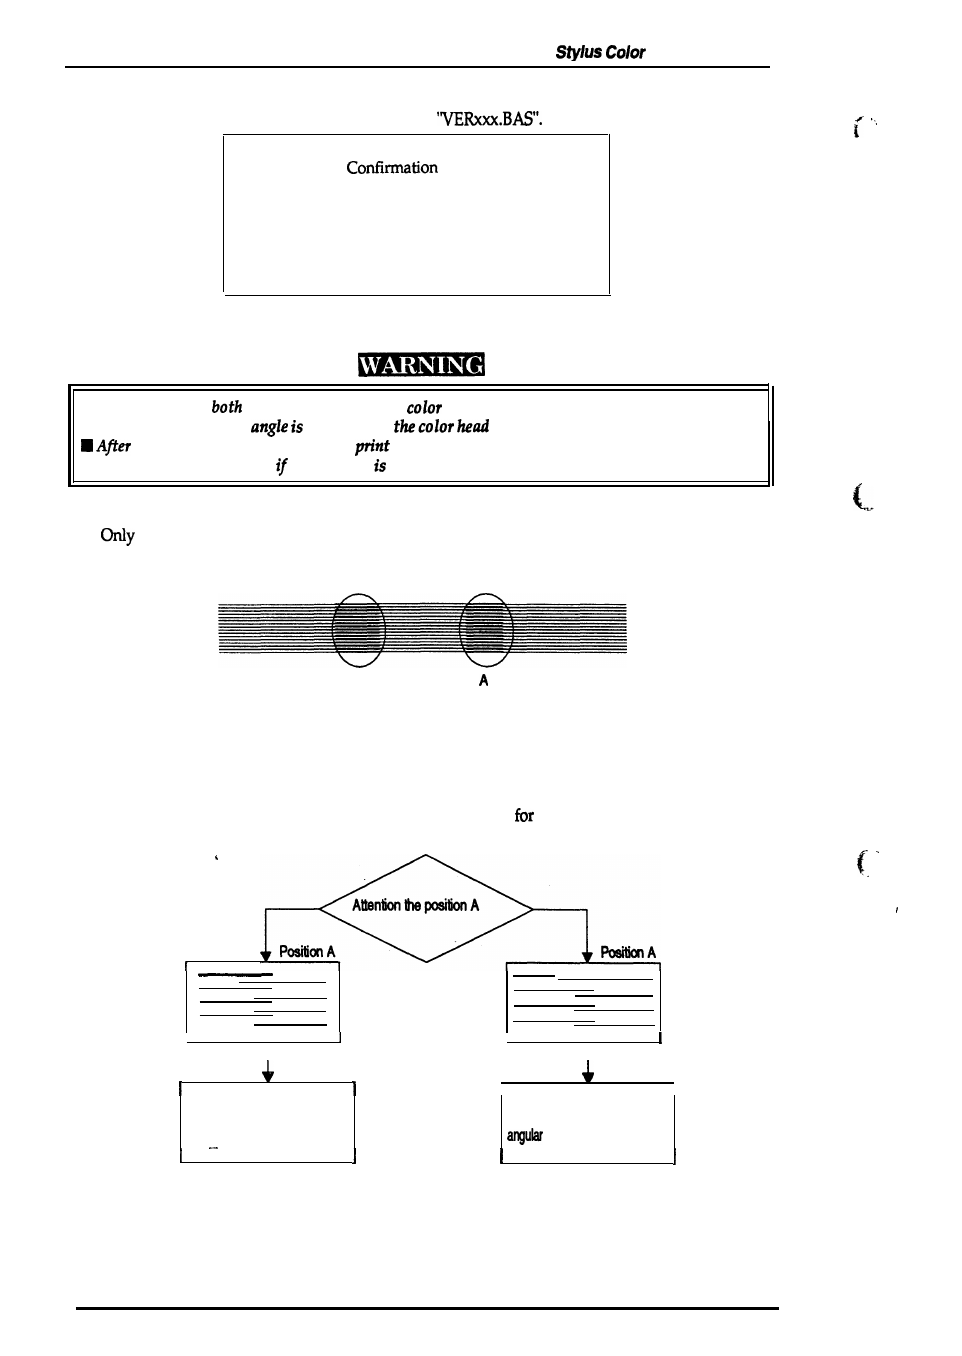
The printer pMts a pattern such as one in the following sample.
the nozzles in row A and row D are fired (making it is easy to see the blackhead angle).
Black Head Angle Adjustment
5.
6.
B
Figure 4-4. Black Head Angle Adjustment Sample
In
the
above
figure,
pay attention to position A. (Do not look at position B.)
By referring to the following flowchart, reset the angular spacer (for the black head) that is
under the right linear spacer. The replacement procedure
the angular spacer is explained in
step 7.
I
I
I
I
I
I
Replace the right spacer
Replace the right spacer
angular to the
thinner.
to the thicker.
Figure 4-5. Spacer Selection
4-6
Rev. A