Epson 4003353 User Manual
Page 84
Adjustments
4.1.3 Head Gap Adjustment
(Black and Color head)
The
head gap printing alignment adjustment is required when the printer mechanism, the MAIN
board, or the
(board) is
or disassembled. This adjustment adjusts the head drive
between the black head and the
head. If
adjustment is not made, the vertical
will not be completed.
Connect the PC to the target printer and turn the printer on.
2. Execute BASIC on the PC and
1. Destination setting
2. Head Angle Confirmation Pattern Printing
(Head Front/Rear Vertical Position Printing)
3. Head Front/Rear Vertical Position Confirmation
4. Head Gap Adjustment
5. Bi-D Adjustment
6.
Reset
7. END
3. When the main menu appears, choose “Head Gap Adjustment” by entering “4” from the
keyboard. (The printer
the check pattern with a sample compensation value.)
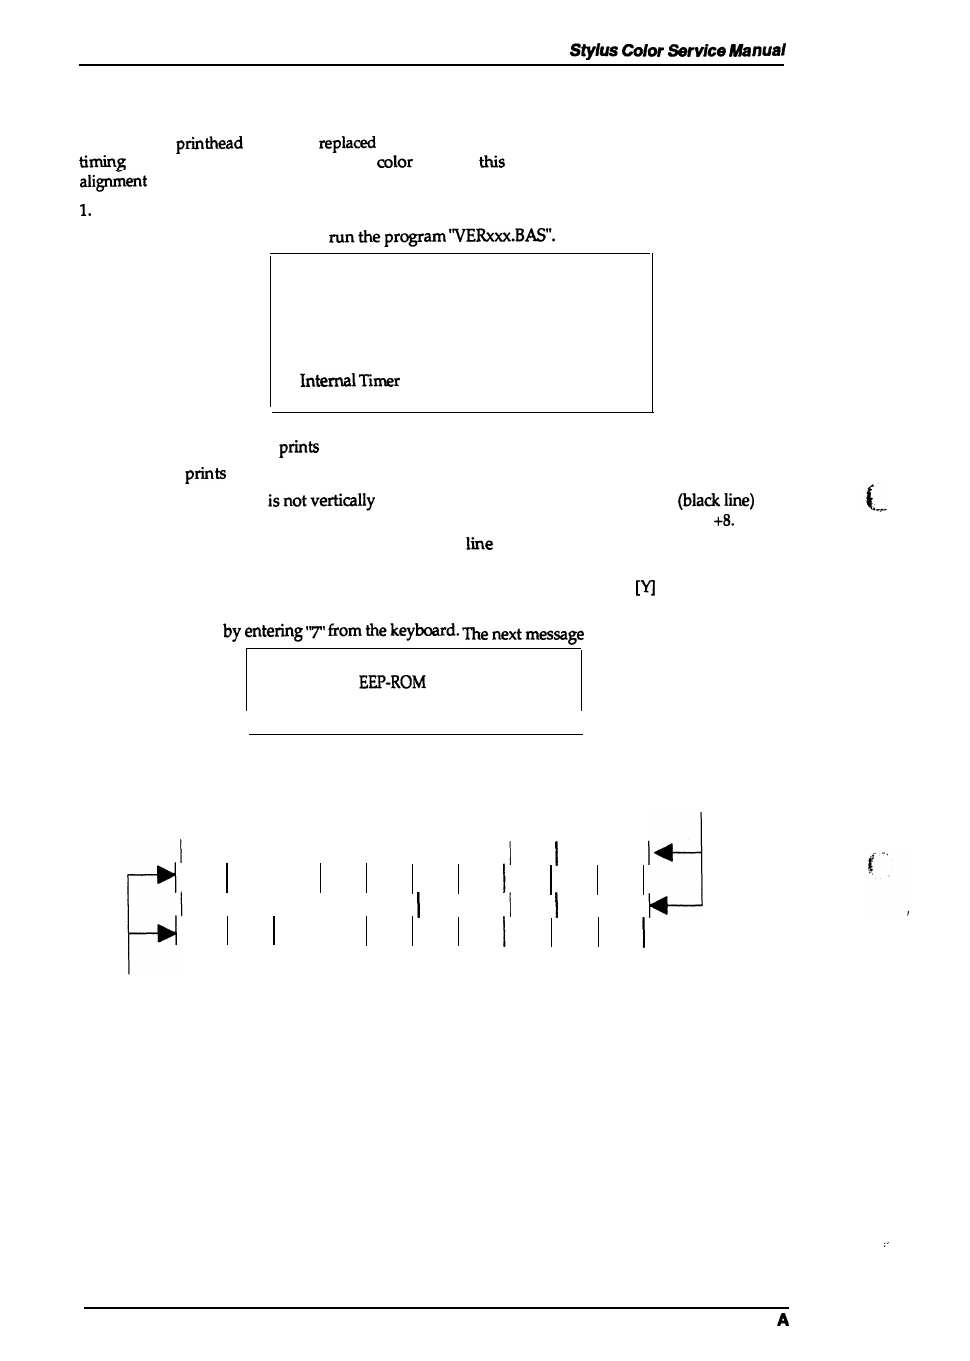
4. The printer
a sample such as the one shown in Figure 4-1.
5.
If the sample printing
aligned in both the odd-numbered lines
and
even-numbered lines (magenta), enter a compensation value in the range from-8 to
■
Positive compensation value: Shifts the 2nd
to the left
■
Negative compensation value: Shifts the 2nd line to the right
When both the black and magenta lines are vertically aligned, press
and ENTER; this
returns you to the main menu.
6.
Choose ’’END’’
appears on the display.
All parameters
that you have specified so far
are written to
upon power off.
I
Turn the printer OFF, Now!
I
7. Turnoff the printer.
Black line
Head Gap Adjustment
I
I
I
I
I
No. O
I
I
I
I
I
I
Color (Magenta)
line
Figure 4-1. Head Gap Adjustment Sample
4-4
Rev.