Epson 4003353 User Manual
Page 77
Disassembly and Assembly
Stylus Color
Manual
3.2.5.7
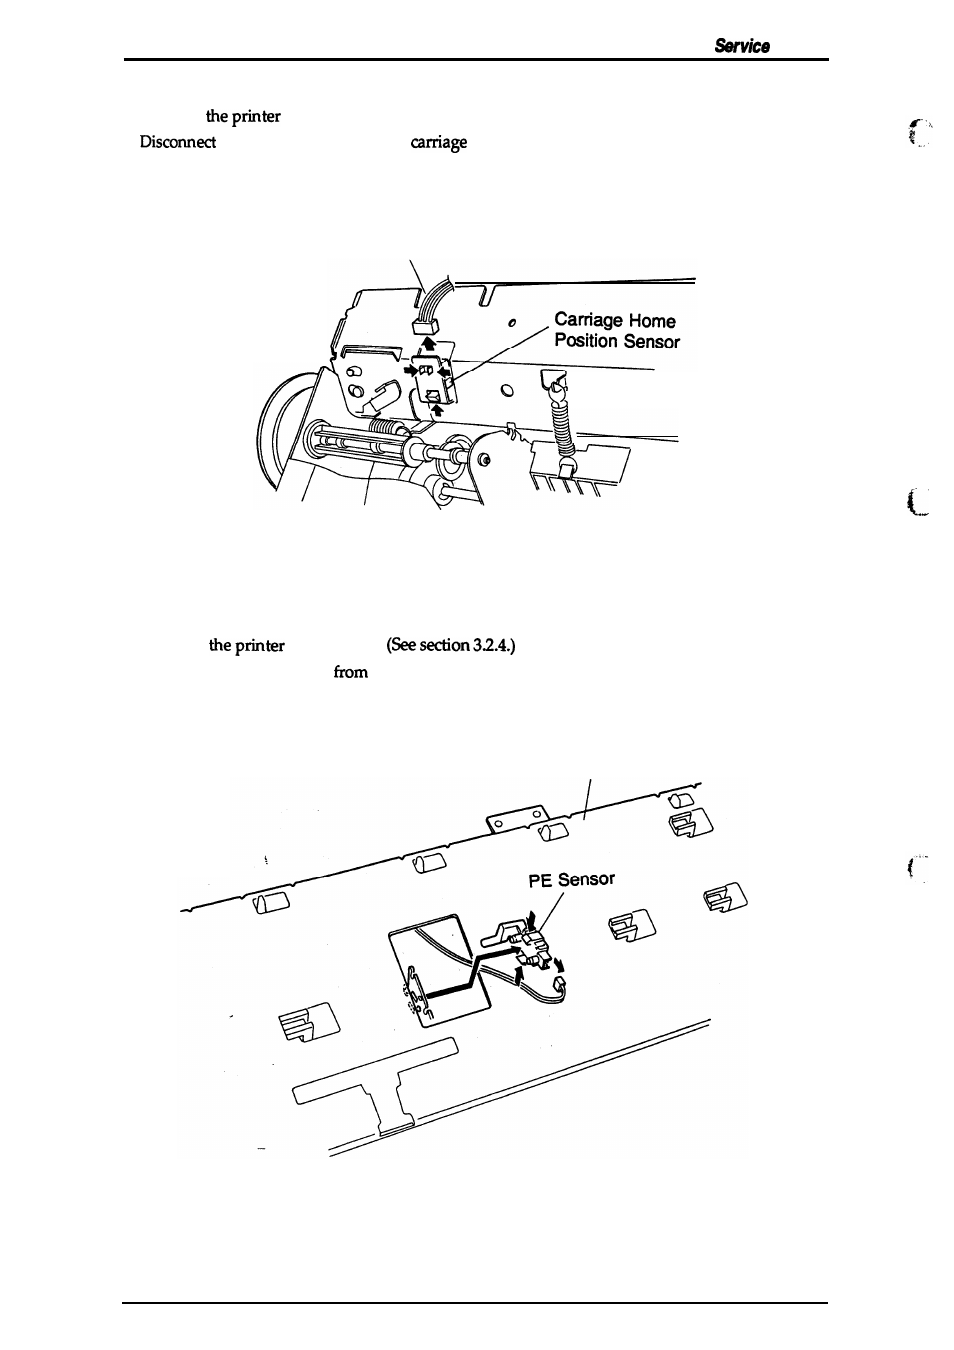
Carriage Home Position Sensor Removal
1. Remove
mechanism. (See section 3.2.4.)
2.
the sensor cable from the
home position sensor.
3. Unhook the 3 notches securing the carriage home position sensor to the upper frame. Then
remove the carriage home position sensor.
Sensor Cable
Figure 3-16. Carriage Home Position Sensor Removal
3.2.5.8 PE Sensor Removal
1.
Remove
mechanism.
2. Disconnect the connector
the PE sensor.
3. Rotate the printer mechanism upside down; use tweezers to release the 2 hooks securing the
PE sensor to the paper feed roller assembly; then remove the PE sensor.
Bottom Frame
I
Figure 3-17. PE Sensor Removal
3-14
Rev. A
See also other documents in the category Epson Printers:
- Stylus Pro 7800 (11 pages)
- Stylus Pro 4000 (49 pages)
- Stylus Photo R300 (2 pages)
- Stylus Pro 7000 (147 pages)
- AcuLaser C3000 (316 pages)
- Stylus Pro 7900 (24 pages)
- Stylus Pro 4450 (21 pages)
- 1000 (272 pages)
- T034120 (4 pages)
- T580300 (4 pages)
- 300 (91 pages)
- B 510DN (190 pages)
- B 510DN (218 pages)
- Stylus NX510 (8 pages)
- Stylus Photo RX580 (95 pages)
- T549300 (4 pages)
- B 500DN (168 pages)
- AculaserCX11NF (5 pages)
- 480SXU (24 pages)
- 4500 (317 pages)
- STYLUS RX500 (99 pages)
- 2100 (13 pages)
- Stylus NX215 (2 pages)
- T098320 (4 pages)
- T041020 (4 pages)
- R210 (8 pages)
- All-In-One Stylus Photo RX600 (164 pages)
- 777I (53 pages)
- T033120 (4 pages)
- Stylus CX7000F (8 pages)
- 60 (113 pages)
- T034220 (4 pages)
- WorkForce 40 Series (36 pages)
- T054220 (4 pages)
- Stylus CX3200 (11 pages)
- Stylus CX7800 (18 pages)
- T060220 (4 pages)
- 2500 (180 pages)
- AcuLaser CX11N (4 pages)
- AcuLaser CX11N (32 pages)
- 2000P (16 pages)
- T606600 (4 pages)
- Stylus CX6000 (18 pages)
- FS-4000DN (2 pages)
- MSDS T544700 (4 pages)