ARRI ALEXA 35 Body & PL Mount Set (LBUS) User Manual
Page 10
Camera Body Overview
10
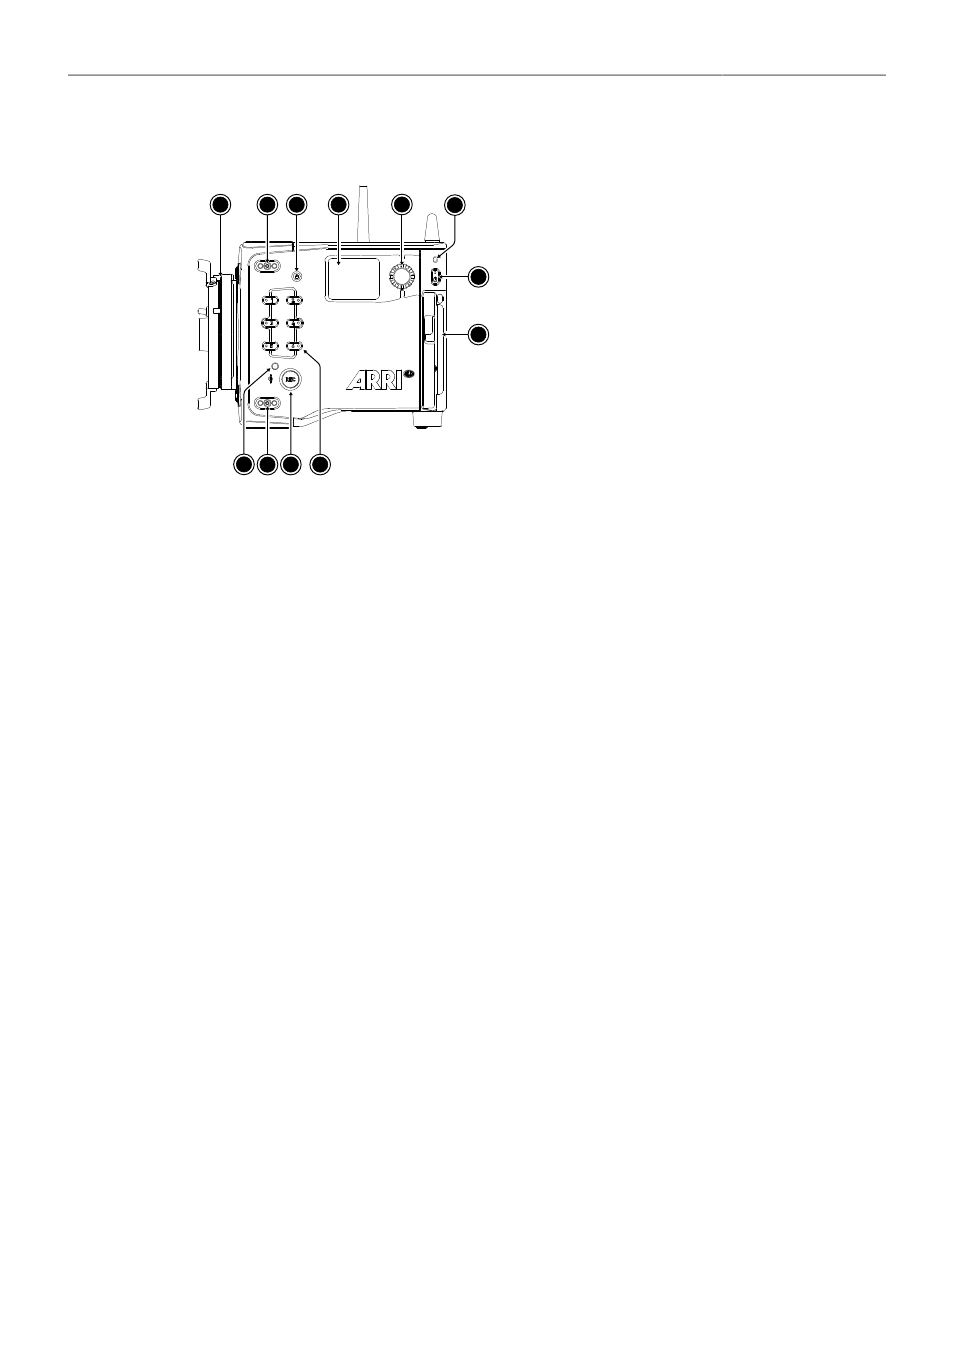
Camera Left
1
2 3
4
5
6
7 2 8 9
10
11
12
1
Lens Mount (here: LPL Mount (LBUS))
2
Mounting Points for Accessories
3
LOCK
Button
4
Side Display
5
Side Display Jogwheel
6
Rear Camera Status LED
7
Left Camera Status LED
8
REC
Button
9
User Buttons 1-6
10
POWER
Button
11
Camera Identification Label
REC Button, LOCK Button & User Buttons 1-6
Use the REC button (8) to start and stop recording. Press and hold the LOCK button (3) to lock all
camera buttons. Besides the REC and LOCK button, the camera left is equipped with six freely
assignable user buttons (9). Each button can be customized with individual functions. Once a user
button is assigned with a function, press the button to trigger its function. An LED on each user button
reflects the functional status.
Camera Status LEDs
The camera status LEDs reflect the current camera state:
Off
Green
Orange
Red
Red / Green flashing
Idle. No recording media inserted or recording media full
Standby and ready to record
Prerecording
Recording
Error State
Side Display and Jogwheel
The side display provides control of basic camera parameters, recording media erase and can show
general information on the camera status. Use the jogwheel to navigate through screens and change
settings.
Media Door and Media Door Release
To access the media slot, slide the media door release towards the camera bottom so that the spring
loaded door jumps open.
Camera Identification Label
The camera serial number is located on the left side of the camera next to the media bay door. The
serial number consists of the last 5 digits of the product number K1.0039373-XXXXX.