5 examples using labview, 1 setting the output to a value, Examples using labview -19 – KEPCO KLP Series Developers Guide, Rev 3 User Manual
Page 41: Setting the output to a value -19
KLP-DEV 041213
3-19
3.5
EXAMPLES USING LABVIEW
These LabView examples show the use of the IVI-COM driver with LabView 8. The procedure
used to create the examples is found in the KepcoDcPwr help file that was installed in the IVI
portion of your Start menu. Step by step instructions are detailed in:
• Getting Started with the IVI-COM Driver - Development Environments - Using LabView
3.5.1
SETTING THE OUTPUT TO A VALUE
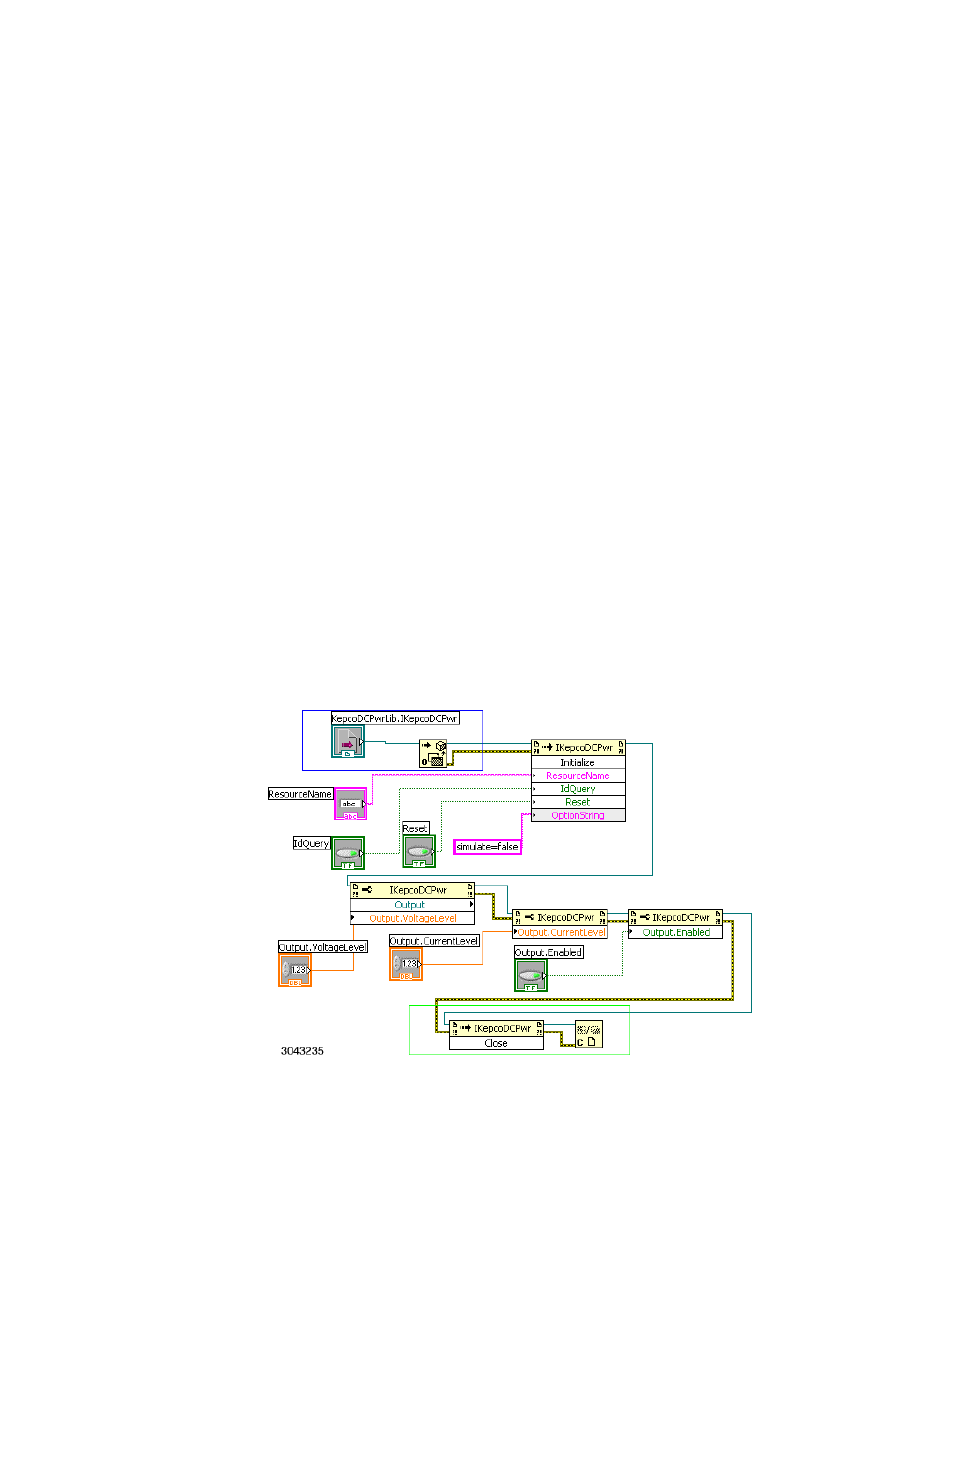
Figure 3-6 illustrates the use of the IVI-COM driver with LabView to set the KLP output to a
value. The first two blocks show the automation controller and kepcodriver functions. These are
followed by the initialize method of the driver,
Referring to Figure 3-6, the initialize method makes the connection to the KLP using the visa
resource string. The driver supports a simulation mode of operation which is set false in the
example. The next three blocks are property nodes which are used to set the voltage, current
and output enable of the power supply. These are the properties of the power supply which
directly affect the power supply output. In LabView each property must be set separately, but
multiple outputs of the property node are allowed. The final two blocks are the close functions.
One block is the method to close (disable the output). The second block is the ActiveX close ref-
erence which performs the driver close, breaking the connection to the KLP, and the instrumen-
tation close which releases the memory used by the driver.
FIGURE 3-6. SETTING THE OUTPUT USING LABVIEW WITH IVI-COM DRIVER