Casio YA-W72M User Guide User Manual
Page 73

73
3.
On the print dialog box that appears, configure the print settings below.
– For “Printer”, select “Dot Pattern Printer for CASIO”. If you are using PowerPoint 2003 or
2007, use the “Printer Name” box to select “Dot Pattern Printer for CASIO”.
– Under “Settings” select “Print all slides”. If you are using PowerPoint 2003 or 2007, select “All”
for “Print range”.
z To specify the print range and number of copies, use the “Dot Pattern Printer for CASIO”
dialog box in step 10 of this procedure.
4.
On the PowerPoint application print dialog box, click [Printer Properties]. If you
are using PowerPoint 2003 or 2007, click [Properties].
z This will display the “Dot Pattern Printer for CASIO Document Properties” dialog box.
5.
Click [Advanced Settings] to display the “Advanced Settings” dialog box.
6.
Use “Paper Size” to select the paper size.
7.
Click [OK] to close the “Advanced Settings” dialog box and return to the
properties dialog box.
8.
Click [OK] to close the properties dialog box and return to the print dialog box.
9.
Click [Print]. If you are using PowerPoint 2003 or PowerPoint 2007, click [OK].
z A message will appear letting you know that the process is being performed, followed by the
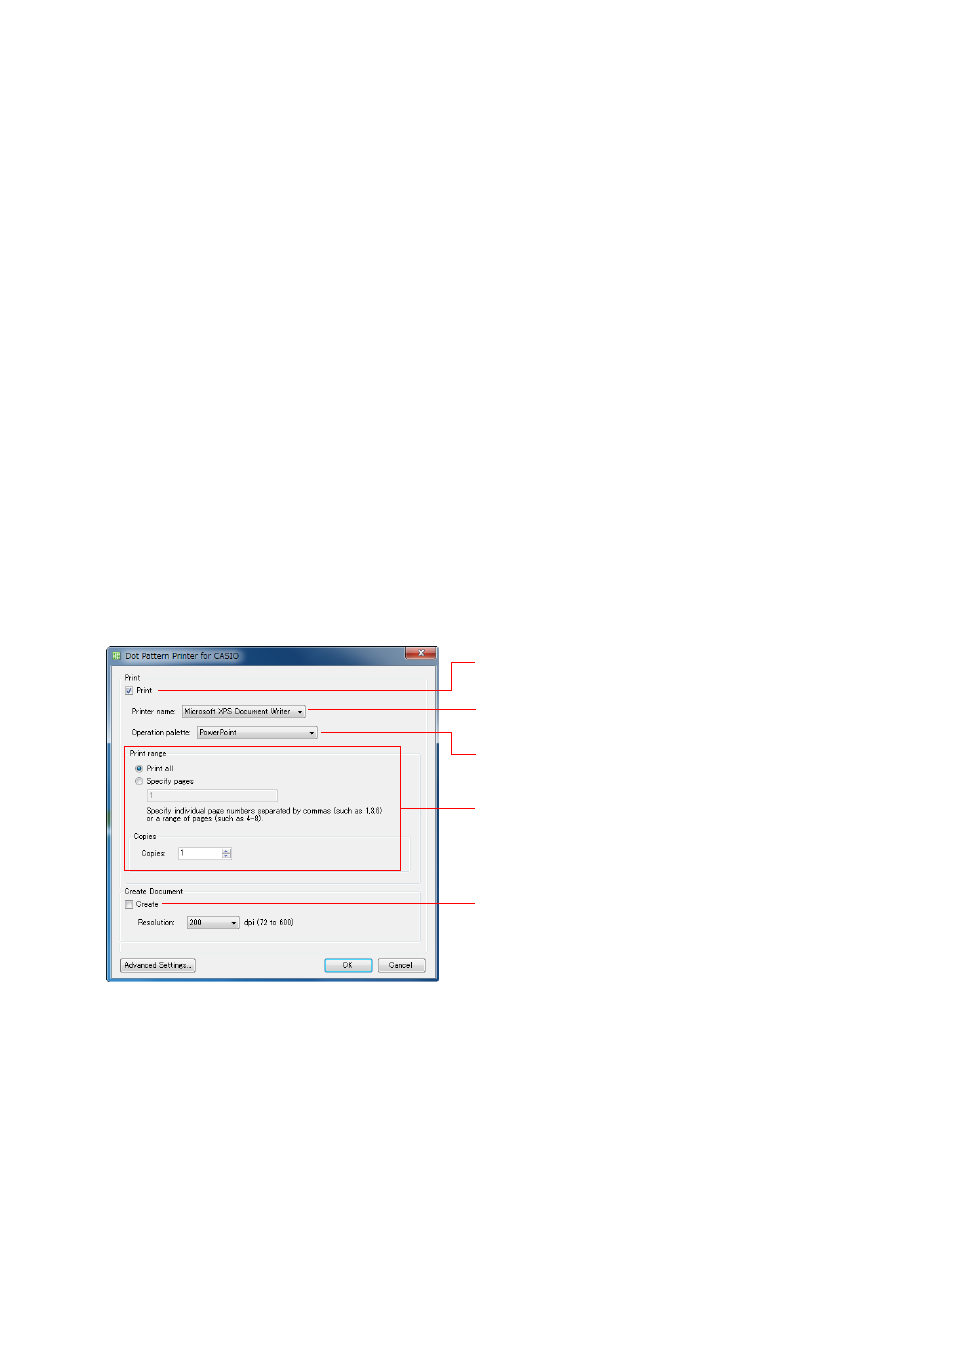
“Dot Pattern Printer for CASIO” dialog box.
10.
Configure the settings below on the dialog box.
z For information about settings that can be configured after you click [Advanced Settings], see
“Configuring Advanced Settings on the Dot Pattern Printer for CASIO Dialog Box” (page 76).
11.
After configuring all the settings you want, click [OK].
z This will print the document with special dot patterns from the specified printer.
* Be sure to use a qualified printer. See the “Important!” note on
page 70 for more information.
Select the “Print” check box.
Use “Printer name” to select the output printer.
*
Use “Operation palette” to select “PowerPoint”.
Configure the “Print range” and “Copies” settings.
Clear the “Create” check box.
