Configuring the network, Settings for a single- or dual-head system – Grass Valley Kaleido-Modular-X v.7.70 User Manual
Page 29
25
Kaleido-Modular-X
Quick Start Guide
• If the control panel’s display shows KEEP SETTINGS, navigate to UPDATE SETTINGS
by pressing the [–] button, and then press the SEL button to apply your change.
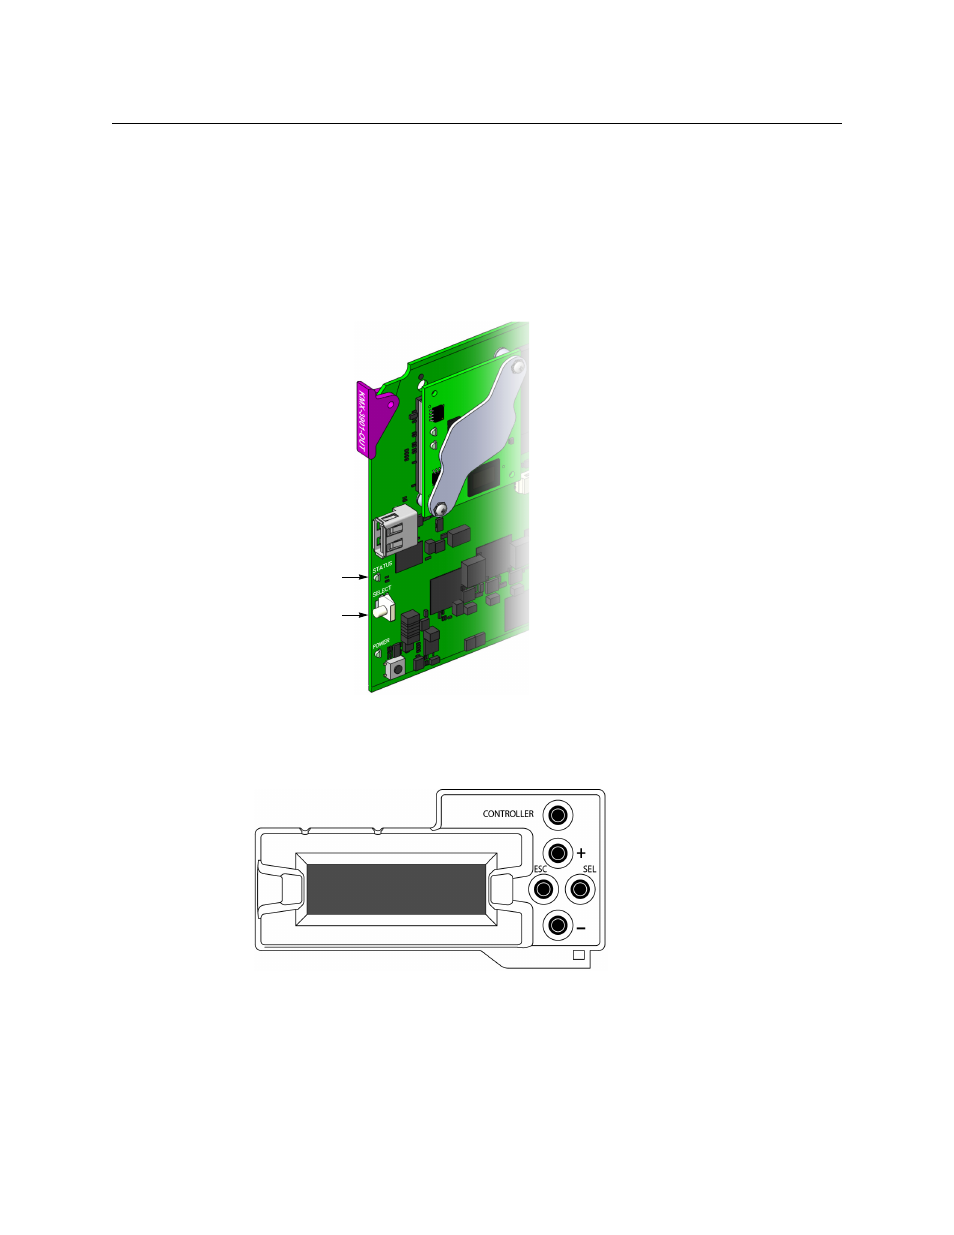
4 Press the CONTROLLER button to exit the controller’s menu.
Configuring the Network Settings for a Single- or Dual-Head System
To configure the network settings for a Kaleido-Modular-X with one output card
1 Press the Select button on the front edge of the output card.
The Status LED on the selected card flashes orange, and the associated control menu
appears on the display of the Densité frame’s local control panel.
2 On the local control panel, press the [–] button repeatedly until NETWORK SETTINGS
appears on the display, and then press the SEL button.
FRAME IP ADDRESS EDIT appears on the display.
3 Press the [–] button to skip this option (the system will automatically receive the
IP address you configure for Output A, once the card will have restarted).
NETMASK EDIT appears on the display.
4 Press the SEL button.
The current value appears on the display.
Select button
Status LED
- Kaleido-Modular-X Jun 11 2014 Kaleido-MX 4K (1RU) Quick Start v.7.80 Kaleido-MX 4K (3RU) Quick Start v.7.80 Kaleido-MX (1RU) Quick Start v.7.80 Kaleido-MX (1RU) Quick Start v.7.70 Kaleido-MX (1RU) Quick Start Jul 16 2014 Kaleido-MX (3RU) Quick Start v.7.80 Kaleido-MX (1RU) Quick Start Dec 17 2014 Kaleido-MX (3RU) Quick Start v.7.70 Kaleido-MX (3RU) Quick Start Jul 16 2014 Kaleido-MX (3RU) Quick Start Dec 17 2014