Changing the output resolution – Grass Valley Kaleido-Modular-X v.7.70 User Manual
Page 23
19
Kaleido-Modular-X
Quick Start Guide
Changing the Output Resolution
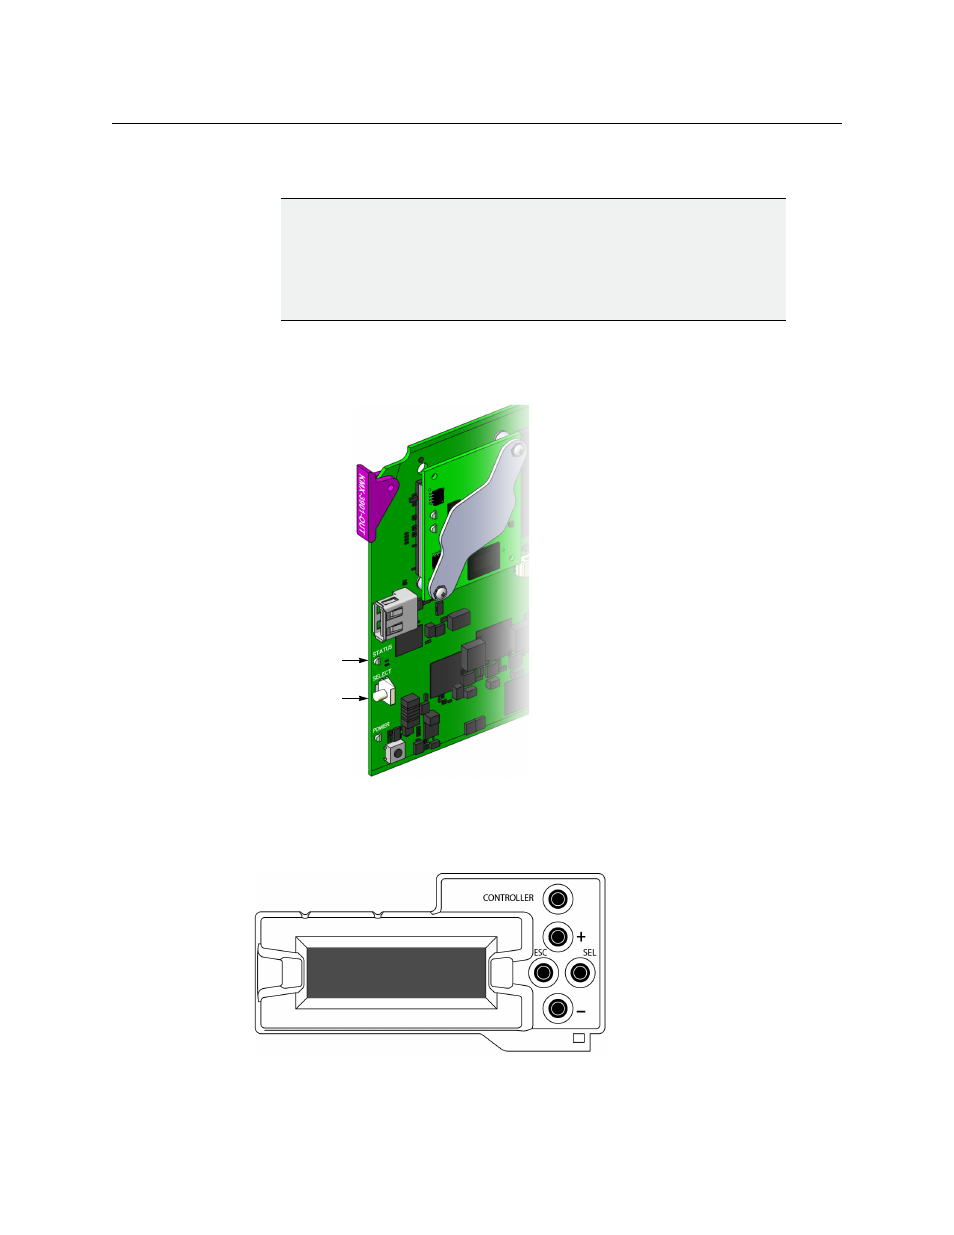
To change the display resolution from the Densité controller’s local control panel
1 Press the Select button on the front edge of the output card whose heads you wish to
configure.
The Status LED on the selected card flashes orange, and the associated control menu
appears on the LCD display of the Densité frame’s local control panel.
2 On the local control panel, press the [–] button twice, until RESOLUTION appears on the
LCD display.
3 Press the SEL button.
HEAD 1 appears on the LCD display.
IMPORTANT
Within a Kaleido-Modular-X system, all output heads must be configured
with the same refresh rate. If your system is referenced, then the heads’
refresh rate must also match the reference signal's refresh rate. If you must
monitor 50 Hz input signals on 60 Hz displays (or vice-versa), then do not
reference your system.
Select button
Status LED
- Kaleido-Modular-X Jun 11 2014 Kaleido-MX 4K (1RU) Quick Start v.7.80 Kaleido-MX 4K (3RU) Quick Start v.7.80 Kaleido-MX (1RU) Quick Start v.7.80 Kaleido-MX (1RU) Quick Start v.7.70 Kaleido-MX (1RU) Quick Start Jul 16 2014 Kaleido-MX (3RU) Quick Start v.7.80 Kaleido-MX (1RU) Quick Start Dec 17 2014 Kaleido-MX (3RU) Quick Start v.7.70 Kaleido-MX (3RU) Quick Start Jul 16 2014 Kaleido-MX (3RU) Quick Start Dec 17 2014