Ripple mode – Grass Valley EDIUS Pro v.7.0 User Manual
Page 64

Editing
56
EDIUS -
User Guide
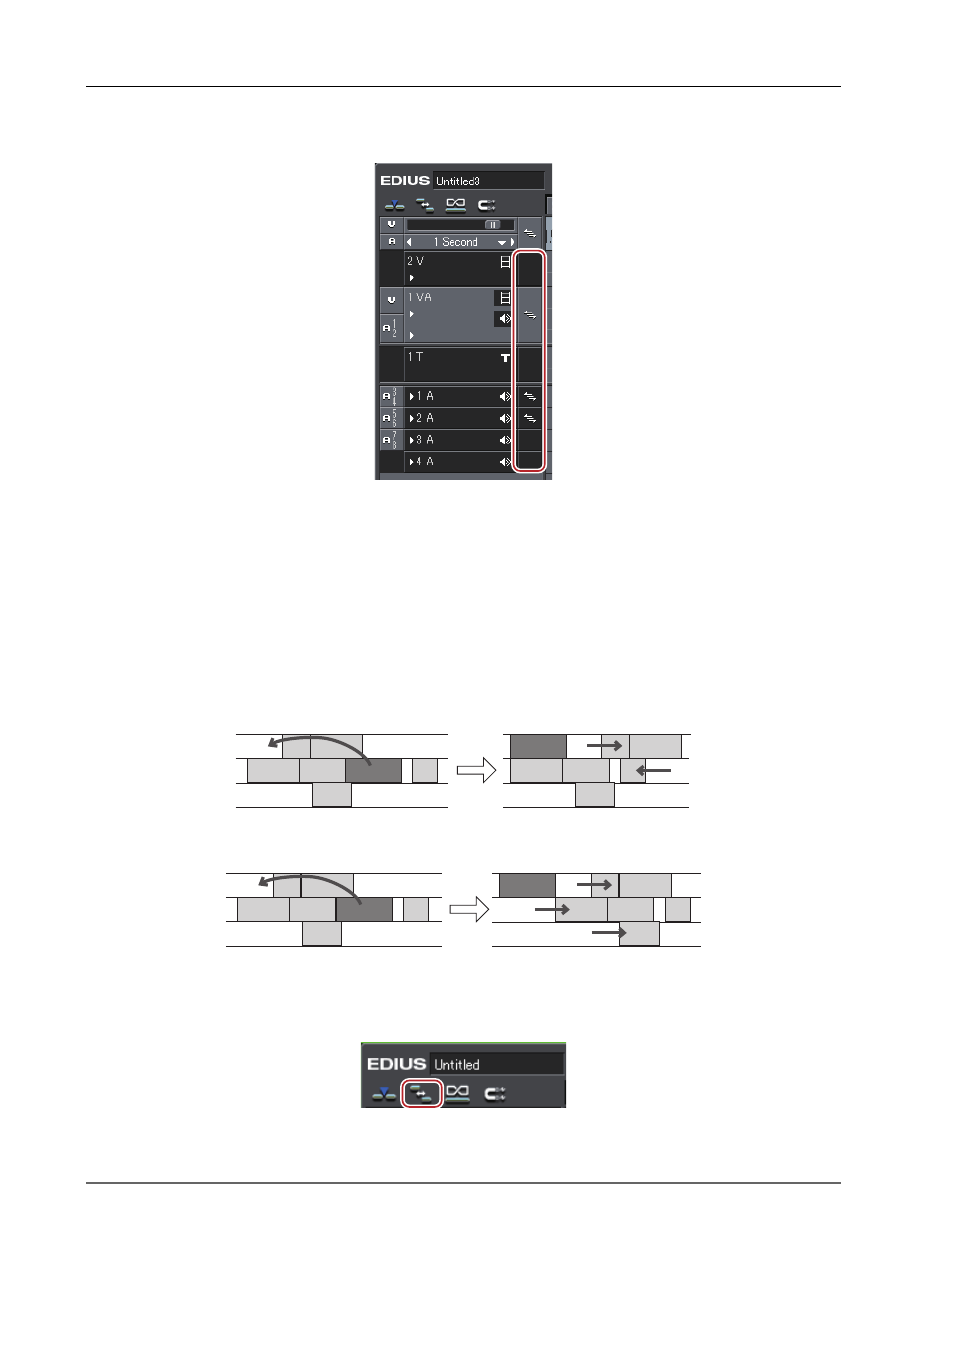
1 Click on the lock panel of the track to which sync-lock is to be set.
An icon is displayed for the track with sync-lock set. Each click switches on/off the sync-lock.
3
•
To set sync-lock to all tracks, click on the batch lock panel.
Ripple Mode
0
In the ripple mode, when a clip is deleted or trimmed, the subsequent clips move forward to avoid spaces being formed
on the timeline. When inserting a clip, you can move the subsequent clips while holding the space at the insert position.
Only the clips on the track currently being edited move together.
3
•
On the tracks with sync-lock set, all the clips subsequent to the operated clip move together.
Example:
When sync-lock is set to off on all 3 tracks and a clip has been inserted with the ripple mode on (insert mode)
Example:
When sync-lock is set on all 3 tracks and a clip has been inserted with the ripple mode on (insert mode)
1 Click [Set Ripple Mode] on the mode bar.
Each click switches on/off the sync-lock.
A diagonal line appears on the icon when the mode is off.
The current mode ([Ripple On]/[Ripple Off]) is displayed on the status bar of the timeline.
Status bar
2
Alternative
• Switching ripple mode:
[R]
